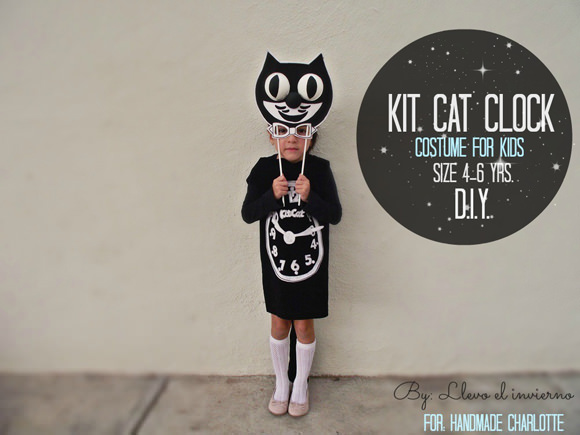
Time to start planning those DIY costumes! Luckily our new contributor Eri, author of the blog Llevo el invierno, dreamed up this super cool Kit Cat Clock costume. With her easy-to-follow tutorial, you’ll have a unique getup for your 4 to 6 year old in time for Halloween!
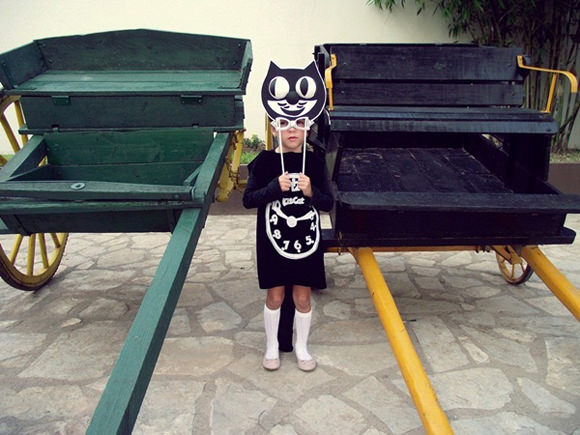
What You Need
- Printable mask and numbers template (download here)
- Pellon fabric in white
- White cardboard
- Paste
- Duct tape
- Synthetic velvet fabric
- Black Sharpie marker
- Black Sharpie ultra fine pen
- For the eyes: two polystyrene balls #6
- For the nose: one polystyrene ball #3
- For the tail: black fabric and polyester filling
How to Make the Mask
Step 1
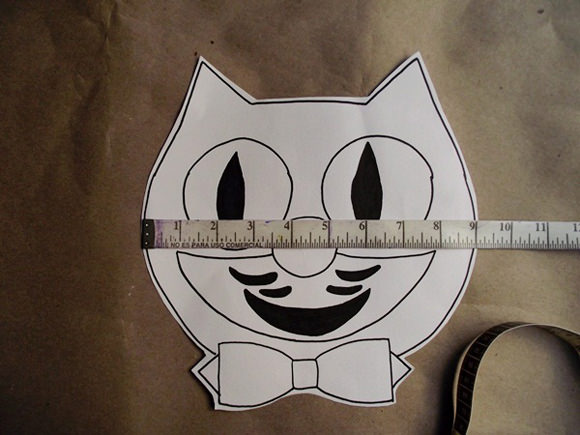
Print the mask and the clock numbers templates. Check to make sure the actual size of your printed mask template is 9 cm wide.
Step 2
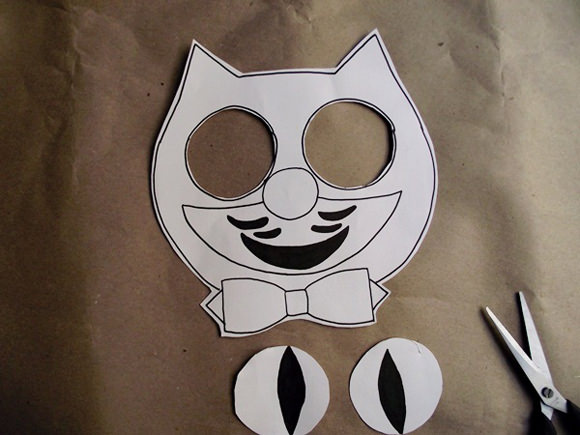
Cut out the eye area, leaving two holes.
Step 3
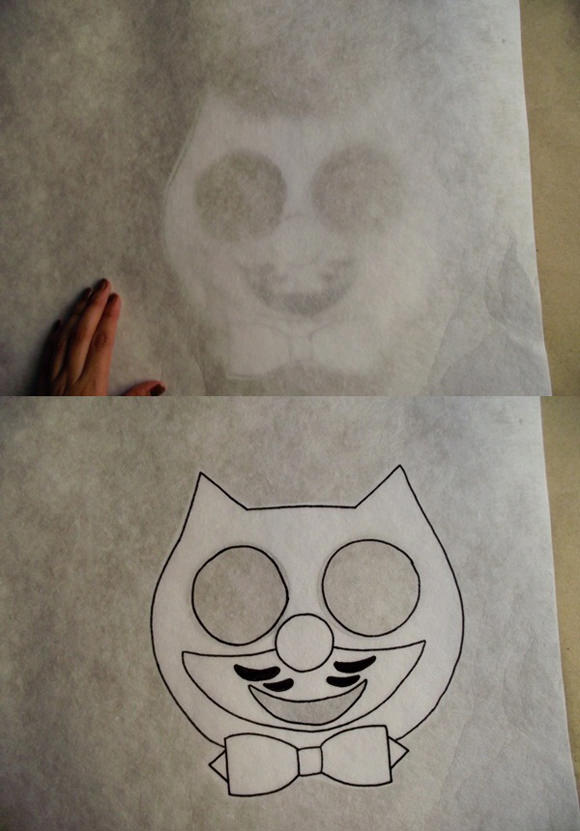
Place the Pellon on top of the mask template and trace the lines.
Step 4
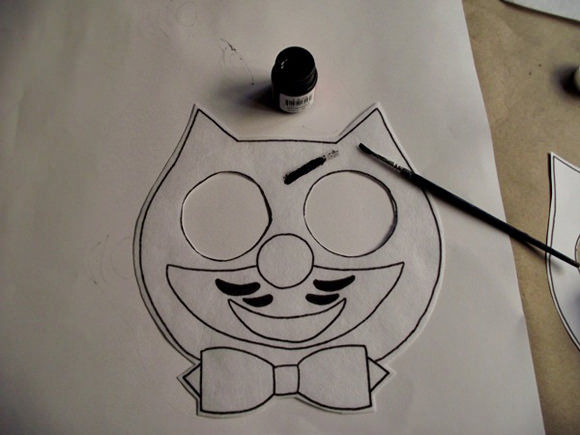
Paint the mask with black acrylic paint, leaving the area around the mouth and the bow tie white (see the photo below for the result).
Step 5
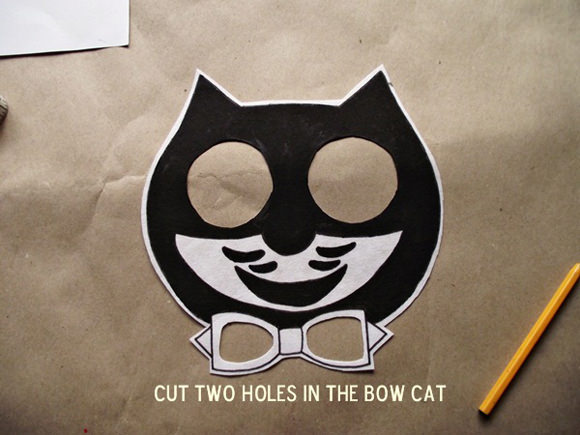
Cut two holes in the bow tie as shown. Kids will be able to look out from here.
Step 6
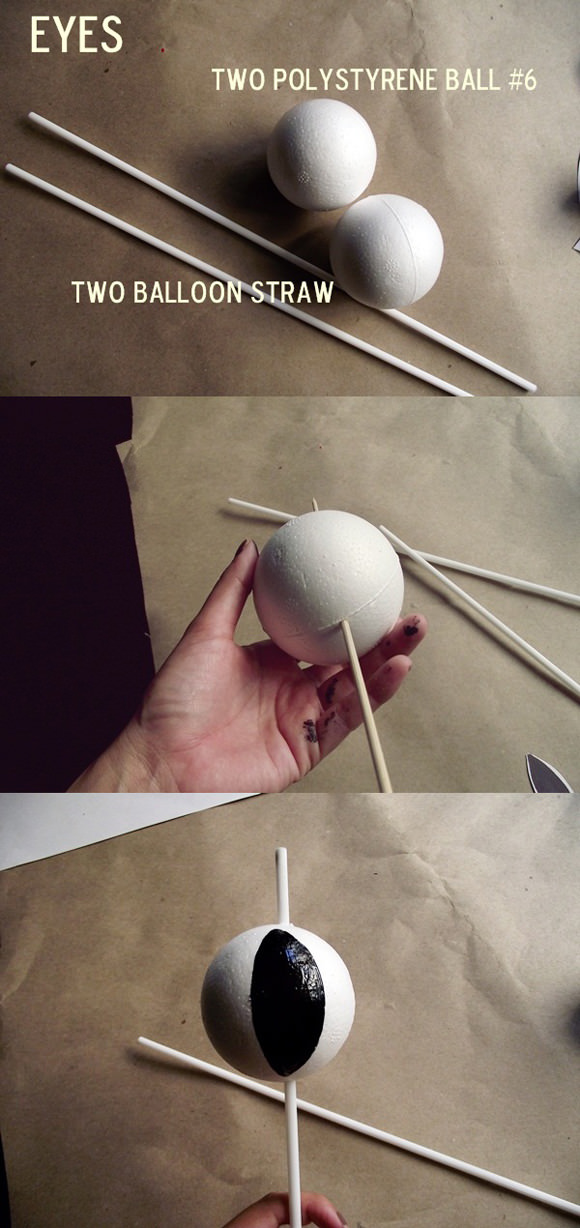
To make the eyes, use something sharp to skewer the large polystyrene balls, so that you can easily insert the balloon sticks. Paint the cat’s pupils as shown.
Step 7
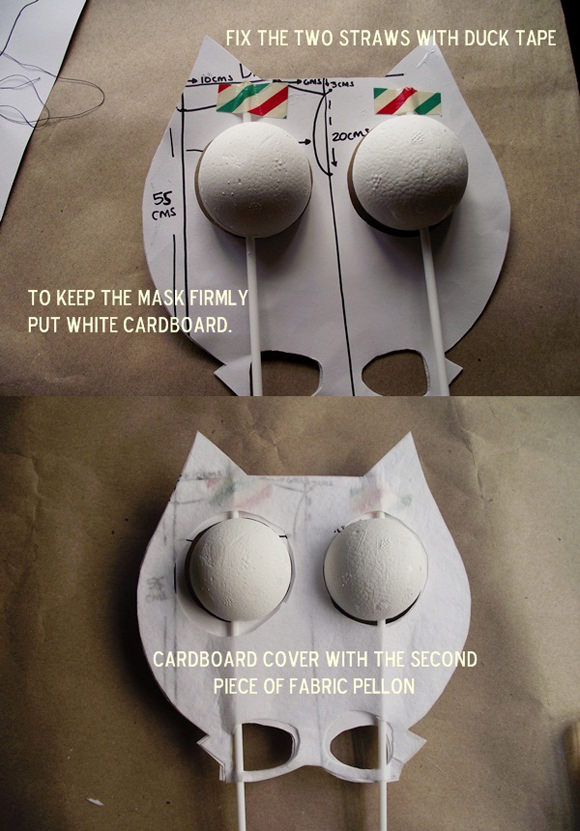
To keep the mask firm, paste a piece of white cardboard onto the back of the Pellon.
When the eyes are completely dry, use Duct tape to fix the eyes onto the back of the mask as shown. Then cover the cardboard with the second piece of Pellon. Kids should be able to slowly spin the straws to move the cat’s eyes!
Step 8
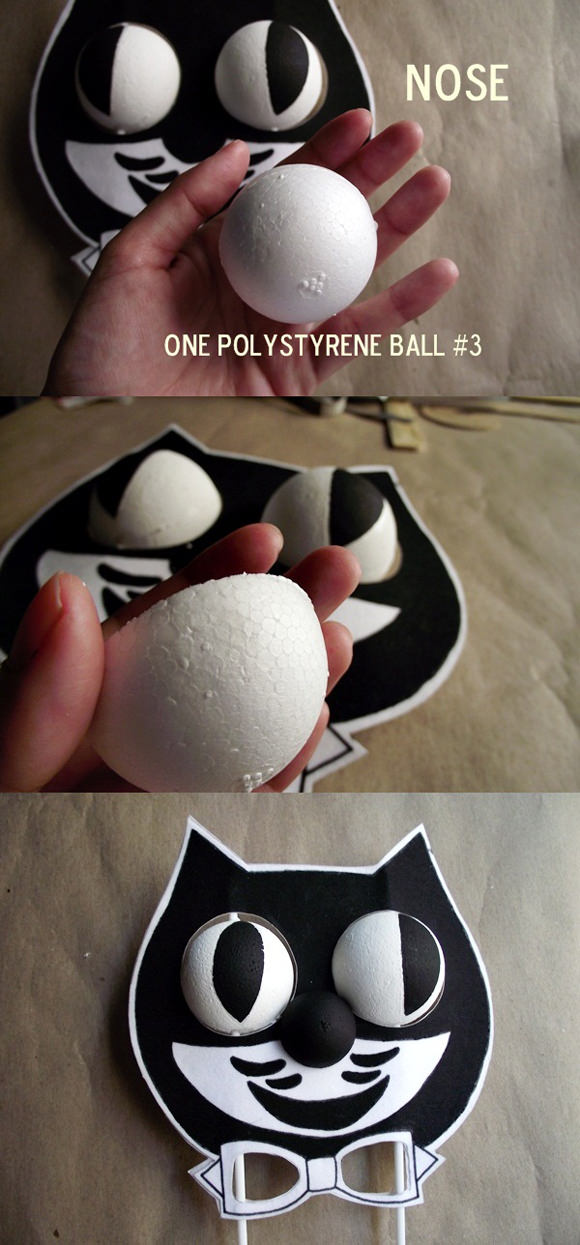
To make the nose, cut the small polystyrene ball in half, paint it black, let it dry, and paste it in place.
How to Make the Dress
To make the dress I used synthetic velvet cloth because it is a fabric that does not require many seams.
Step 1
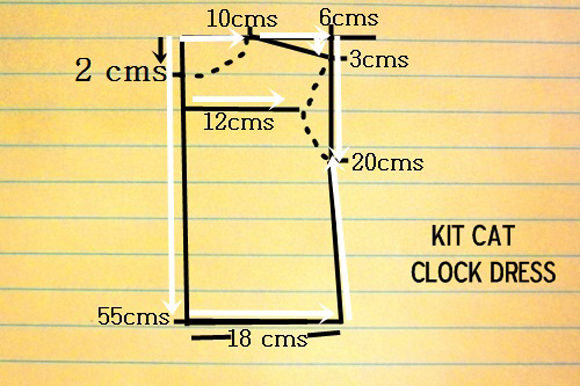
Fold the fabric in half. Refer to the above guide and mark the following: measuring vertically from the top, mark 2 cm for neck and 55 cm for the length of dress. Measuring horizontally from the top, mark 10 cm for the neck, add 6 cm for the shoulder, and close the neck using a French curve ruler. From the 6 cm point mark for the shoulder, measure vertically from the top to 3 cm to make the shoulder slope; join this point to the 10 cm mark on the neck. From the 6 cm shoulder point, measure vertically to 20 cm. (This will be the bottom of the armhole.) Measure 12 cm across as shown and close with French curve ruler to form the armhole.
Step 2
From the 55 cm point at the bottom, measure 18 cm across and join that point to the armhole. Add a 1-cm seam allowance to the pattern. Place the pattern with the fabric folded to make two pieces (front and back).
Step 3
Sew the shoulders and sides.

How to Make the Numbers
Place the Pellon on top of the numbers template, trace, then cut out the numbers. Make an oval for the clock. Glue everything onto the dress.
How to Make the Tail
Step 1
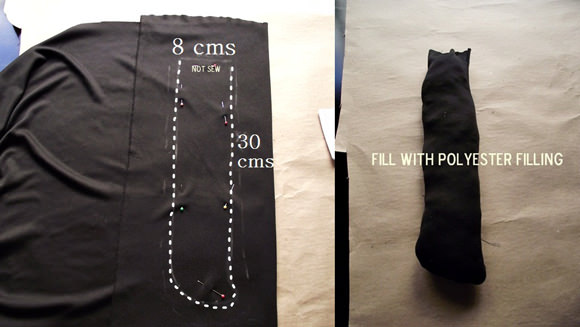
Using any type of black fabric, fold the fabric and draw a tail that measures 8 cm wide by 30 cm high. Sew around the dotted line, leaving the top open, then fill with polyester filling.
Step 2
Sew the tail onto the back of the dress.
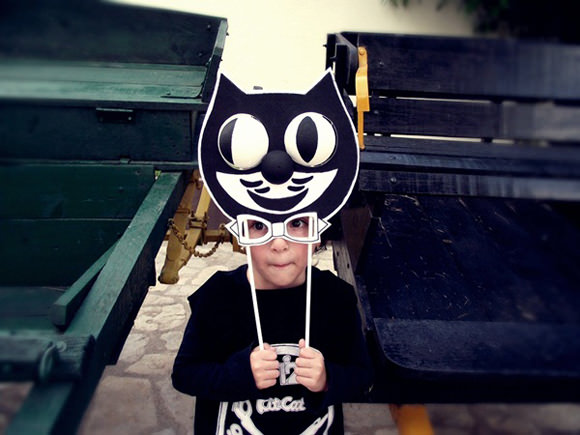
There you have it—one cool cat! Happy Halloween!