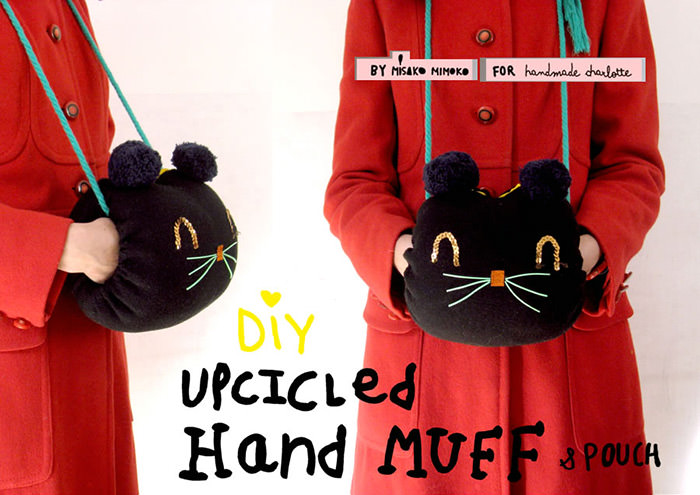
As a fan of Little Women and Hans Christian Andersen’s The Snow Queen, this kitty hand muff pocket pouch is one of my all-time favorite accessories. I remember making a felt version that had a green faux-fur inside for my best friend when I was 20. Now I’m going to show you how to make your own from a recycled sweater and fabric scraps!
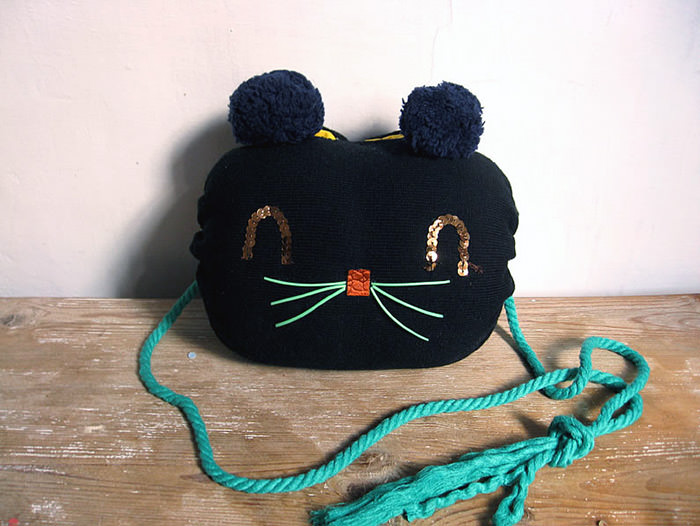
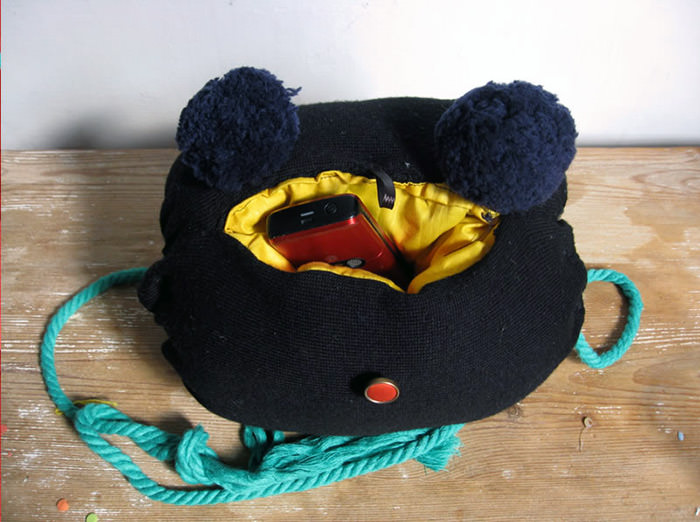
It not only warms hands, but it’s also perfect for holding your cell phone and keys.
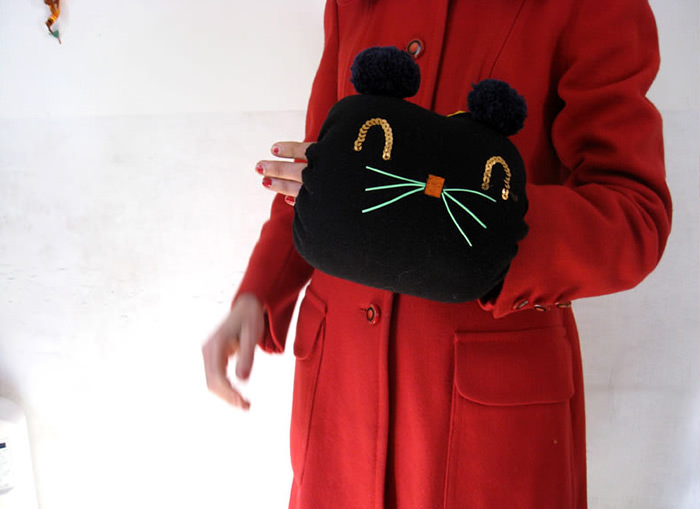
This is an easy, fun sewing project for beginners! You can use the downloadable template to embroider a charming kitten face, then add pom-poms, shinning sequins, and fluorescent plastic strands for a touch of glam.
Let’s get started!
what you need
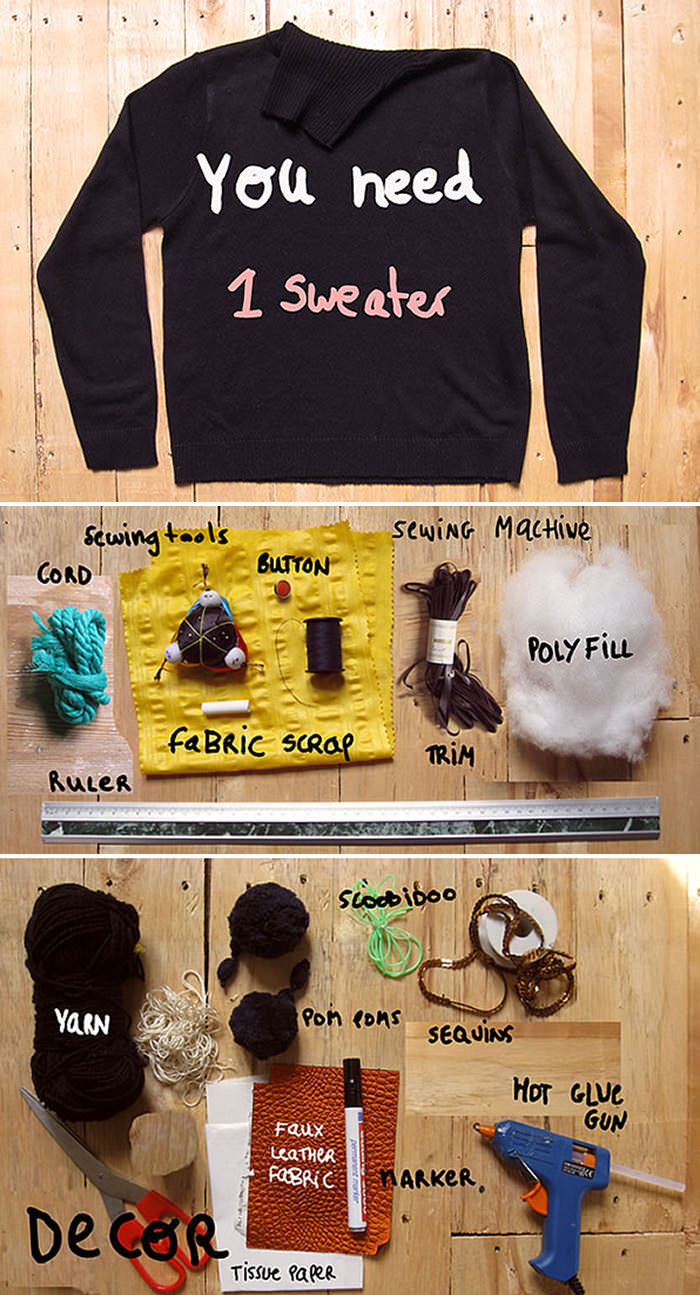
- Kitty Face embroidery template (download here)
- Old sweater
- Poly-Fil
- Yarn
- Chalk
- Scissors
- Ruler
- Pins
- Needle
- Coordinating thread
- Sequins, neon Scoubidou and plastic lacing strings
- Embroidery thread (perlé)
- Marker
- Tissue paper
- Scrap faux leather fabric
- Hot glue gun
- Sewing machine (optional)
- Cording for strap (optional)
For The Pocket (optional)
- Scrap of fabric
- Button
- Ribbon or trim
- Pom-poms
how-to
Step 1
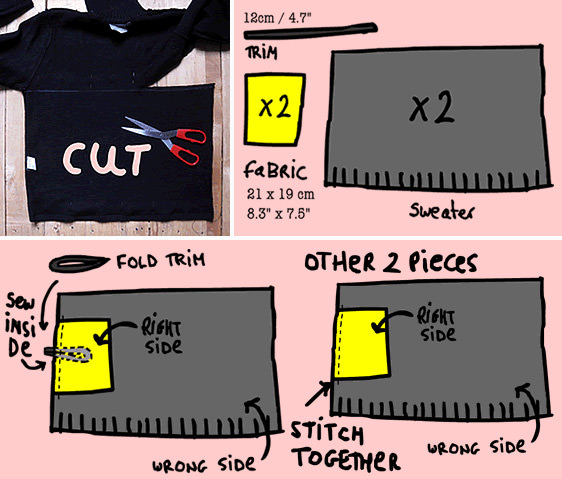
Cut out two rectangles from your sweater that are 13.4″ x 19.7″ (34 x 50 cm). For the pocket (optional), cut out two rectangles from the scrap fabric measuring 8.3” x 7.5” (21 x 19 cm) and a trim or ribbon of 4.7” (12 cm).
Basically we’re going to make a pillow case with a pocket inside. Place one sweater rectangle wrong side up and center the pocket fabric face up, lining up the top edges. Pin and sew them together about a half inch in. Do the same to your other two pieces of sweater and pocket fabric, but this time sandwich the folded trim between the sweater and pocket fabric, leaving the folded edge inside.
Step 2
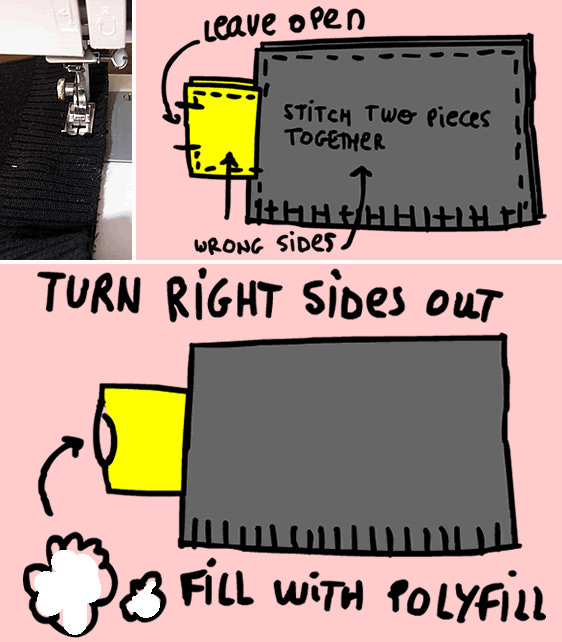
Fold back the pockets and place the two sewed pieces on table with the right sides up. Sew around the edges with a 1.2″ seam, leaving a small opening at the top edge of the pocket fabric. Turn your pillow right side out and stuff it with Poly-Fil.
Step 3
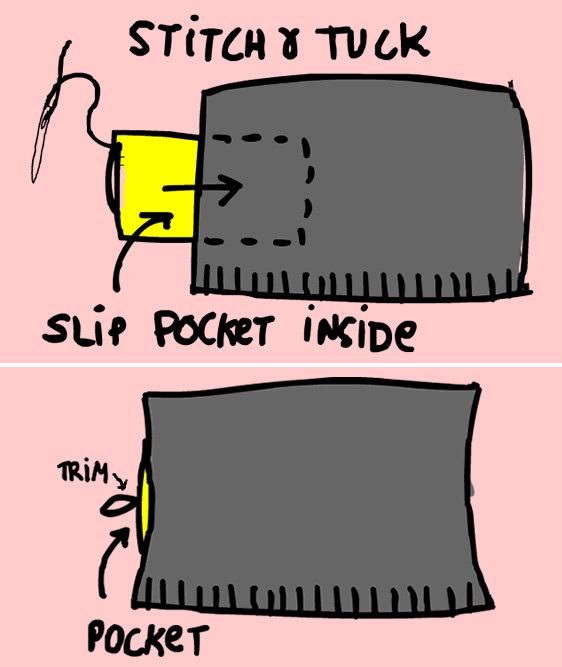
Press stuffing and mold it to get an even 1.5” filling. Sew up the opening and slip the pocket inside the pillow.
Step 4
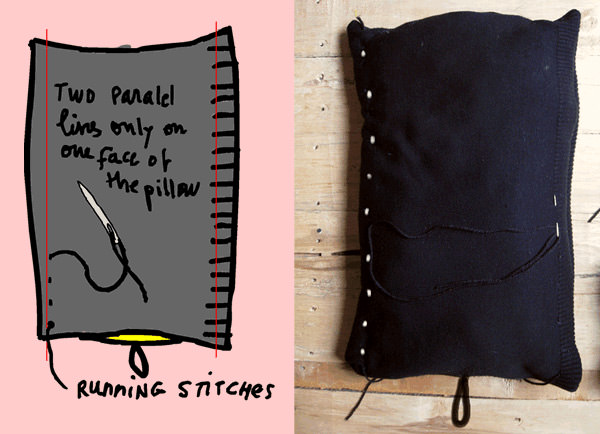
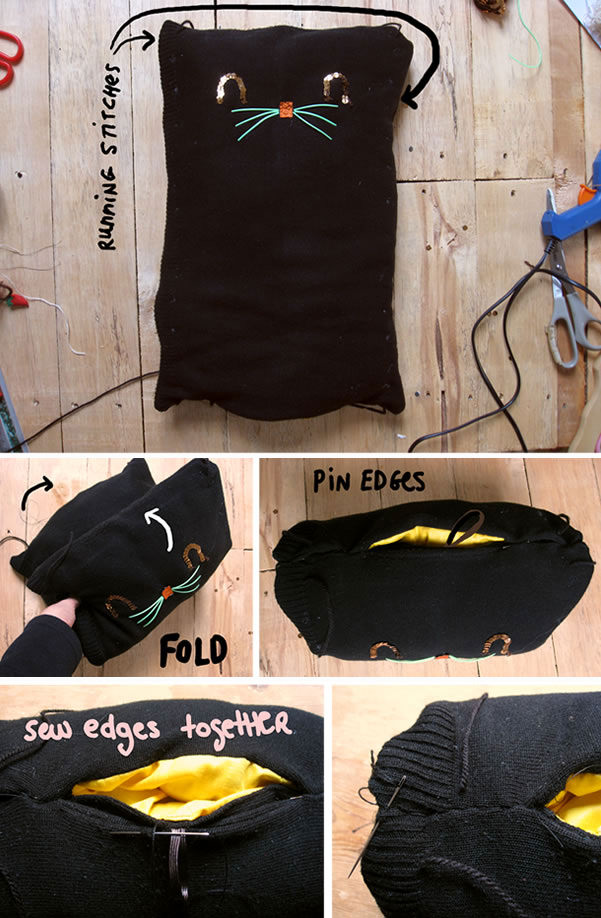
Place the pillow ribbon side down. Thread yarn and stitch two parallel lines, one along each side of the pillow. Use tiny spaced running stitches. Don’t go through the whole pillow; stitch only onto the top sweater layer. Leave long tail ends for easy gathering later.
Step 5
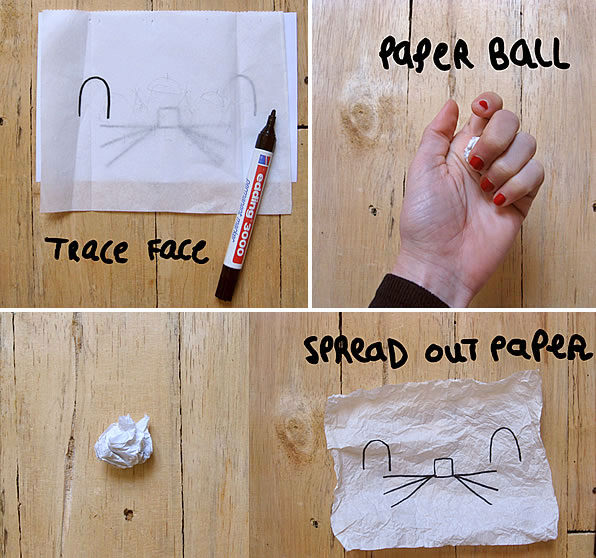
Now let’s embroider the kitten face! We’ll use tissue paper to transfer our face design onto our knitted sweater surface. First, trace the downloaded pattern onto your tissue paper, then wrinkle it by making a paper ball. Smooth it out. This makes tissue paper easier to work with—it won’t get ripped so easily while stitching.
Step 6
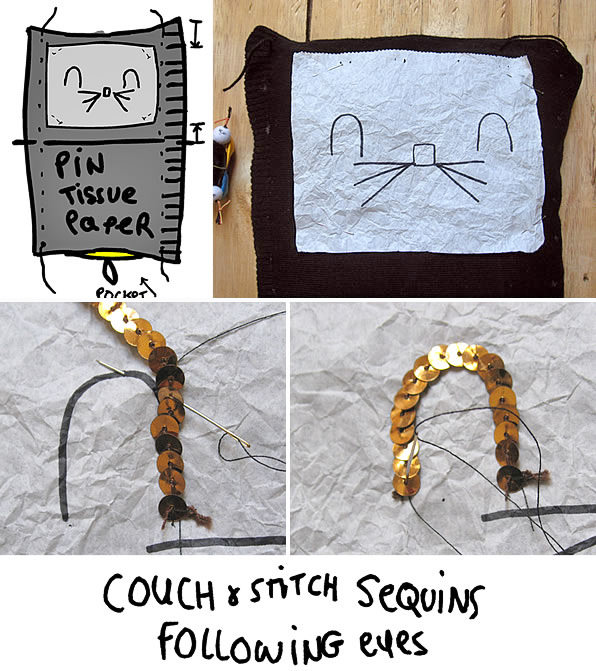
With the pillow ribbon side down and stitched yarn lines up, center the tissue paper on the top of the pillow (with pocket on the bottom edge of the pillow) and pin in place. Couch a a 3” sequins trim using tiny stitches all along the kitten eyes. Sew the sequins through the tissue paper and top sweater layer; tuck to secure.
Step 7
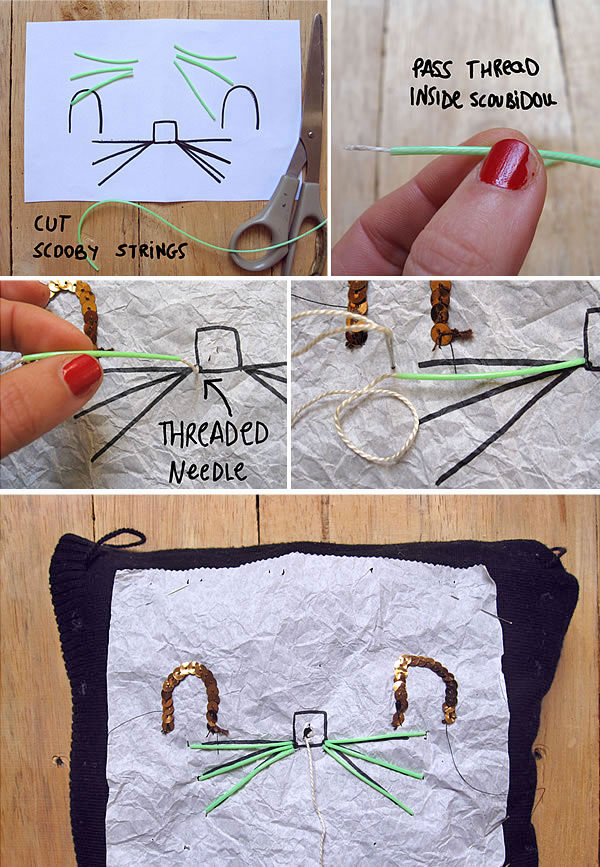
Now cut six Scoubidou strings, one for each of the kitten’s whisker, following the pattern sizes. Use a thick embroidery thread and pass it through one piece of Scoubidou, then thread a needle with it and stitch through the tissue paper to the top sweater layer. Do the same to the rest of the Scoubidou and finish the whiskers. You can tuck and fix stitches at the kitten’s nose.
Step 8
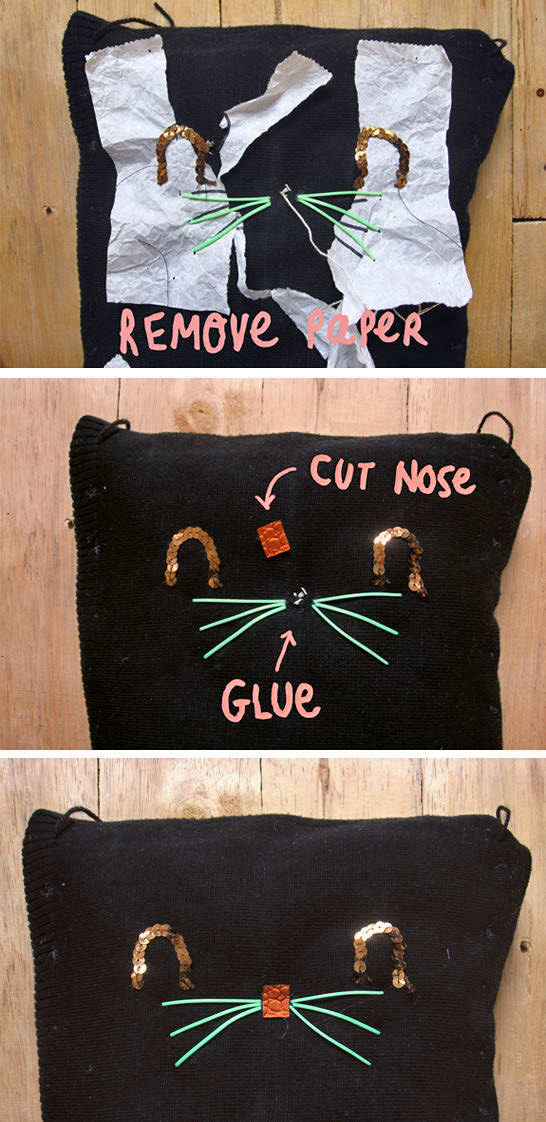
Time to remove the tissue paper! Gently, pull the paper up and back, away from the stitching. Once you’ve completely removed it from the embroidery and face, cut out a rectangle measuring 0.5” x 0.6” (1,27 x 1,6 cm) from a faux leather fabric. I used a metallic orange one, which looks great combined with sequins and neon plastic. Glue it on the kitten’s nose.
Step 9
Fold the pillow in the middle and align the top edges. Pin the edges together, leaving the pocket open. Topstitch both edges.
Step 10
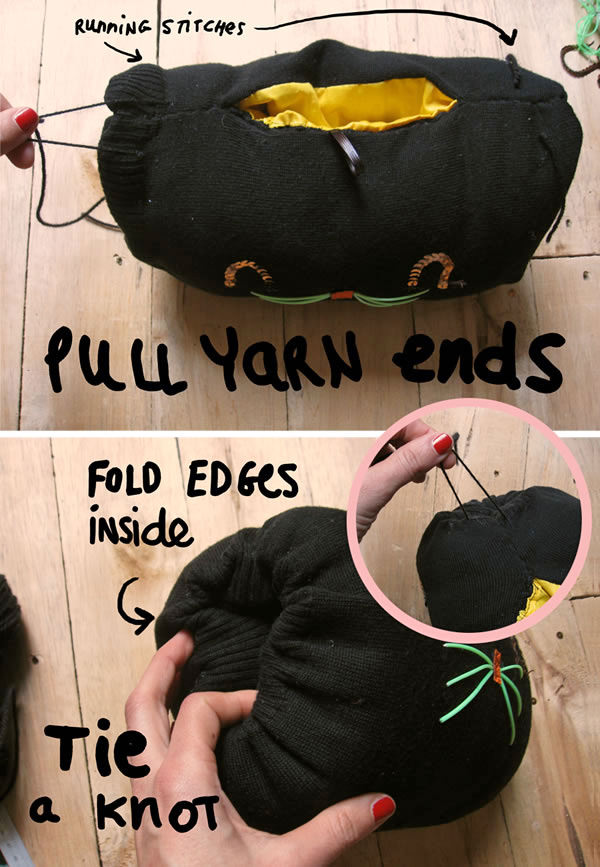
Gather both the muff sides by pulling out the yarn tail ends. Tie a knot on each end and fold the side edges inside the muff to get rounded sides.
Step 11
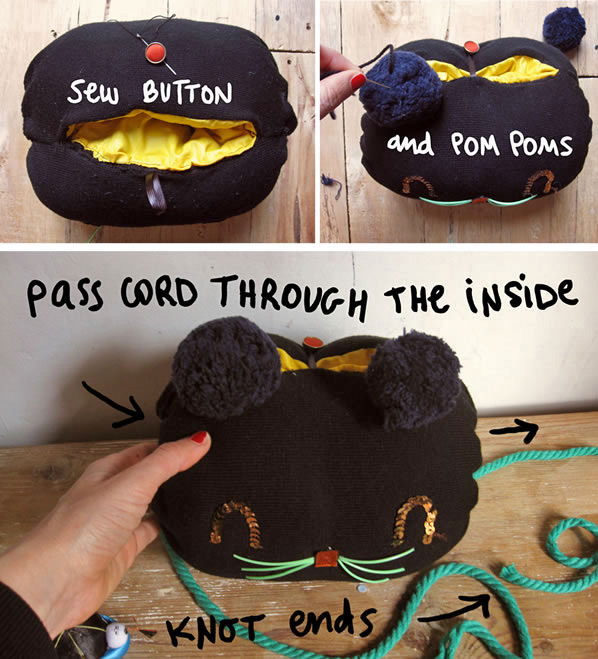
Sew a button for the end of the string closure. Stitch one pom-pom on each topside of the hand muff. Now take one end of your cord and pull it through the inside of the hand muff. It will go around your neck, so find a comfortable length. My cord strap was 69” (175 cm). I left an excess of a 6” (15 cm) tail hanging at the end of the knot.
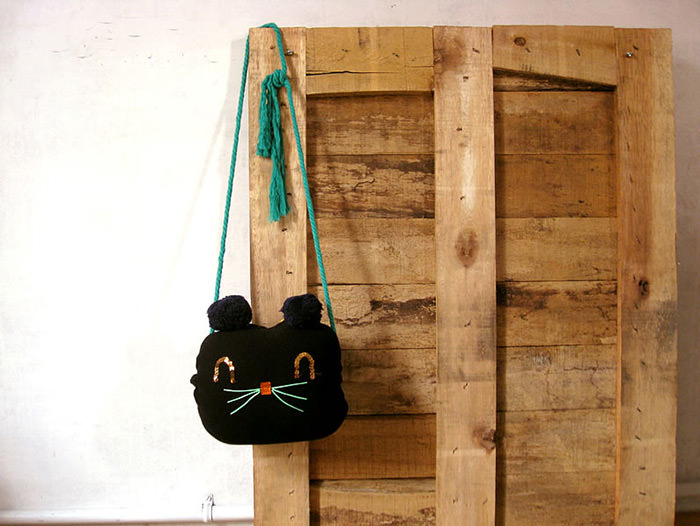
You’re done! Wasn’t that fun and easy to make?
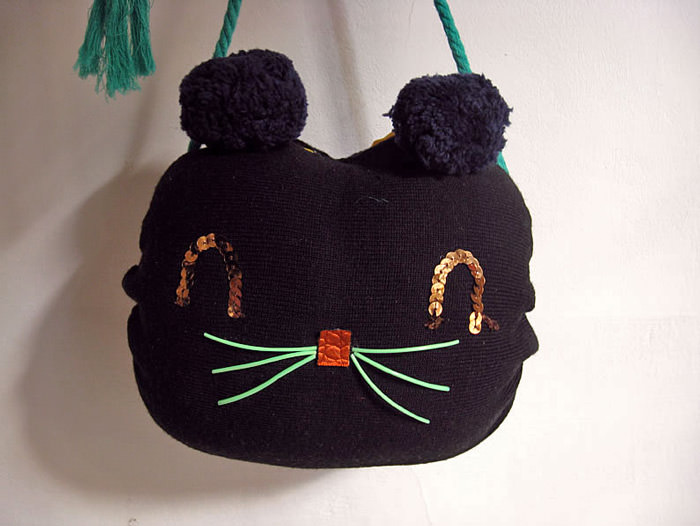
Enjoy your new cute kitten hand warmer! ☺