
Counting down the days to Christmas is half the fun of the holiday season, isn’t it? Building up the anticipation with your family, getting in the holiday spirit – no wonder advent calendars have become so popular! This year, try your hand at making an advent calendar that’s totally unique – all you need to make this sweet little Christmas tree advent calendar is some old fabric scraps, stuffing, felt, and buttons. Bonus: it doubles as a festive pillow!
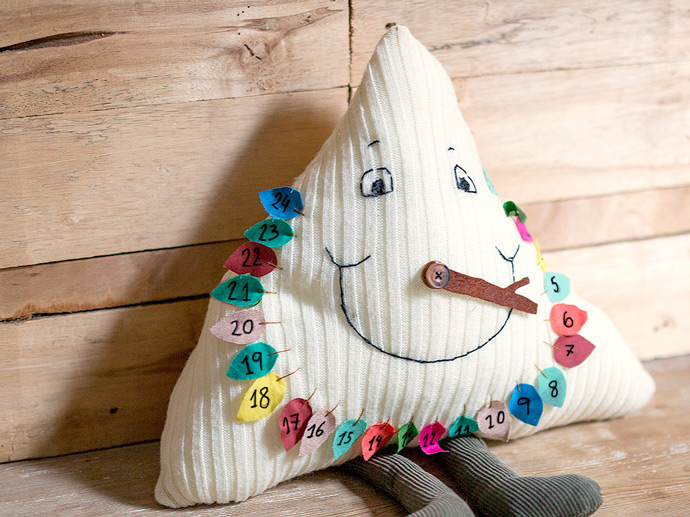
This jolly tree is perfect for helping your little ones count – each day is written on each of it’s tree leaves, and it’s little branchy nose adjusts to point toward each day as you count down! This little tree will cheer everybody up with its big smile and lovely colors.
What You Need

- Old clothes (I used corduroy trousers and knitted jersey)
- Fabric scraps
- Felt
- Buttons
- Needle and thread
- Marker
- Scissors
- Stuffing
How To
Step 1
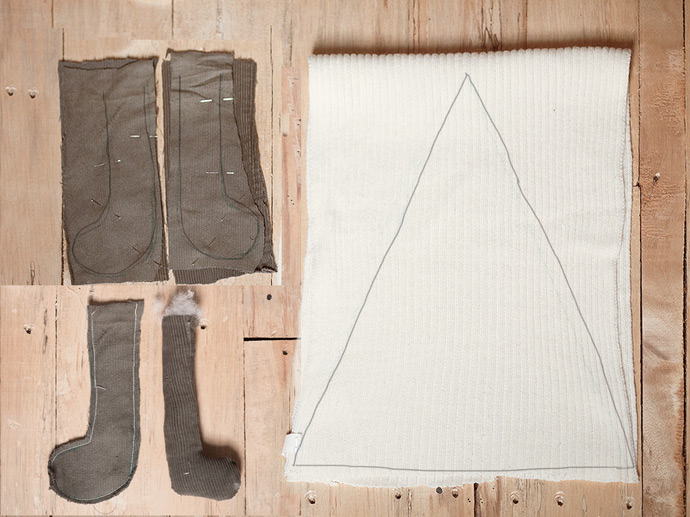
Download and print your templates. Enlarge the pillow template 140% to get a triangle that measures 11.5” wide x 13” high. Cut out all of your templates. Lay the triangle shape onto your knitted jersey or scarf (right sides together) and mark it. Cut four leg shapes on your old trousers, pin them in pairs (right sides together). Stitch legs all around leaving the top edge open and trim all the seams to ¼. Clip all curves. Turn legs right side out and stuff.
Step 2
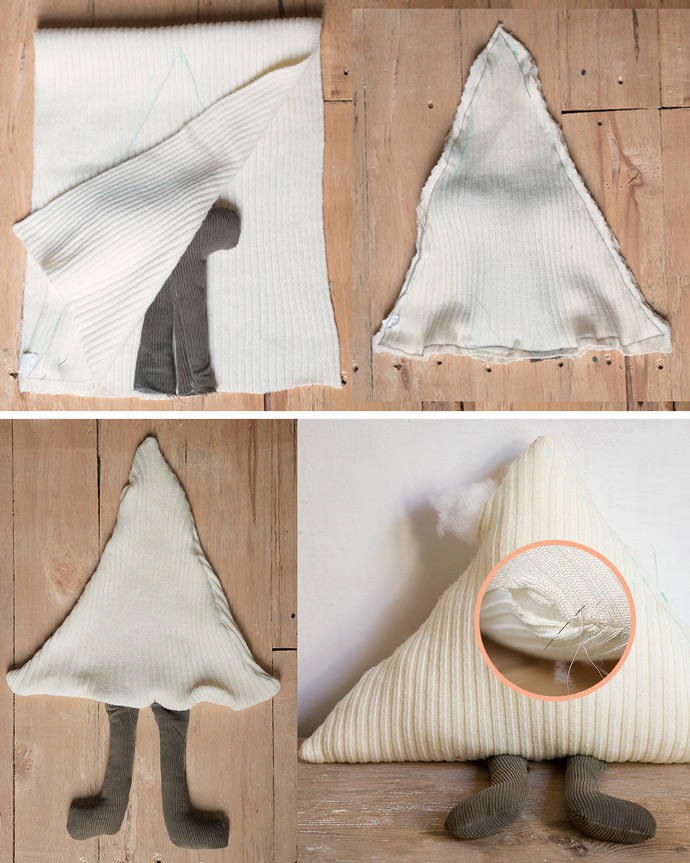
Lay down your knitted fabrics and sandwich the legs between them. Stitch around the triangle with a 1/2 inch seam. Leave a three-inch opening at one side. Turn pillow right side out and stuff. Stitch to close up the opening.
Step 3
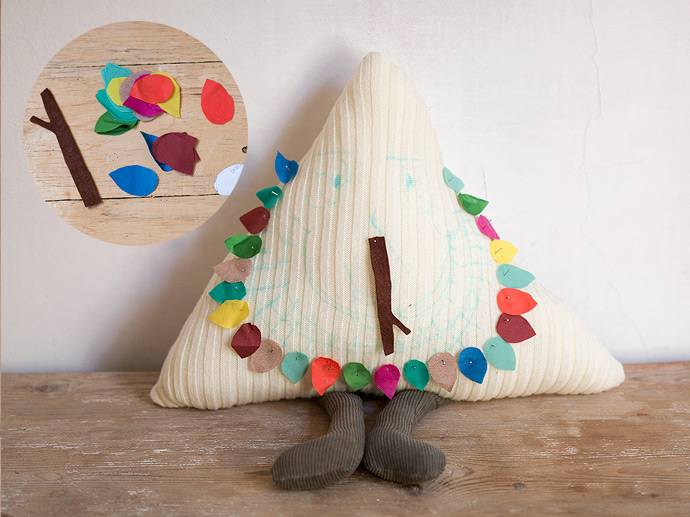
Cut branch shape from felt and 24 small leaves of fabric scraps from templates. Distribute leaves all around the sides and bottom of the pillow, then pin. Pin the branch at the center of the pillow.
Step 4
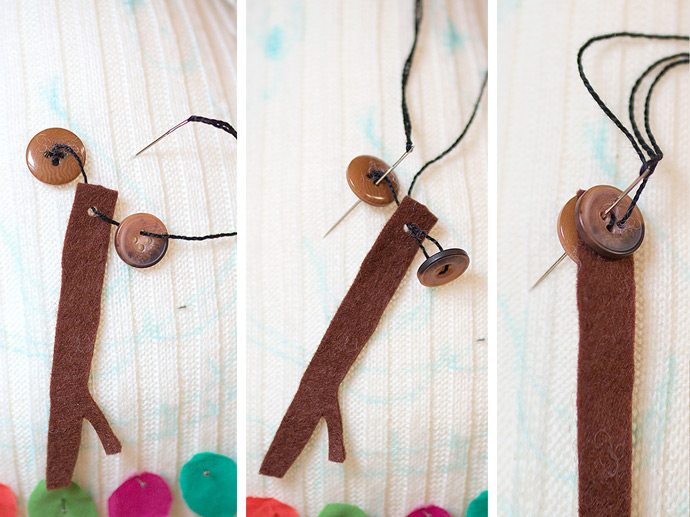
Make a hole at the top of the branch. Stitch one button at the center of the pillow, then thread the branch and another button to sit on top of the existing button. Go back with the needle passing the thread through a different button hole and through the branch again. Repeat until all 3 pieces are secure on the tree. You want to make sure your tree branch can rotate freely!
Step 5
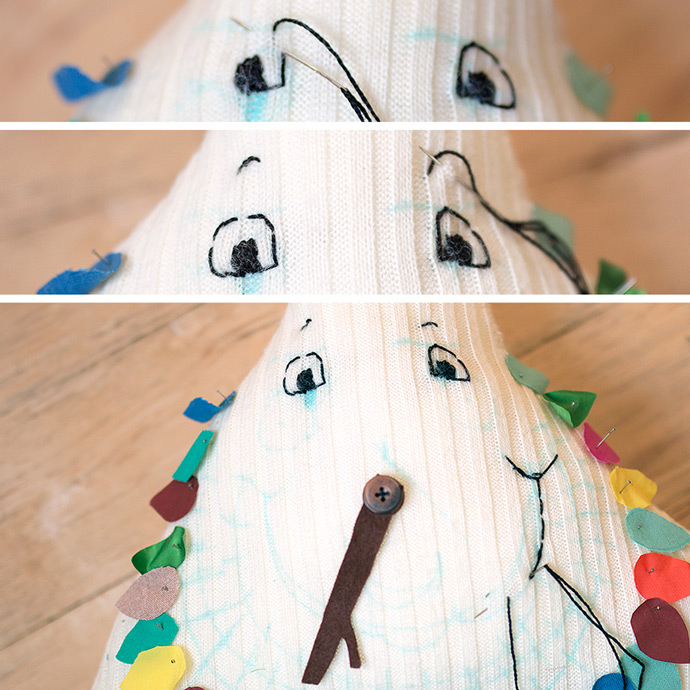
Draw, then embroider your tree’s face: eyes, eyebrows and a big smile using a thick, black perle thread or wool.

Step 6
Using a green or brown perle thread (or wool) sew one long straight stitch onto each leaf to fix them to the tree’s body. Number all of your leaves with December days – start writing dates from the right side and around, ending at the left top leaf.
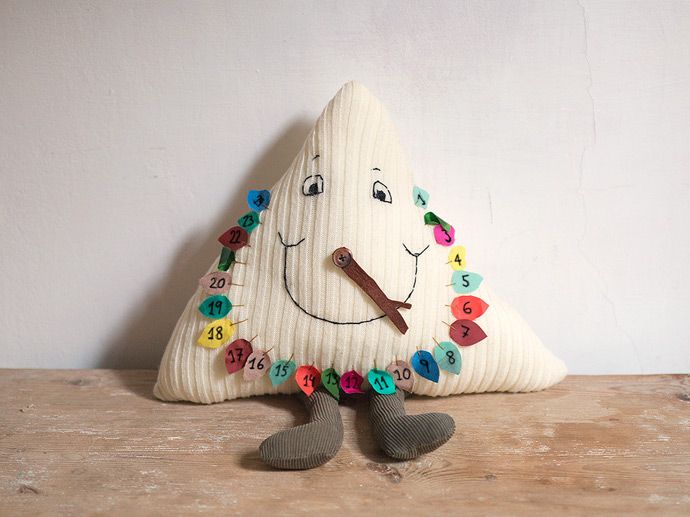
That’s it! Now enjoy counting down for Christmas with your little new friend! Happy crafting!