NOTE: This Part 1 of an 11 part series – Eva really went for it with this project! Here are the links to all the parts in the series: Part 1, Part 2, Part 3, Part 4, Part 5, Part 6, Part 7, Part 8, Part 9, Part 10, and Part 11.
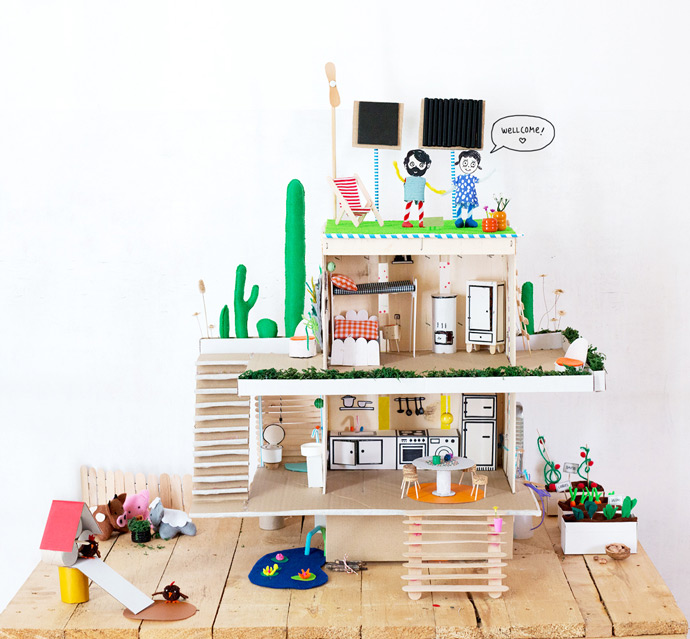
Build a completely off-the-grid dollhouse and farm using recycled and scrap materials! This minimal dollhouse is a great way for kids to learn about sustainability and how to recycle everyday materials into a fun and creative toy. As you make this project with your kids, it’s the perfect opportunity to discuss how self-sufficient homes operate relying on the sun, wind, earth, and water.
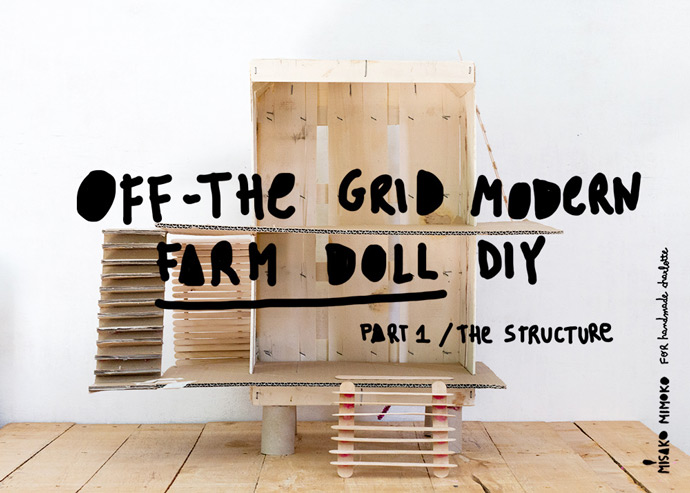
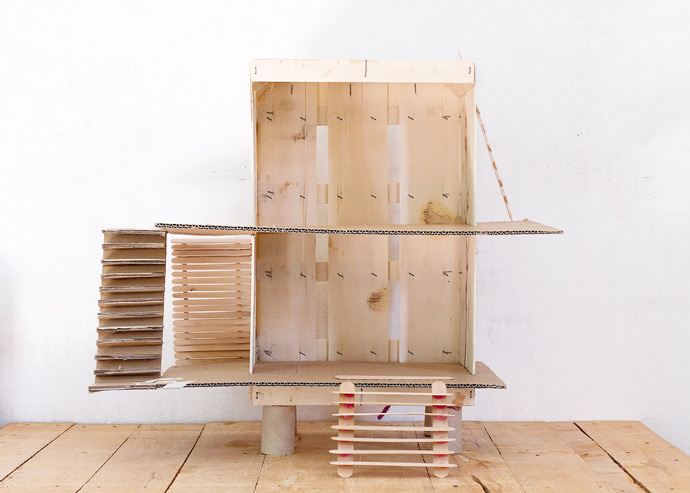
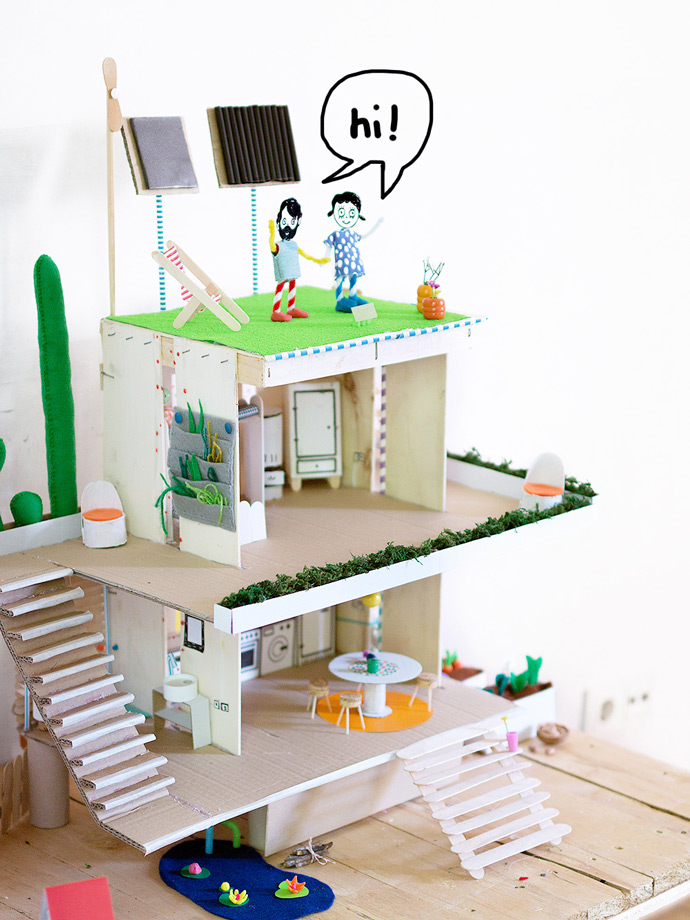
Lately I’ve been fantasizing about living in an eco-friendly house deep in the woods, so I designed this tiny farm to be just like the sustainable dream house in my head. It’s the perfect green oasis to unplug and get away from it all! I’ve divided this dollhouse into seven tutorials to cover all aspects of this project – today we’ll be focusing on building the structure. Keep reading to get started on an eco dollhouse all your own!
What You Need
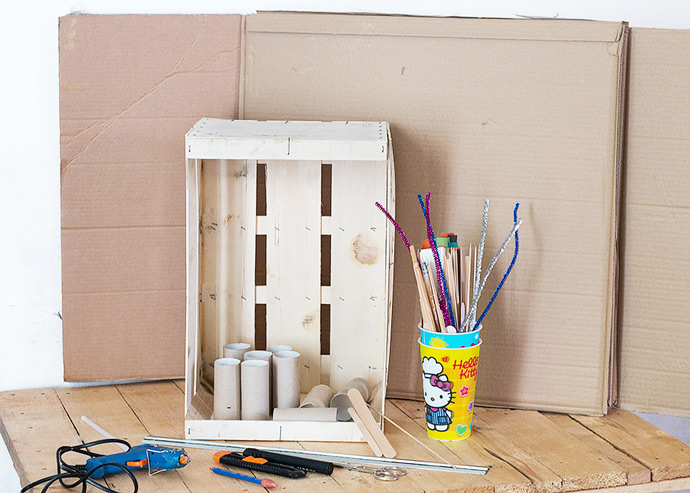
- 1 wooden fruit box
- 4 toilet paper rolls
- 1 large cardboard box
- Popsicle sticks (regular, jumbo, coffee stir sticks)
- Wooden skewers
- Pipe cleaners
- Pencil and eraser
- Ruler
- Tape
- Hot glue gun
- Scissors
- Craft knife
How-To
Step 1
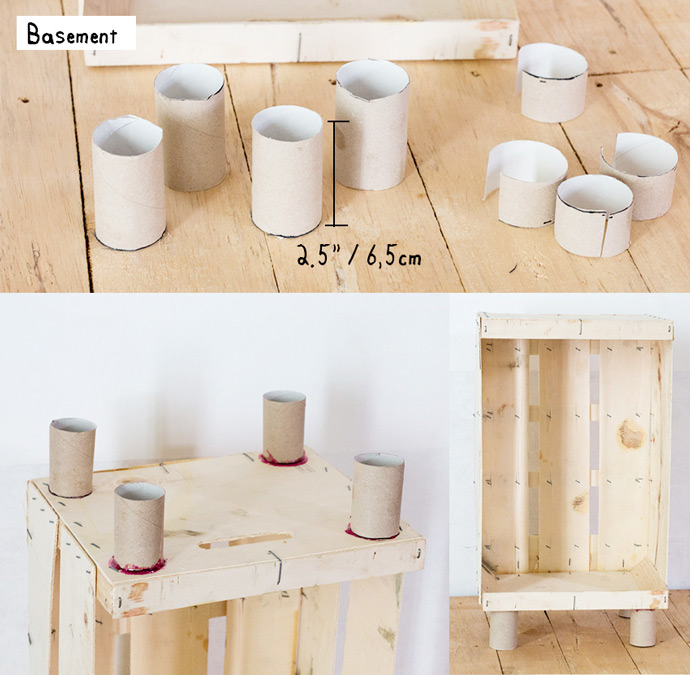
Cut the 4 toilet paper rolls down to a height of 2 ½” each. Glue them onto the bottom of the wooden box, like mini pillars.

Step 2
The main heat source for this dollhouse is the radiant floor, which we’ll install on the ground floor. (It will work with the geothermal heat pump system that we’ll make in the next tutorial.) To imitate plastic tubing for the hot water, link pipe cleaners together and shape them into a continuous S shape to cover the ground floor. Feed the ends of the pipe cleaners through the handle hole of the fruit box and tape onto the underside of the box.
Step 3
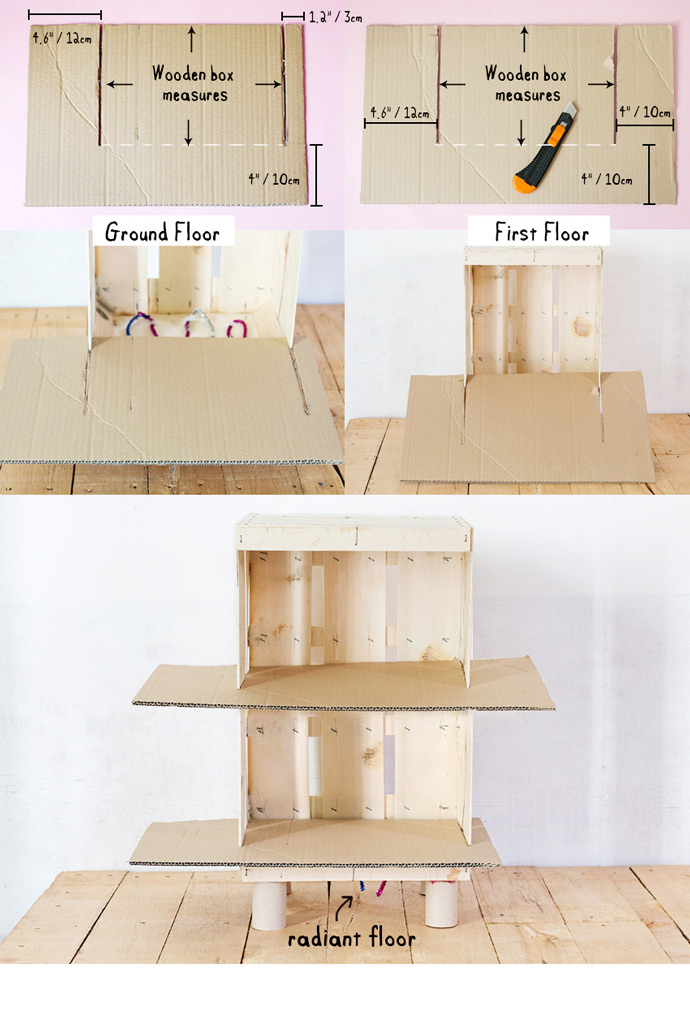
Now to make the floors! Measure the width and depth of your wooden box and use two pieces of cardboard to draw out the measurements as shown in the diagram. Mark and cut the two slots for the depth of the box on each piece. Slide the ground floor into place and hot glue to the wooden box. Slide the first floor into place, about halfway up the box, and again use hot glue to attach to the wooden box.
Step 4
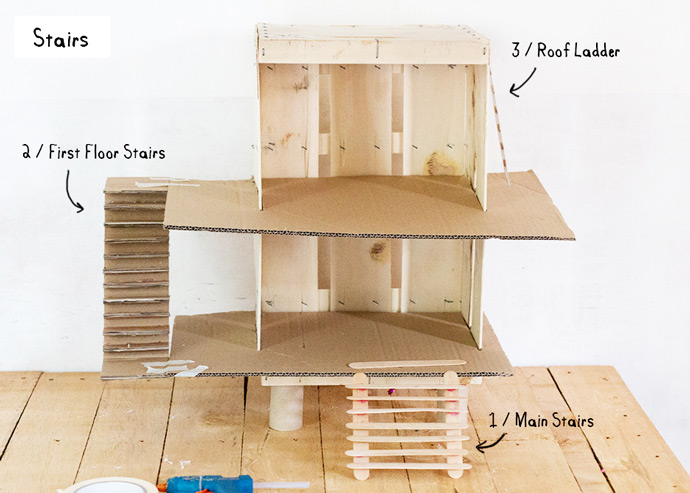
There are three different sets of stairs/escalators in this dollhouse: the main stairs, the first floor stairs, and the ladder
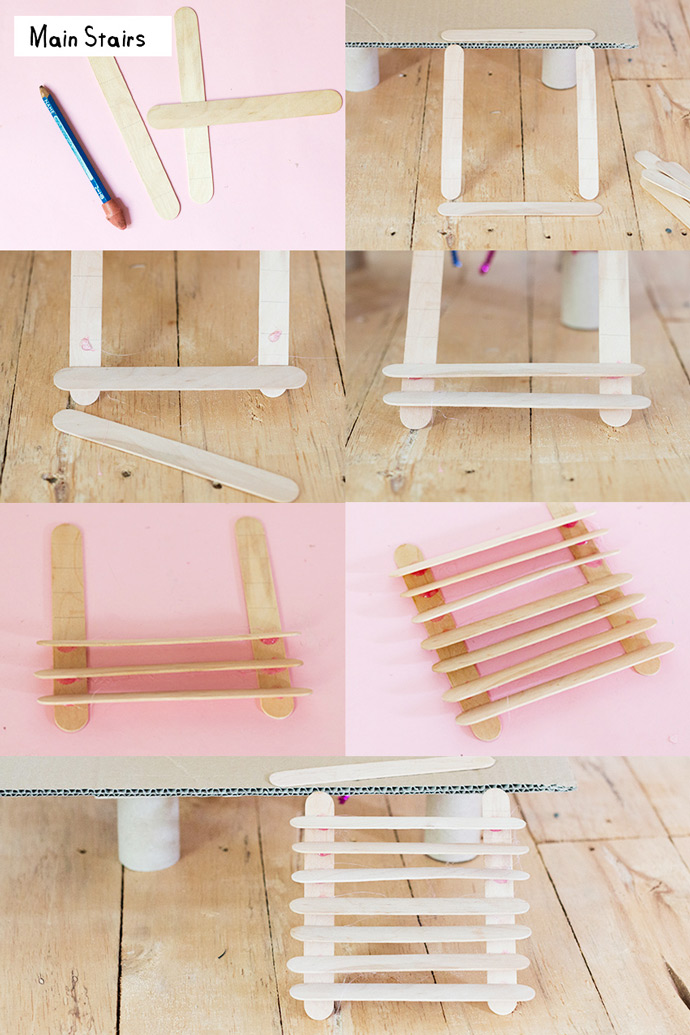
For the main stairs:
We’ll use two jumbo popsicle sticks as the support structure for the stairs. Use the pencil and ruler to draw evenly spaced marks (about 7) along each popsicle stick. Place these two popsicle sticks leaning on the ground floor from the table, and use another jumbo popsicle stick as a guide for how far apart the two sticks should be placed, as shown. Keeping the popsicle sticks leaning in place, carefully hot glue another jumbo popsicle stick onto the bottom two pencil marks, keeping this step parallel to the table. Hot glue on the next popsicle stick step in this way, keeping it parallel to the previous step. Now that these two steps are securely in place, you can put the stairs flat on the table to glue on the remaining steps, following the angle of the existing ones. Glue the finished staircase in place – we will add one last step to the very top later.
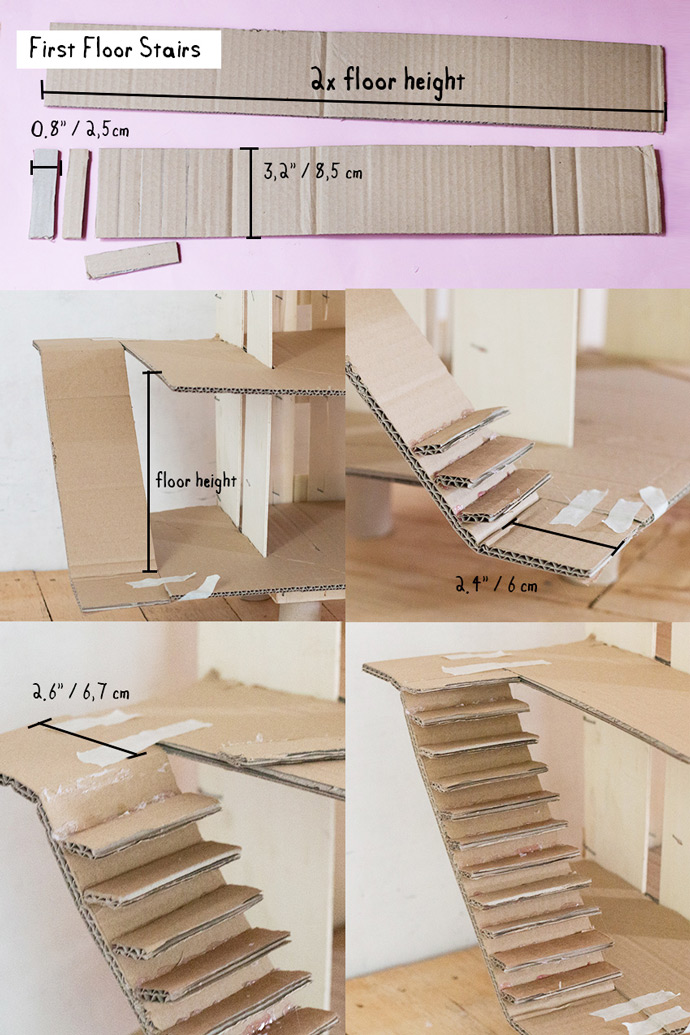
For the first floor stairs:
Measure the distance between the ground floor of the house and the first floor, and cut two cardboard rectangles whose lengths are each twice this distance and 3.2” wide. On the first rectangle, mark and fold a line 2.4” from the end and tape this folded platform to the ground floor on left side of the house. Adjust the angle of the remaining cardboard rectangle, and once you’re happy with it, fold another landing at the top (about 6.7” long), tape in place to the first floor, and cut off any excess cardboard. Cut the second cardboard rectangle into 0.8” wide strips – these will be the steps for the staircase. Use a pencil and ruler to make evenly spaced marks along the staircase and hot glue the steps in place, keeping them parallel to the floor.
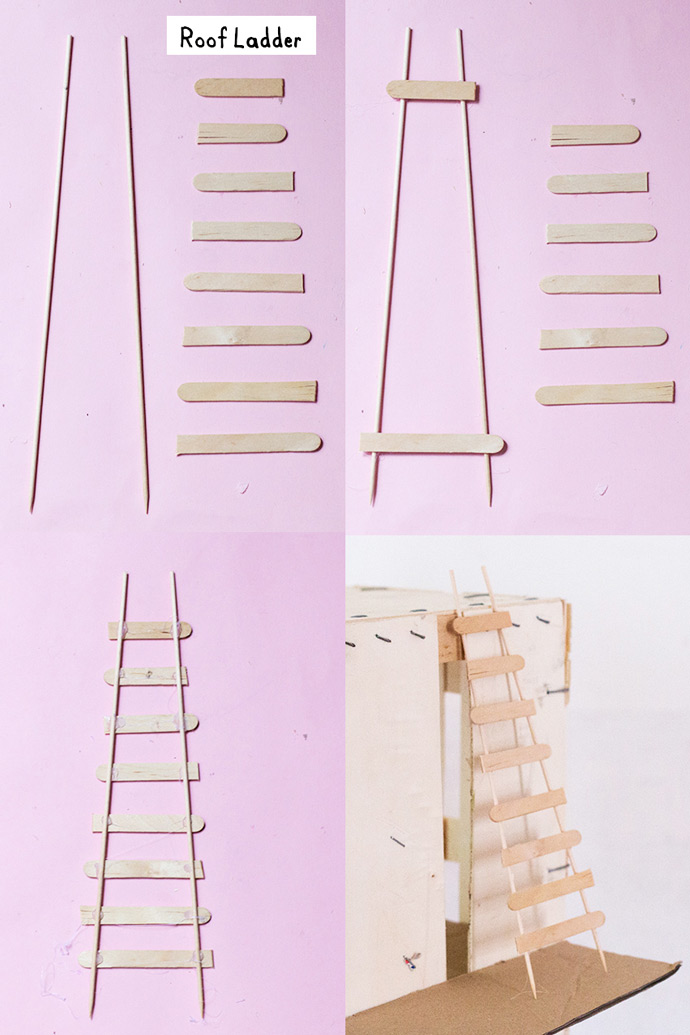
For the ladder:
The ladder connects the first floor of the dollhouse to the roof. Lay out two wooden skewers in a slight angle, like in the image above. Cut regular popsicle sticks into various lengths for the rungs, and arrange them so that they connect the two wooden skewers. Hot glue the top and bottom rungs in place, and then fill the middle with the remaining rungs.
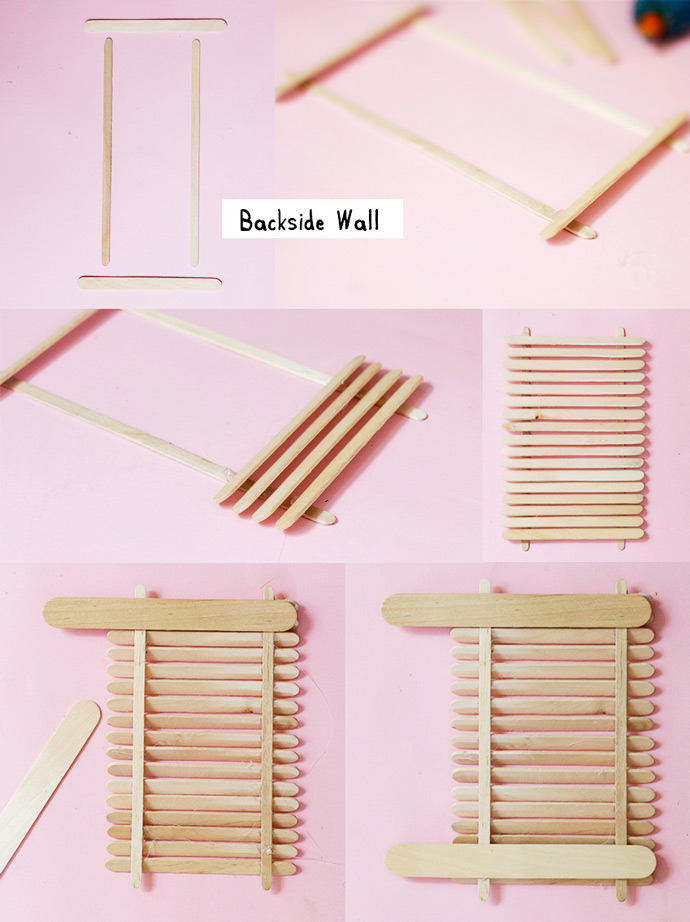
Step 5
For the backside wall (next to the first floor staircase), we’ll make a cute wooden shutter wall that will be the back wall of the future bathroom. Lay two coffee stir sticks parallel on the table. Hot glue one popsicle stick across the top and one across the bottom of the stir sticks, attaching them on slight angles (like you’d see on a shutter door). Glue more popsicle sticks down on this same angle, filling the stir sticks as shown. Then glue jumbo popsicle sticks onto the top and bottom of the back of the shutter wall, letting the excess length of these sit on the same side.
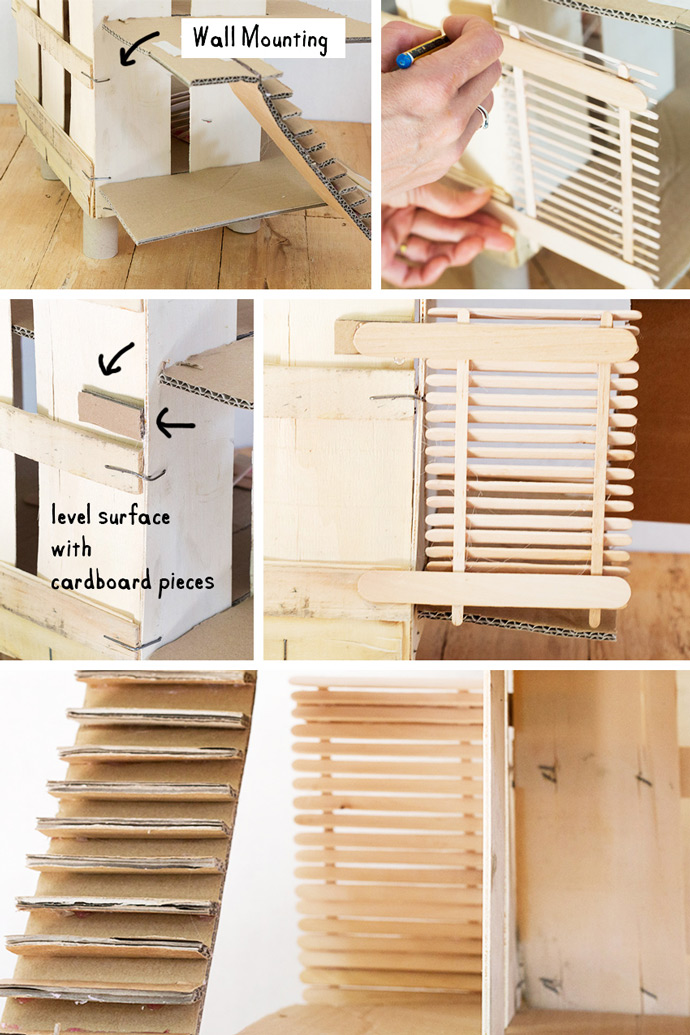
To mount the shutter wall, hot glue the extended jumbo popsicle sticks onto the backside of the wooden fruit box. If the box isn’t level, first glue down a small rectangles of cardboard as needed.
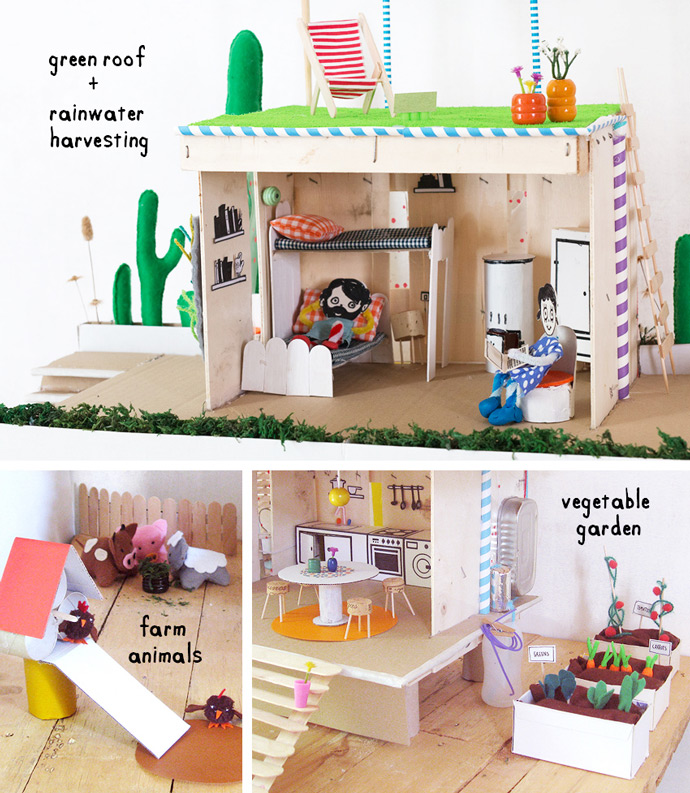
And that completes the base structure for your eco dollhouse! Stay tuned for the next tutorial :)