NOTE: This Part 9 of an 11 part series – Eva really went for it with this project! Here are the links to all the parts in the series: Part 1, Part 2, Part 3, Part 4, Part 5, Part 6, Part 7, Part 8, Part 9, Part 10, and Part 11.
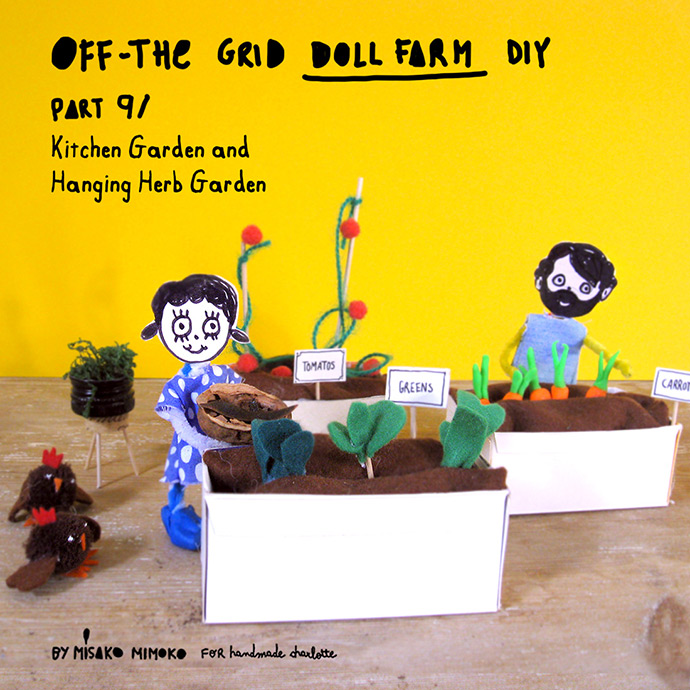
We’re back with part 9 of our off-the-grid dollhouse series! Today we be making big containers to grow all your favorite veggies: carrots, tomatoes, and some leafy greens too.
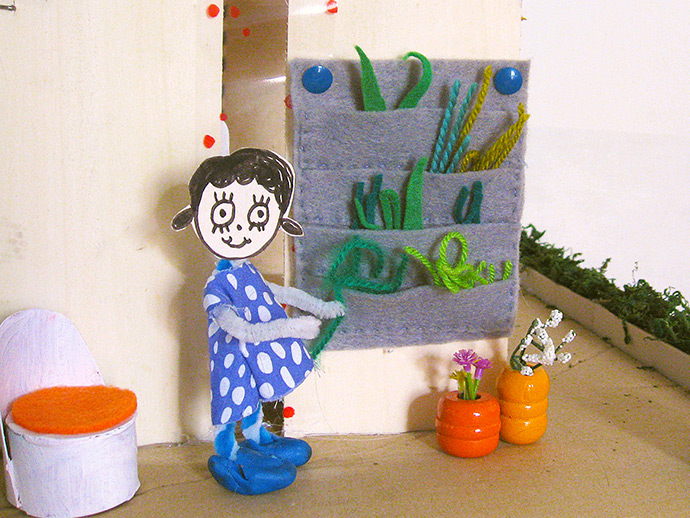
We’ll also be making a handy place to grow your kitchen herbs: a vertical hanging planter! This is a smart solution for tiny spaces and it smells gorgeous too. Gather your supplies and get ready to craft! As always, don’t forget to use recycled or eco-friendly materials to make your dollhouse as green as possible!
what you need:
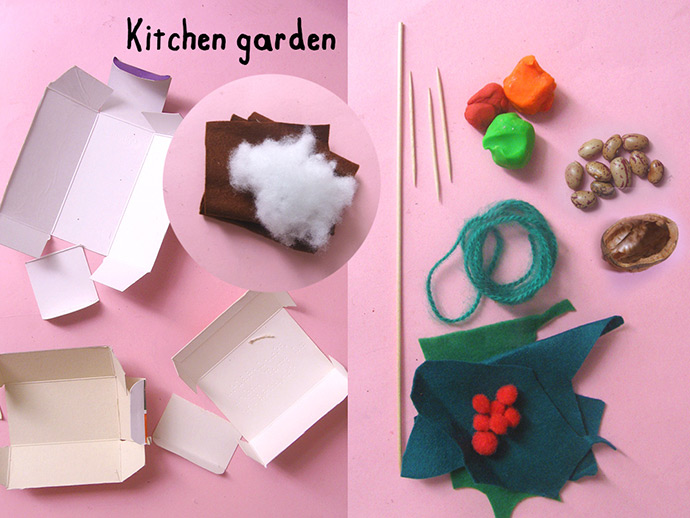
- Small cardboard boxes
- Brown and green felt
- Stuffing
- Wooden skewers
- Toothpicks
- Play dough
- Green yarn
- Red pompoms
- Beans
- Empty walnut shells
- Craft knife
how-to:
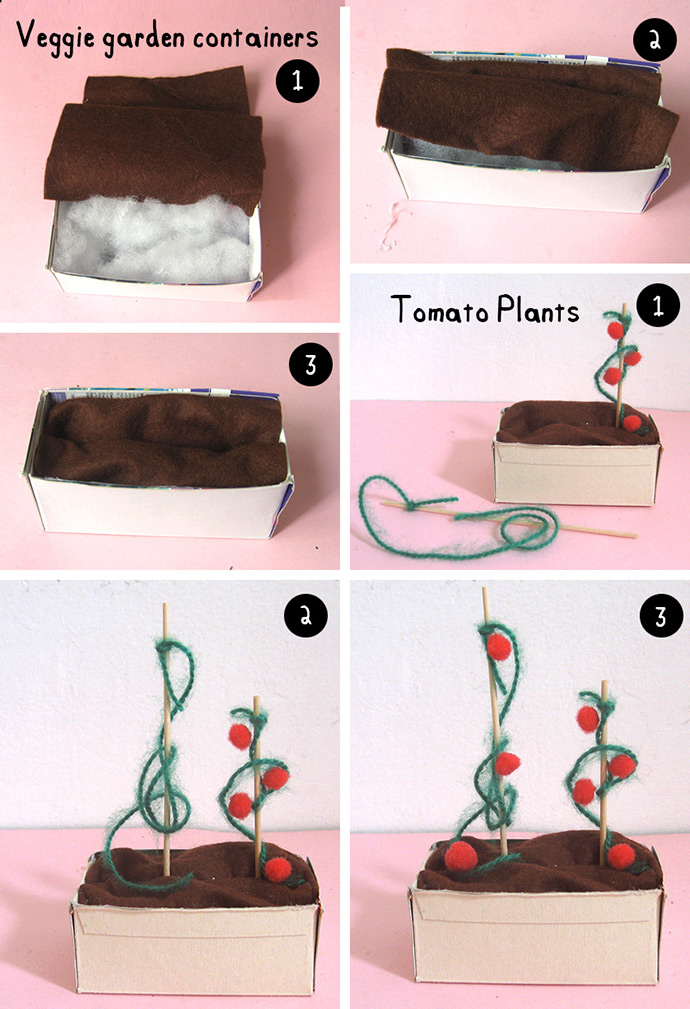
KITCHEN GARDEN CONTAINERS
Step 1
Disassemble some empty cardboard boxes and reassemble them again with the blank sides out. Glue the box together to secure it and then use a craft knife to cut away one of the bigger sides out of the box. Cut a piece of brown felt about twice as long as the cardboard side you just cut out and glue one side of the felt into the box. Under the brown felt, fill the box with stuffing.
Step 2
Shape the stuffing to make a ditch in the center of the box and then fold the felt to cover it.
Step 3
Glue the other end of the felt piece into the inside of the box.
TOMATO PLANTS
Step 1
Cut large wooden skewers into various lengths. Tie a piece of green yarn to the top of each stick.
Step 2
Place sticks inside the container by inserting the stick into the ditch. If the skewers aren’t standing up straight, add more stuffing to keep sticks standing up. Loosely wrap the yarn around the stick.
Step 3
Add red pompoms – they should stick onto the yarn easily without any glue. Your tomato plants are now ready!
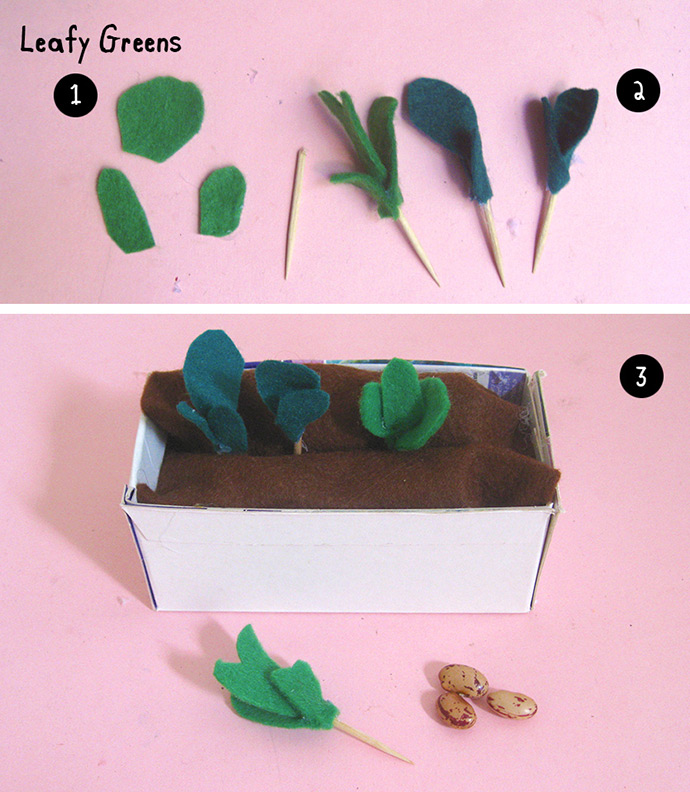
LEAFY GREENS
Step 1
Cut small leaf shapes out of green felt and cut tooth picks in half.
Step 2
Wrap and glue each leaf around the top of a toothpick, and repeat with a second and third leaf, wrapping around the previously glued leaf to form overlapping leafy layers.
Step 3
Use different shades of green to make spinach, chard, lettuce, kale, etc. Place the leafy sticks into the felted ditch in the container and fill in with more stuffing if needed to keep sticks standing up.
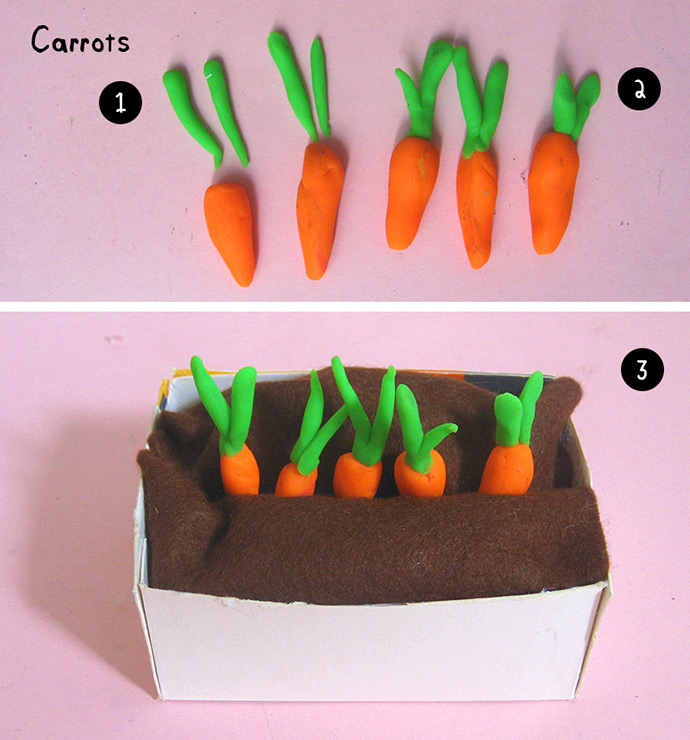
CARROTS
Step 1
Roll two small snakes of green play dough for each play dough carrot shape.
Step 2
Attach the greens to the top of each carrot.
Step 3
Insert the play dough carrots into the ditch of your containers.
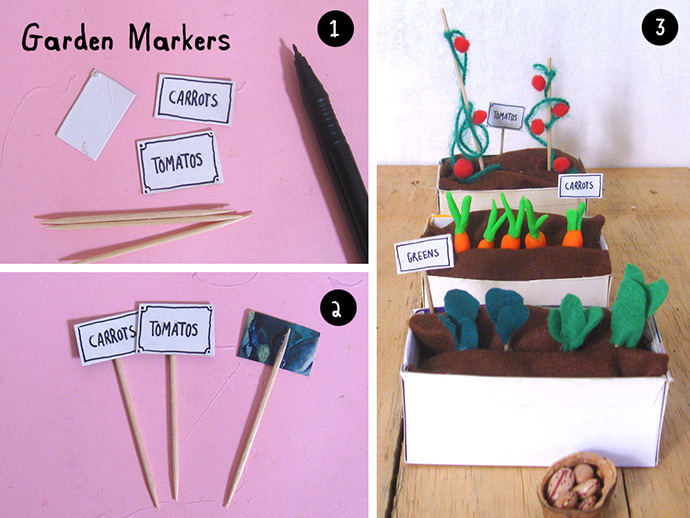
GARDEN MARKERS
Step 1
Cut several 1″ by 1/2″ rectangles from cereal boxes and write the name of your veggies on each one.
Step 2
Glue tooth picks onto the backs of the labels.
Step 3
Place the garden markers inside containers to keep your vegetable garden organized.
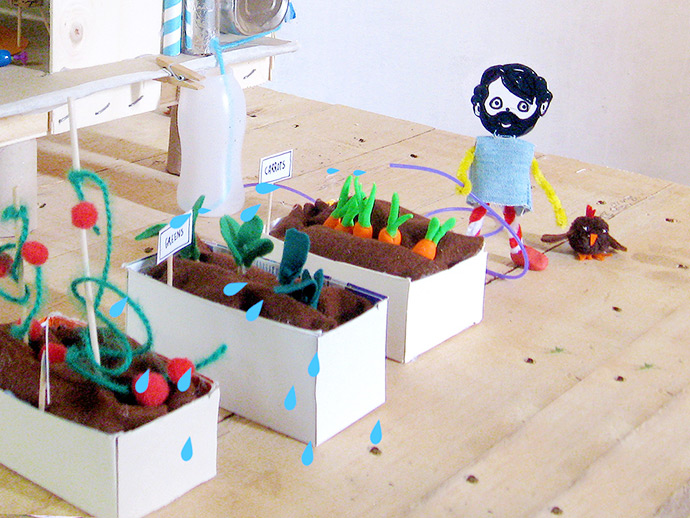
Make as many plant containers as you want and fill them in with your favorite vegetables. The more the merrier!
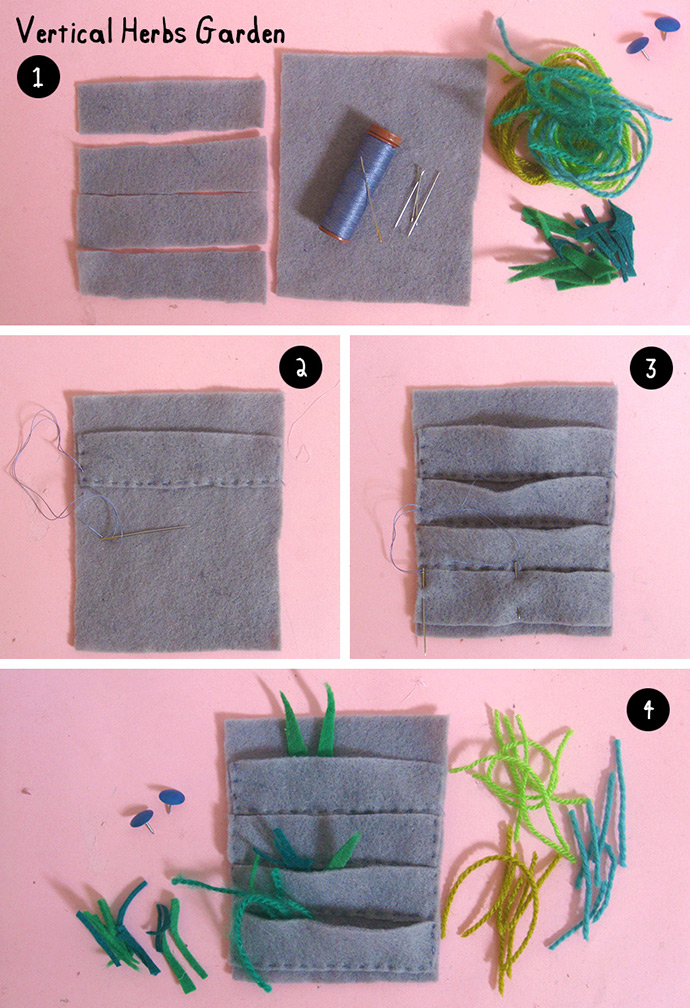
Vertical Herbs garden
Step 1
To make a hanging herb garden, you’ll need felt, thumbtacks, yarn, a needle, and thread. Start by cutting a 3 3/4″ by 4″ rectangle and four 3 3/4″ by 3/4″ rectangles from grey felt.
Step 2
First add the pockets by placing one of the small rectangles about 1/2″ down from the top edge of the big piece of felt. Sew a running stitch around the two sides and bottom edge to create a large pouch.
Step 3
Repeat this down the big rectangle with the rest of the felt pieces, adding three more pockets.
Step 4
Cut green felt into various long shapes and yarn into pieces, all about 1″ long. Combine different shades of greens and types of yarns to create a colorful herb garden.
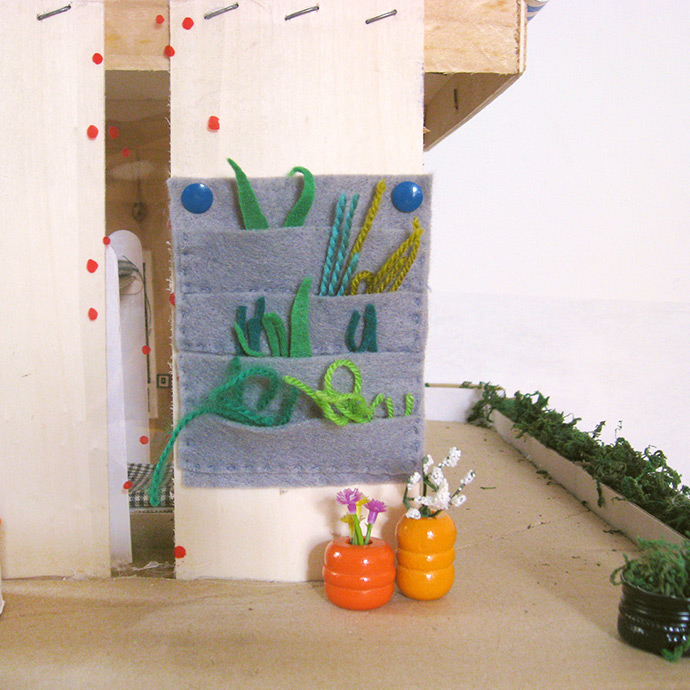
Fill vertical garden pockets with felt and yarn pieces and then hang it on the wall using thumbtacks.
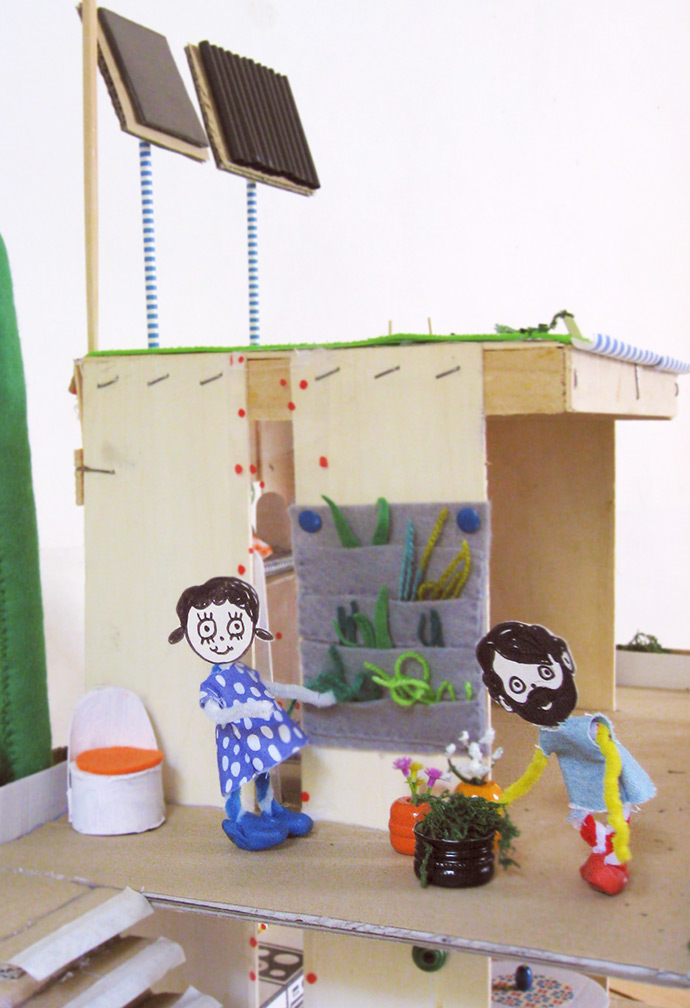
Enjoy your new vertical garden! This green living wall makes a nice decoration for your terrace and it will smell lovely too! In the next chapter, we’ll learn how to craft farm animals and the henhouse!

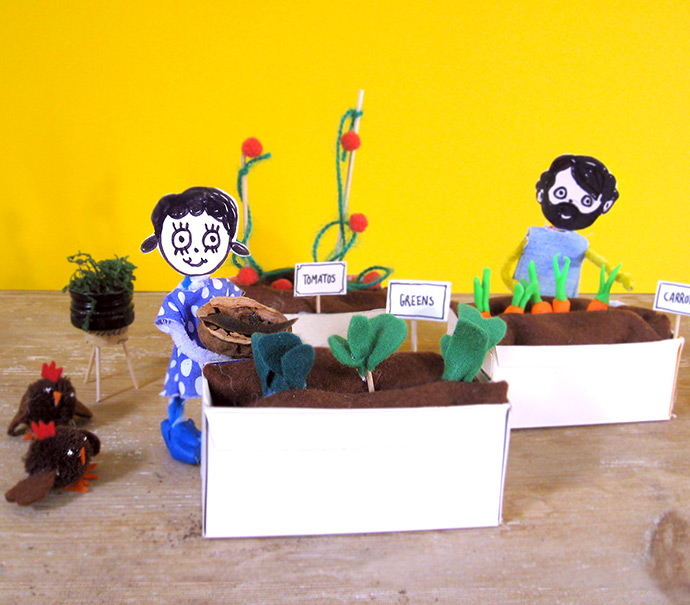
Happy crafting!