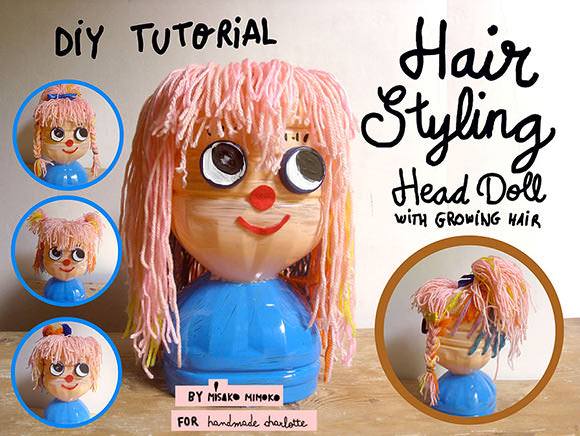
Our fave crafter from Barcelona is back with a DIY craft project for recycling plastic bottles into a super fun hairstyling head doll. The coolest part? The yarn hair actually grows! This project is perfect for making use of leftover yarn scraps…
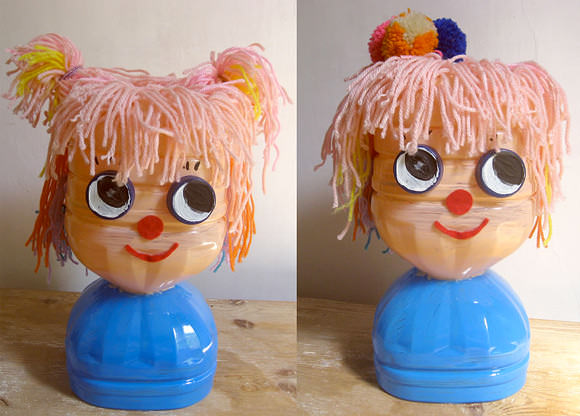
I can remember playing with one of these head dolls myself (as well as My Little Pony!). I loved them so much that I thought it would be a great idea to give the doll rainbow-style hair and lots of trendy pink. All the other kids loved to brush her long, colored hair, pulling it to make it longer or shorter, using clips and rubber bands to hold the doll’s hair in different styles.
Hopefully all of you will have as much fun as I did making and playing with this sweet little gal!
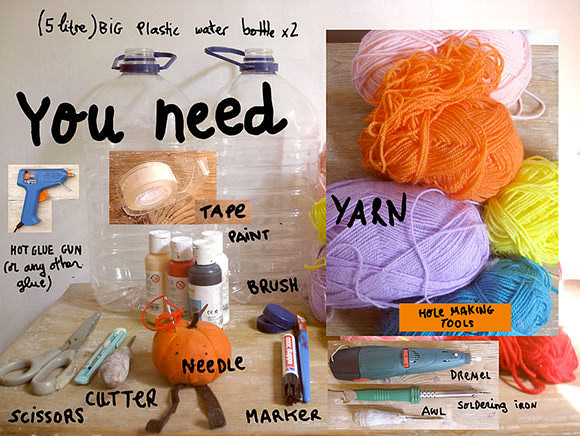
What You Need
- Two 5-liter plastic water bottles with caps
- Yarn scraps
- Marker
- Paint and brushes
- Felt
- Craft Knife
- Scissors
- Awl
- Glue
- Hot-glue gun (optional)
- Dremel, electric drill, or soldering iron (optional, for making larger holes)
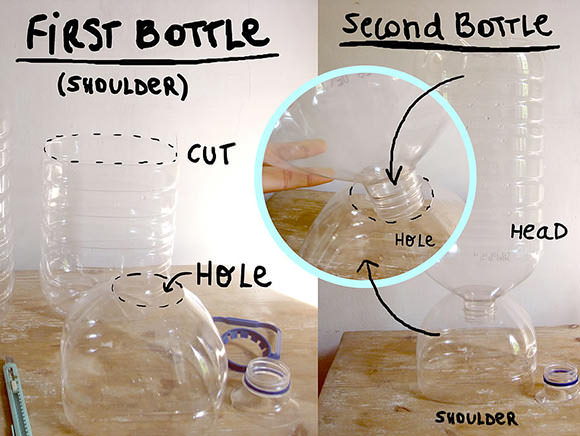
Step 1: Making The Shoulders
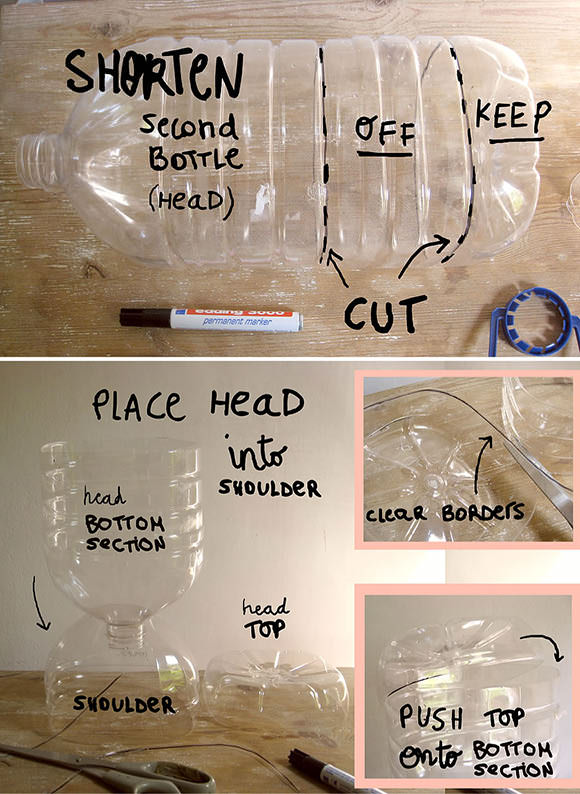
Using the grooves as a guide, cut the top section off one of the bottles. Cut off the neck of the bottle as well to create a large, 3.1-inch hole.
Step 2: Making The Head
Now it’s time to take the second bottle and make it shorter. You’ll need to have a top and bottom section, cutting off a section from the middle of the bottle and keeping a short top section. You can leave the bottle uncut, but it might be a bit too long.
Test the cover/top section of the head by pushing it onto the bottom section until it fits tightly.
Step 3: Paint & Create The Face
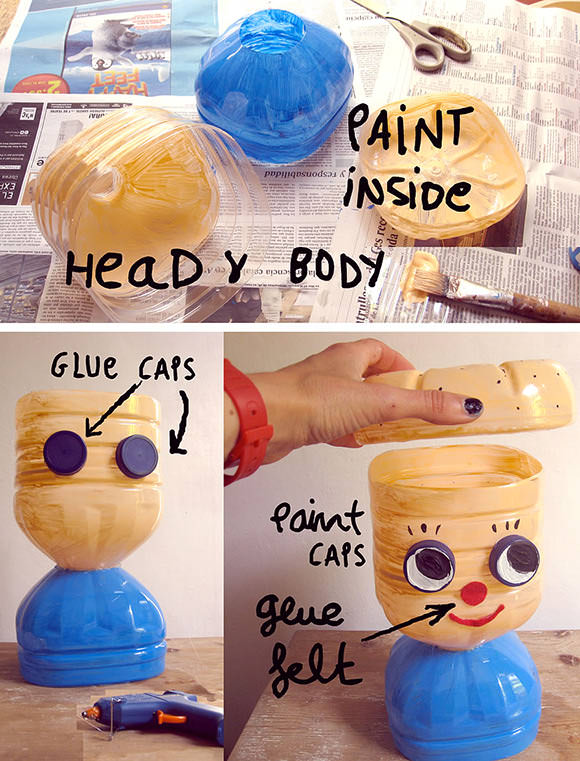
Paint the inside of the bottles, shoulders, and head. It doesn’t have to be perfect — brush strokes actually look really cool!
Place head onto the shoulders by fitting the bottom of the head bottle into the big hole in the shoulders. Glue them together.
To create the doll’s face, glue the two plastic bottle caps where eyes should be. Cut a 0.7-inch circle from red felt and another felted curve shape for the smiling mouth, then glue.
Step 4: Add Hair
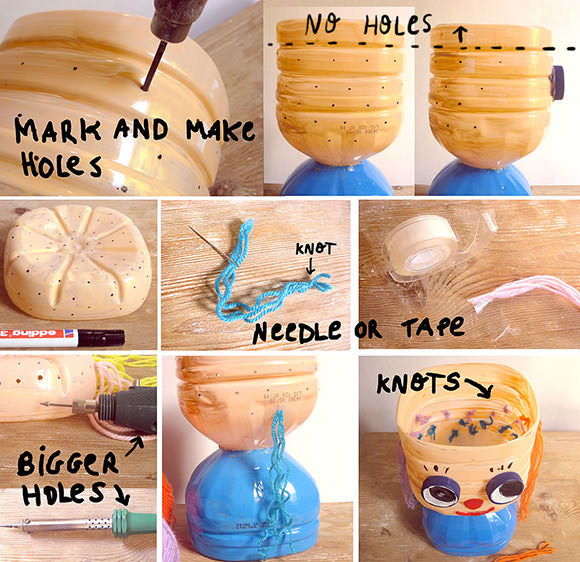
Mark and make holes around the head. Now comes the fun (and time-consuming) part of the project—filling in the yarn hair!
Cut three strands of yarn in the desired length. Thread a yarn needle, tie a knot at the end of the floss, and pass through the holes starting from the bottom of the head. I’ve filled each hole with 5 or 6 strands of wool.
Note: You can make things easier by using an electric drill or a small soldering iron to making holes larger and use tape for passing 5 strands through at a time.
Step 5: Pull Hair
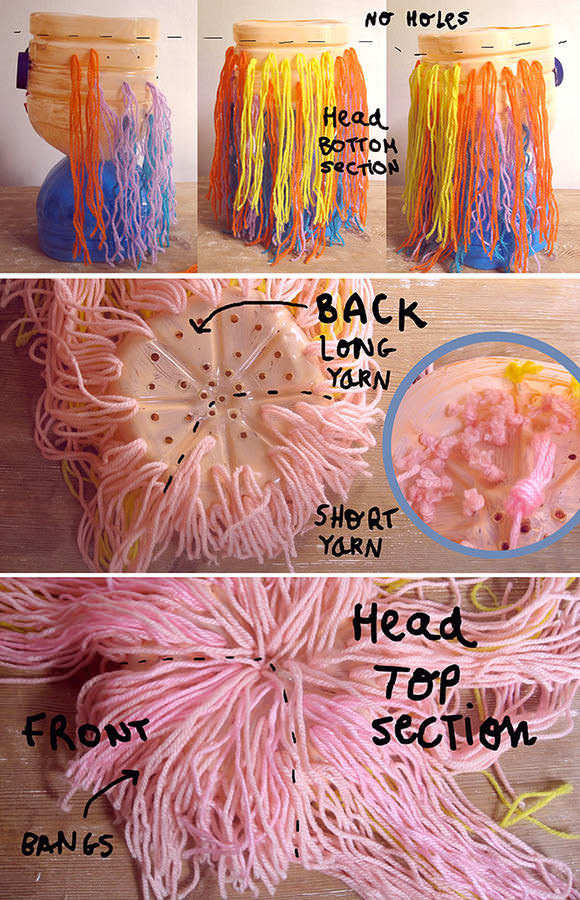
Once you have the bottom section of the head filled with yarn, start with the top section, working from the border holes to the center.
Note that I’ve marked the front side of the head for bangs/fringe using short yarn. The rest of the holes will be filled with long strands.
Step 6: Finishing Up
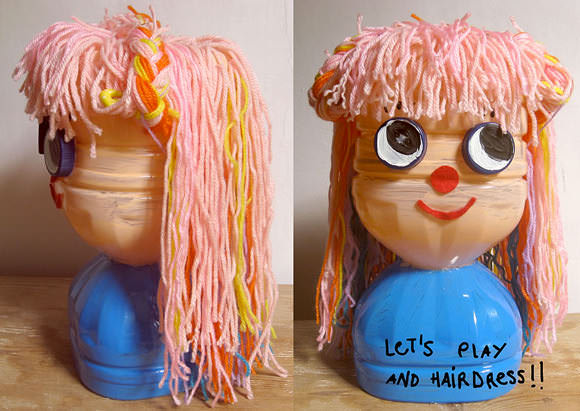
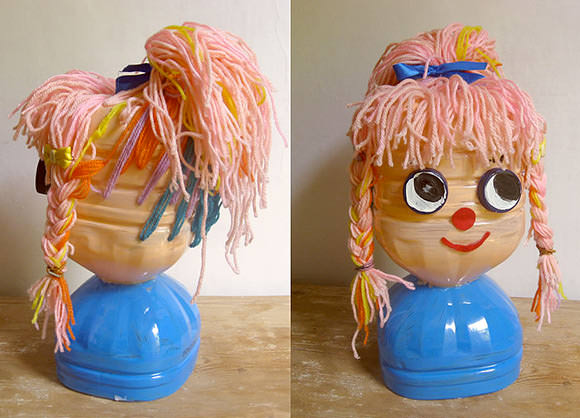
Once you finish with all of the holes, carefully cover the doll’s head with the hairy top section by pushing it onto the head section. That’s it! Now your hairy new friend is ready to play and be styled :)
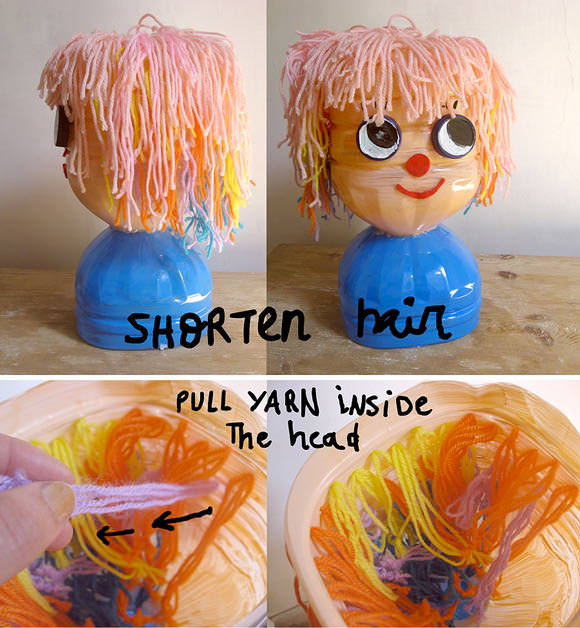
TIP: Making Hair Shorter
Take the lid off the head and pull in yarn knots from the inside of the doll’s head. Cover the top of the head again.
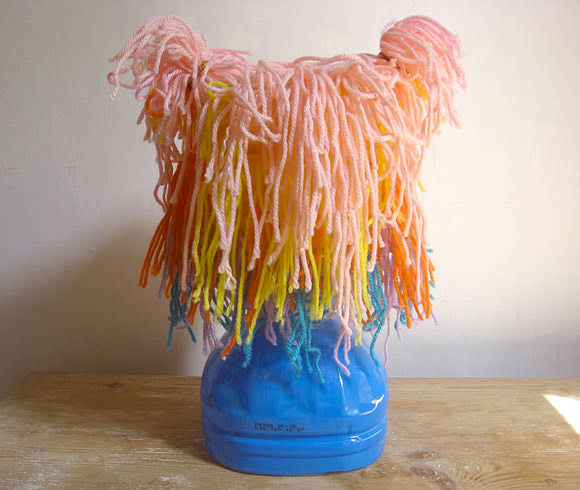
TIP: Growing Hair
From the outside of the head, pull the yarn out of the holes for different hair lengths.
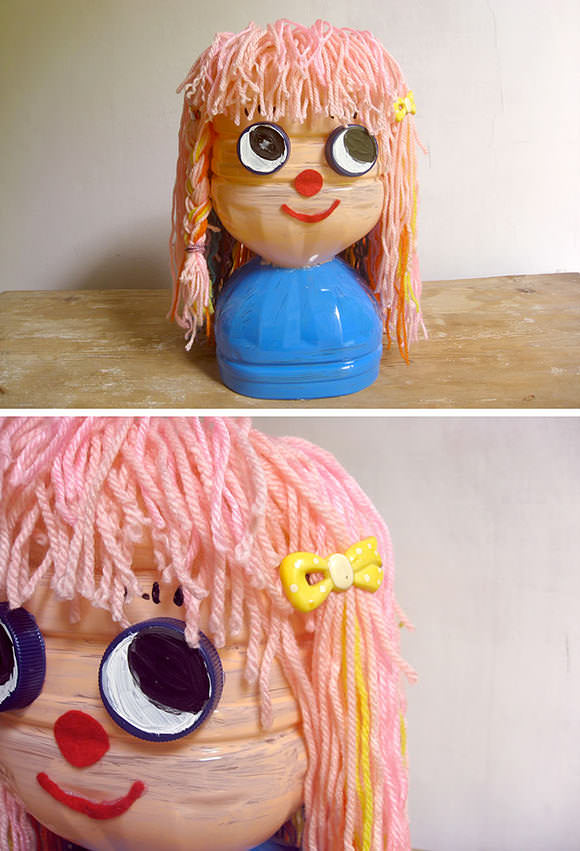
For added fun, use favorite clips and ribbons to create different hairstyles. Happy crafting!