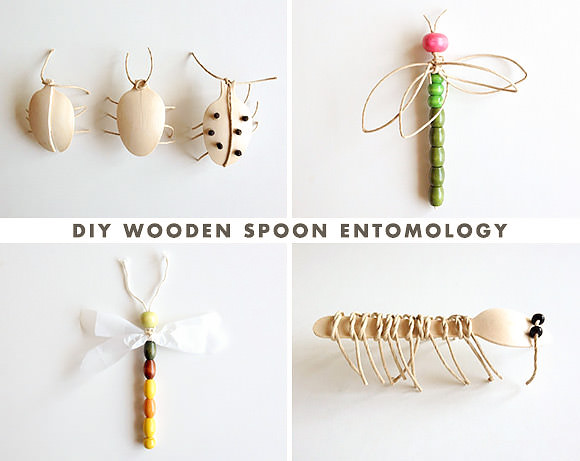
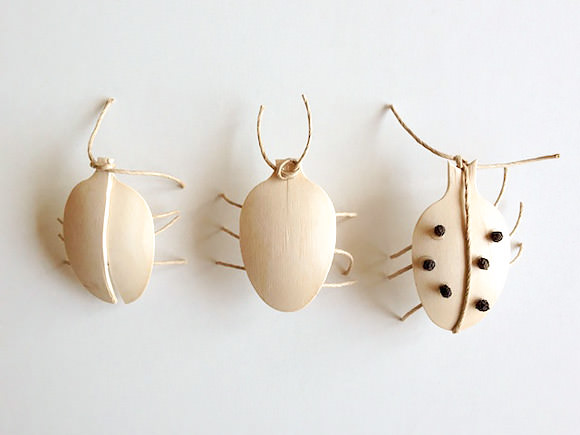
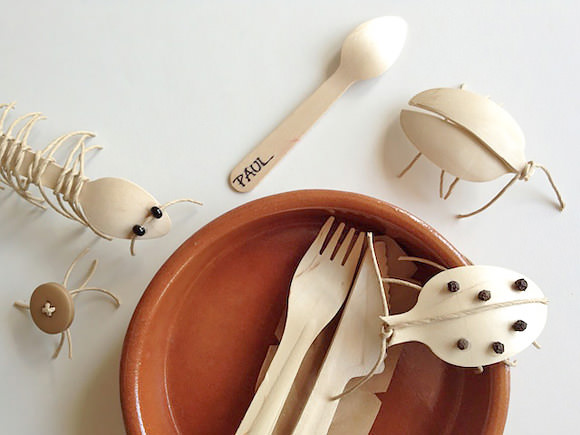
Everyone knows that summer time is picnic time. Why not turn those leftover spoons into a super fun collection of wooden bugs for the kids? Add some paper cord, attach a few peppercorns, and you’ll have millipedes, ladybirds, and dragonflies for your next picnic.
Grab your supplies and let’s dig in to a little wooden spoon entomology!
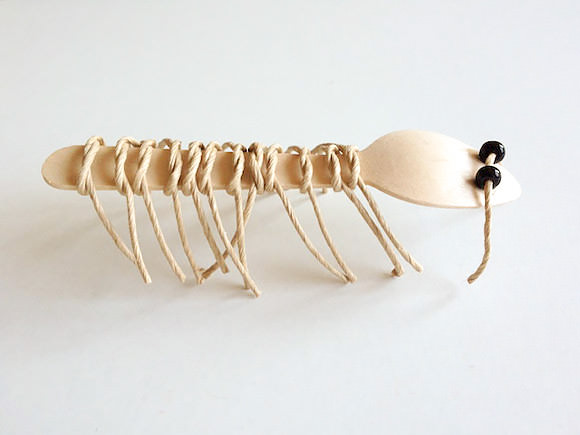
Millipede
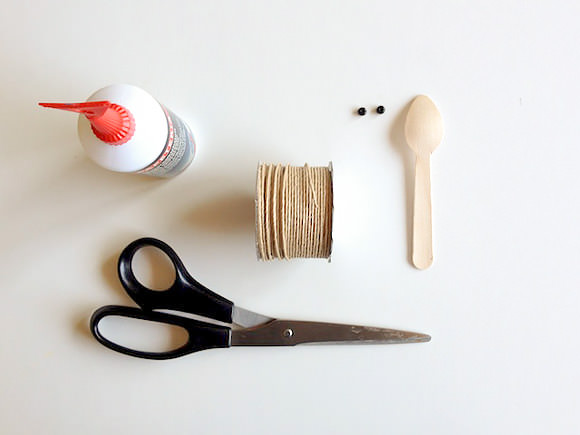
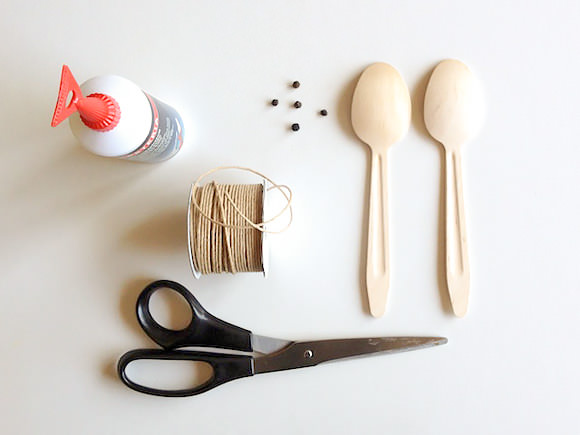
Materials (Millipede)
- Wooden spoon
- Paper cord
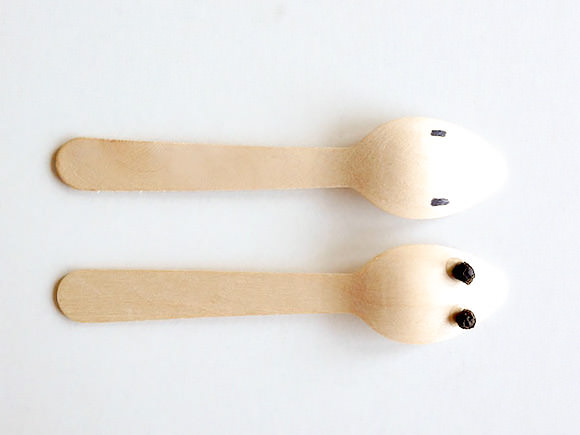
- Peppercorn for eyes (you could also use black beads or a black marker)
- Scissors
- Glue
Step 1 (Millipede)
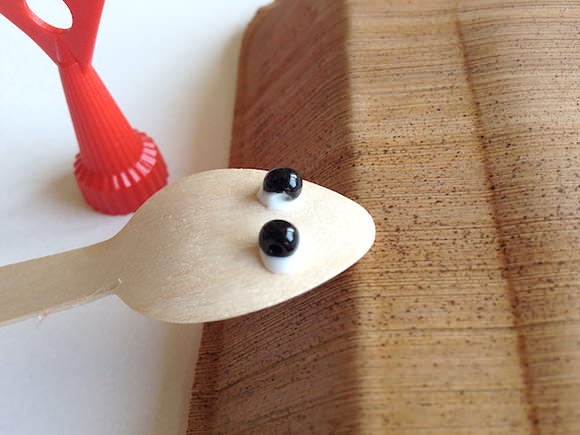
Lay the spoon on a plate. Apply two drops of glue to the spoon and attach the peppercorns or beads. Wait until it’s dry (roughly one hour). If you don’t have time to wait, you can use a faster glue (careful!) or a black marker.

Step 2 (Millipede)
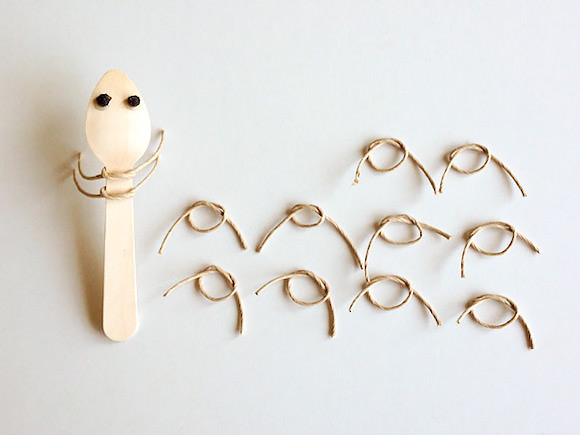
Cut twelve 4-inch strands of paper cord.
Step 3 (Millipede)
Tie the paper cord strands into simple knots and gently tighten them around the base of the spoon. If you are using beads for eyes, cut two additional strands of cord and pull through the spoon to attach the beads.
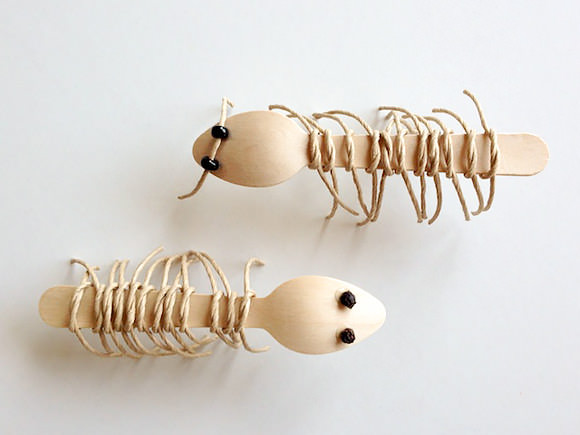
Your millipede is ready!
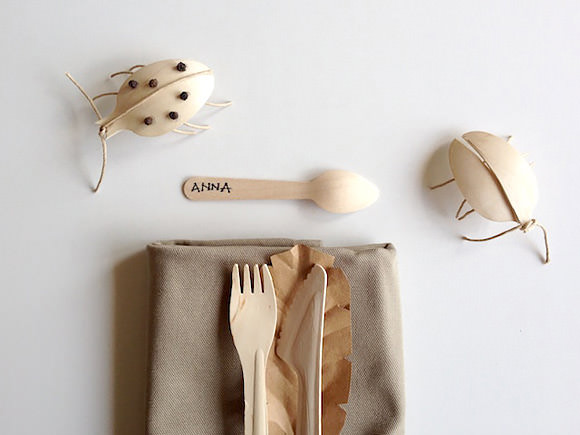
Ladybug
Materials (Ladybug)
- Wooden spoons
- Paper cord
- Peppercorns (for decoration, you could also use a black marker)
- Scissors
- Glue
Step 1 (Ladybug)
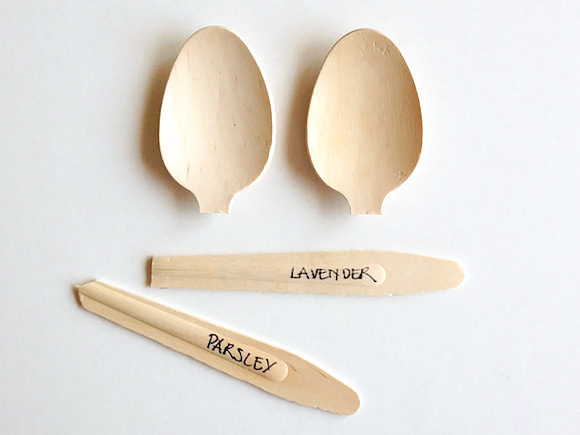
Cut the spoon in half, just under the rounded part. You can also use the sticks for your herb garden. Don’t be afraid to improvise with what you have on hand (one spoon broke in half and I simply glued it together).
Step 2 (Ladybug)
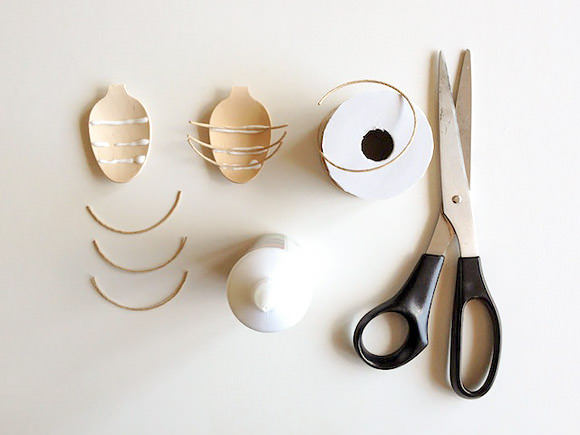
Cut three 3-inch strands of paper cord. Apply three lines of glue inside the spoon and attach the cord.
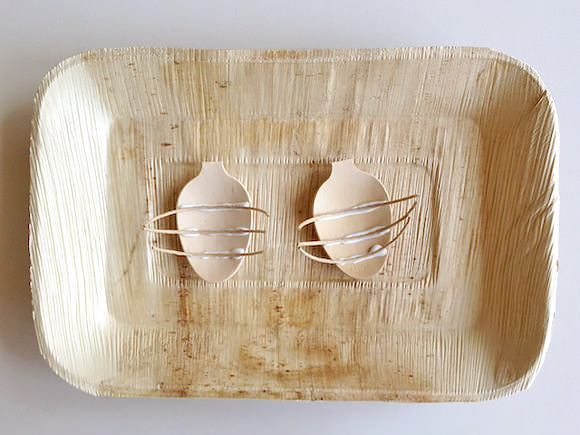
Step 3 (Ladybug)
Place the spoons on a tray and set them on a shelf to let the glue dry (roughly one hour). If you don’t have time to wait, you can use a faster glue (carefully around little fingers!).

Step 4 (Ladybug)
Flip the spoon over and add several glue points for the peppercorns. After attaching the peppercorns, cut another 3-inch strand of cord (or longer, if desired) tie around the spoon, make a knot, and attach with glue. Let dry.
Note: You may have to cut the strings to ensure all feet are the same length.
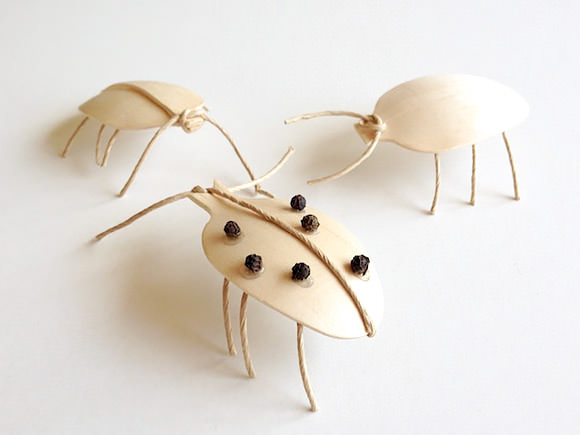
Your ladybird is ready!
Damselfly
This little guy is a perfect project for younger children.

Materials (Damselfly)
- 3 Wooden craft sticks (4-inch)
- Wooden bead (pink)
- Kitchen string
- Scissors
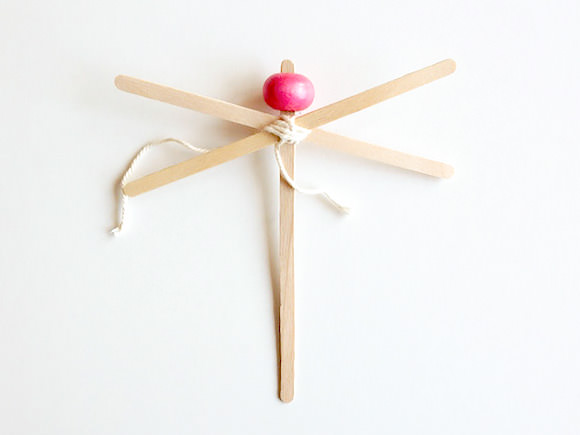
Steps (Damselfly)
- Cut some string. Lay two wooden craft sticks crosswise on a third wooden craft stick and attach with string 1-inch from the top. Pull on the wooden bead.
- Your damselfly is ready!
Dragonfly #1
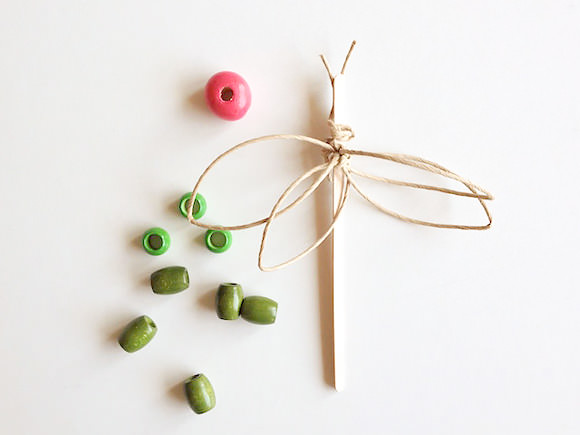
Materials (Dragonfly #1)
- Wooden craft stick (4-inch)
- Wooden beads (1 large pink bead, 8 small green beads)
- Paper cord
- Scissors
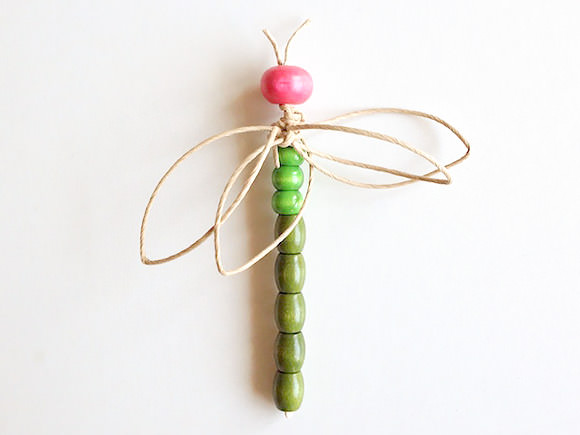
Steps (Dragonfly #1)
- Cut a 24-inch strand of string. Make knots with the string to get four wings. Tie the string to the stick with a knot, 1-inch from the top. Pull on the beads.
- Your dragonfly is ready!
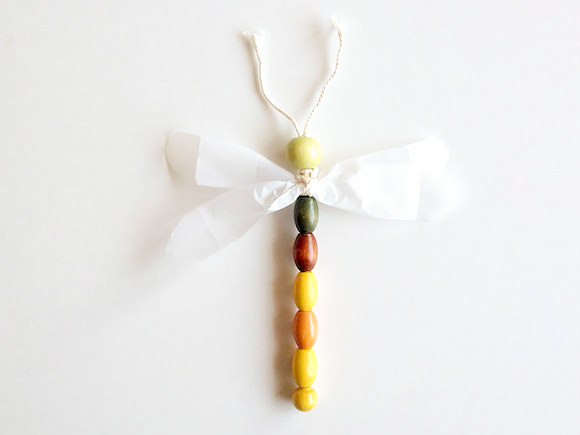
Dragonfly #2
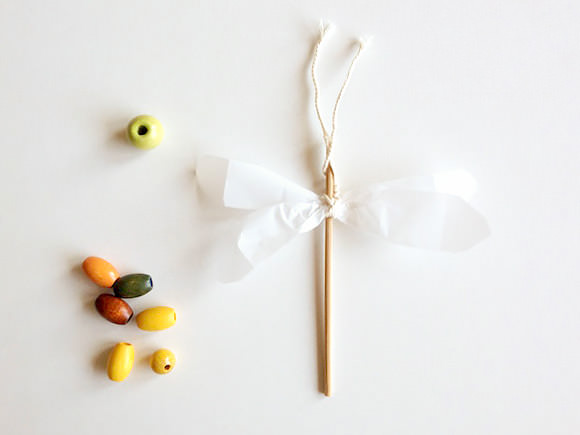
Materials (Dragonfly #2)
- Wooden craft stick (4-inch)
- Wooden beads (1 large green bead, 6 small yellow, green, and brown beads)
- Kitchen string
- Baking paper
- Scissors
Steps (Dragonfly #2)
- Cut one 7-inch strand of string. Cut two long, slender wings from the baking paper. Tie string to attach the wings to the stick, 1-inch from the top. Pull on the large bead over the string ends.
- Pull on the smaller beads.
- Your dragonfly is ready!
Note: If the beads are too loose, add a little glue.
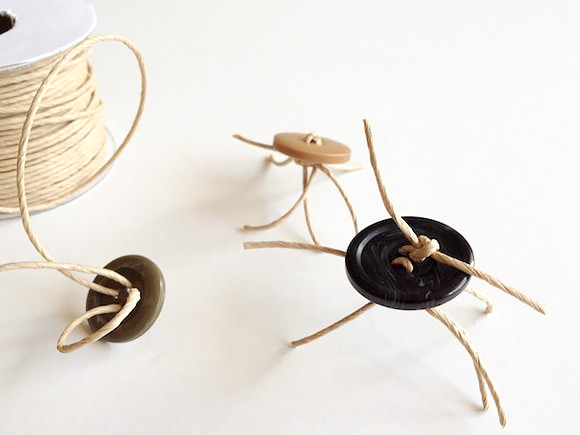
Extra Fun: Funny Bugs
Make a collection of funny bugs using buttons and paper cord. Get creative and experiment!
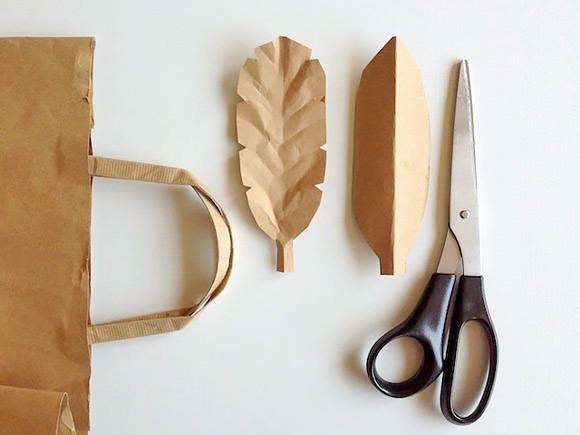
Extra Fun: Bug Leaves
Make leaves for your bugs using a brown paper bag.
Decorate your summer picnic table or blanket with your new bugs!