![DIY Origami Halloween Lights](https://www.handmadecharlotte.com/wp-content/uploads/2014/10/0_origami-pumpkin_tree-2.jpg)
![DIY Origami Halloween Lights](https://www.handmadecharlotte.com/wp-content/uploads/2014/10/0_origami-pumpkin_wall-1.jpg)
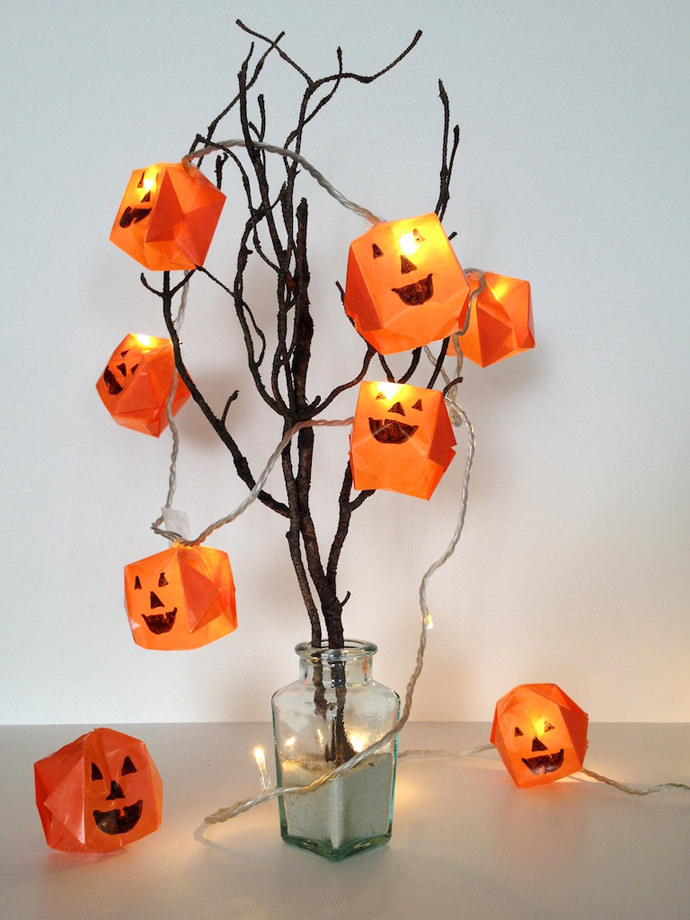
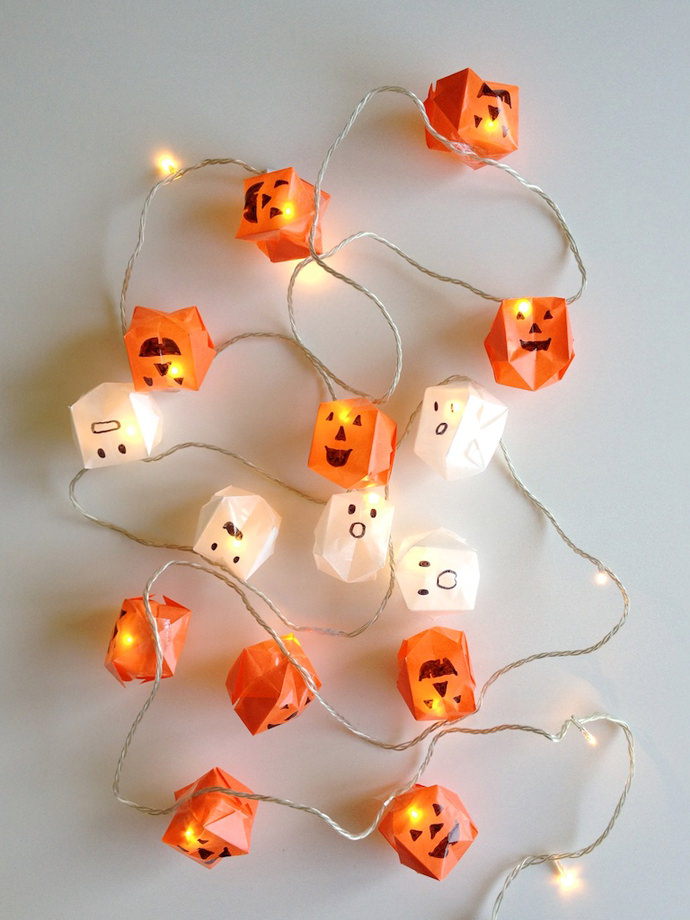
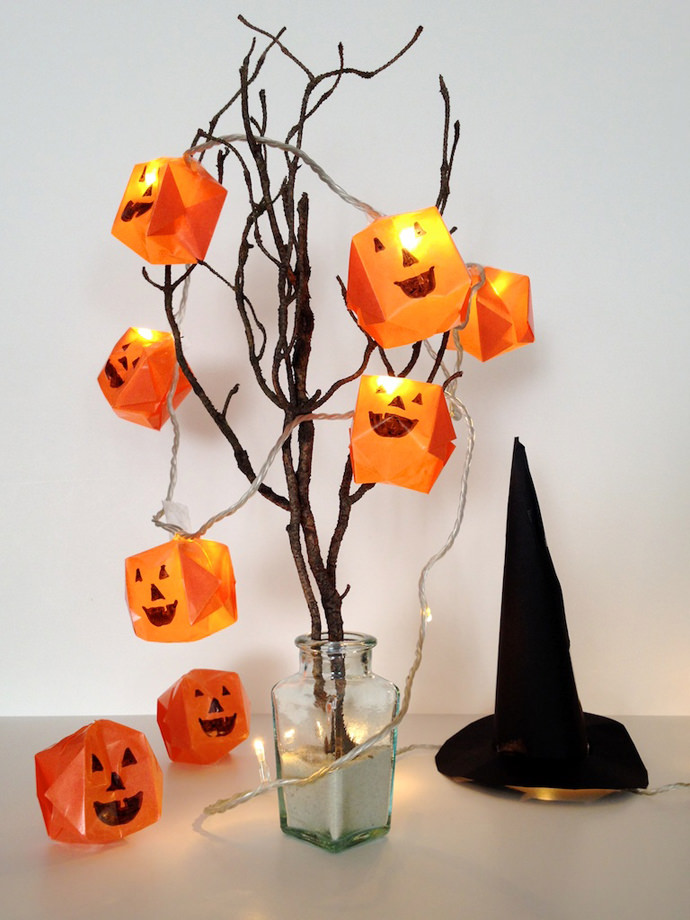
Fold a simple origami balloon, draw a scary pumpkin face on it, and voila! You have a perfectly spooky string of lights to decorate your house for Halloween.
Let’s get started…
What You Need
![DIY Origami Halloween Lights](https://www.handmadecharlotte.com/wp-content/uploads/2014/10/1_origami-pumpkin_what-you-need.jpg)
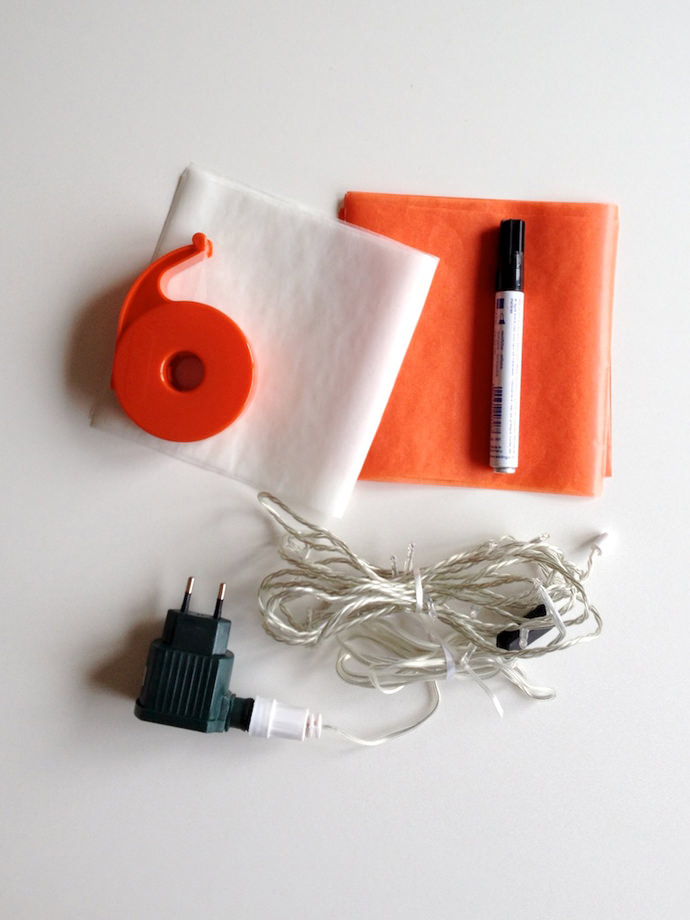
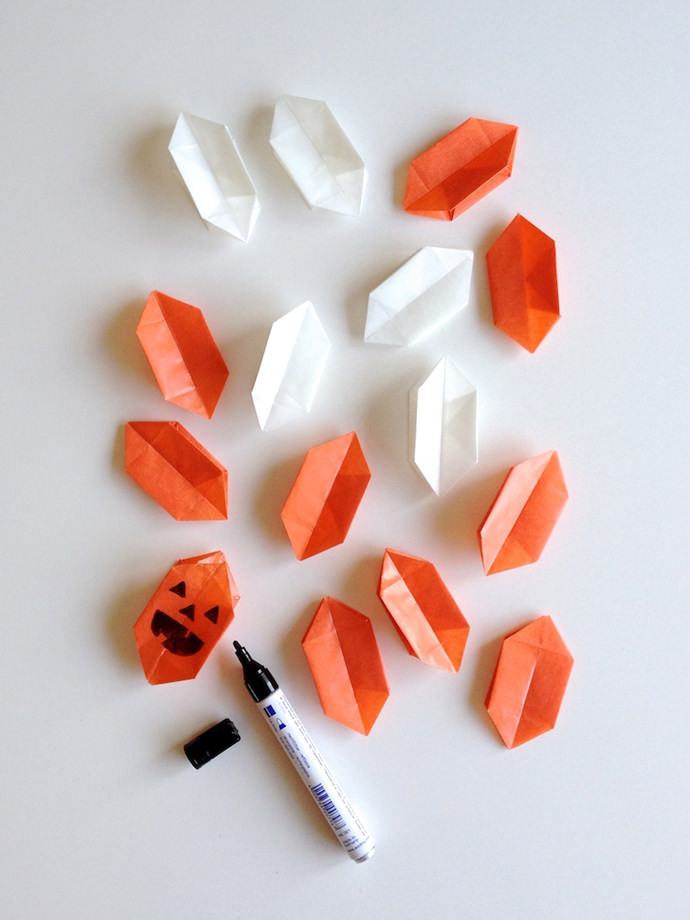
- Wax Paper, cut in 6-in. by 6-in. pieces (10 orange and 5 white)
- LED christmas lights (20 lights)
- Tape
- Waterproof marker, black
How-To
![DIY Origami Halloween Lights](https://www.handmadecharlotte.com/wp-content/uploads/2014/10/2_origami-pumpkin_fold-1.jpg)
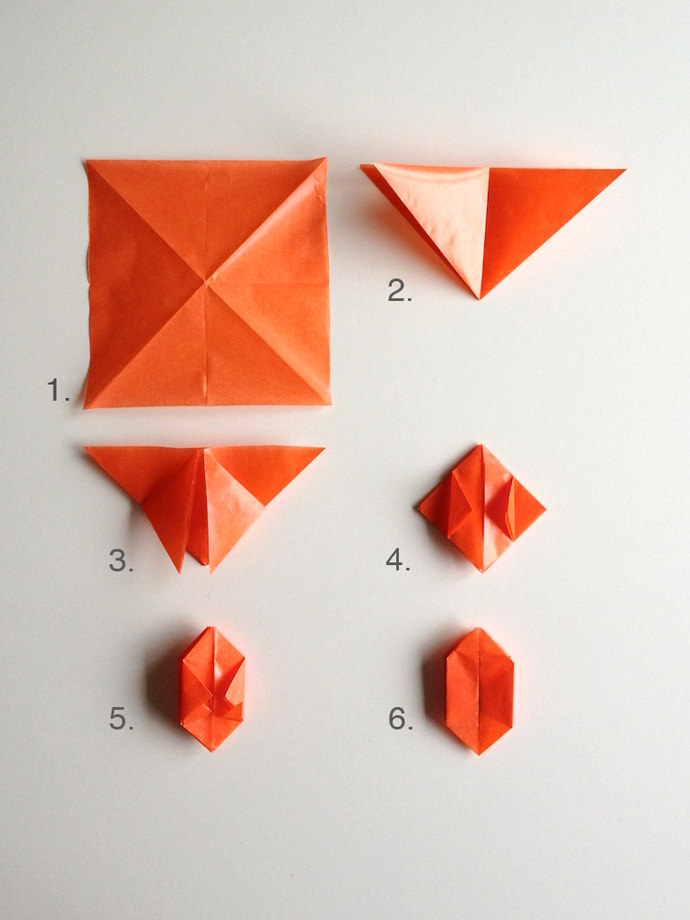
How to fold the origami balloon using 6-in. by 6-in. paper:
- Fold the paper in half twice and crease. Unfold. Turn it and fold twice diagonally.
- Make a triangle (boat base).
- Fold the 4 flaps down right to the middle.
- Fold the 4 side corners to the middle.
- Fold the 4 flaps into the “pockets”.
- Turn it once. It’s ready for the face!
![DIY Origami Halloween Lights](https://www.handmadecharlotte.com/wp-content/uploads/2014/10/2_origami-pumpkin_step-2-draw-1.jpg)
![DIY Origami Halloween Lights](https://www.handmadecharlotte.com/wp-content/uploads/2014/10/2_origami-pumpkin_step-2-draw-2.jpg)
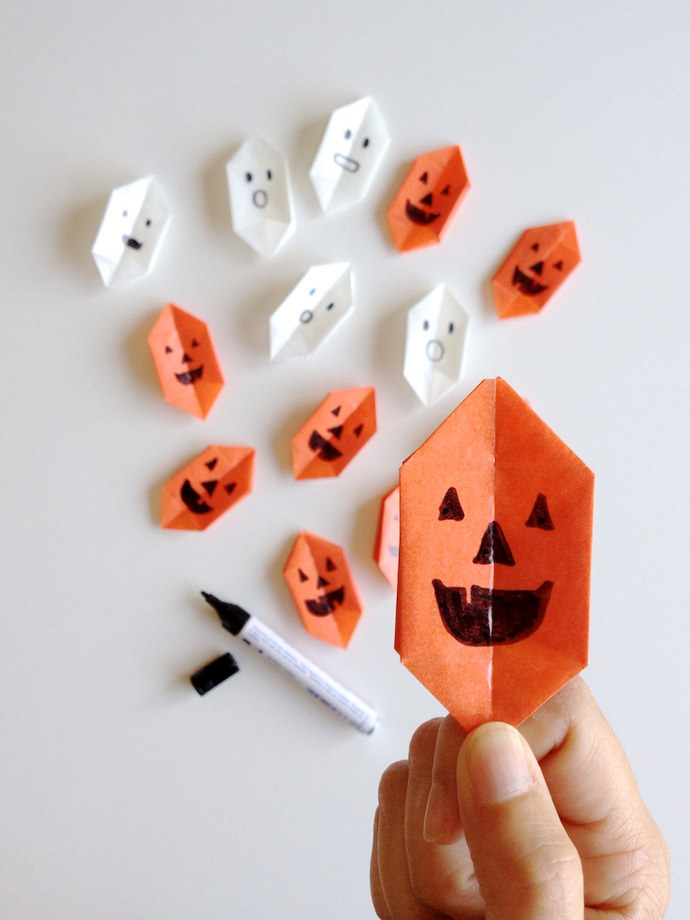
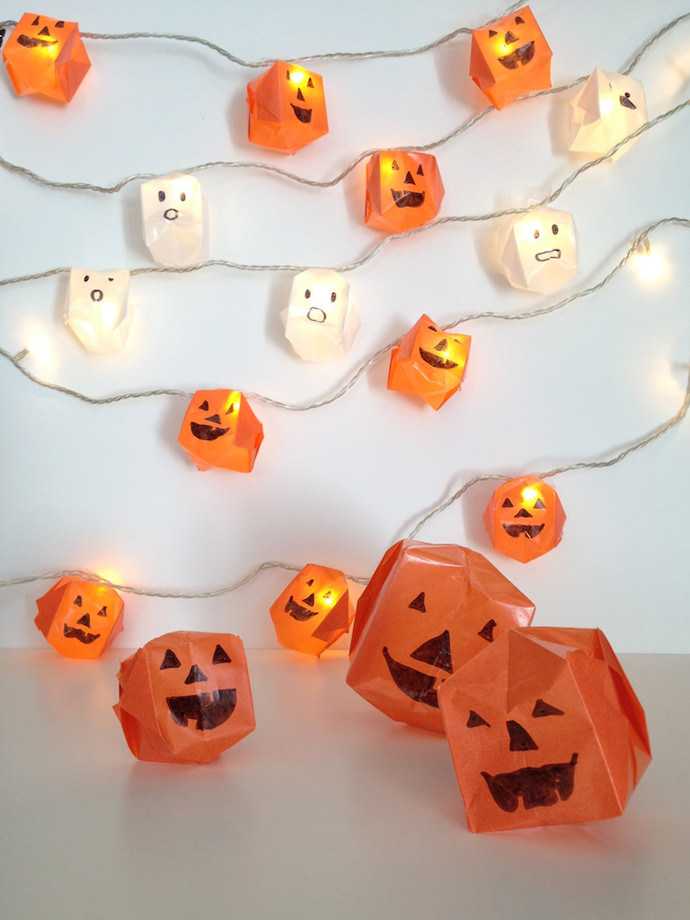
Be sure that the opening is on the top. Draw some scary pumpkin faces on the orange papers. Vary the triangles and how many teeth they have. The ghost faces are also a bit different. Carefully blow them up.
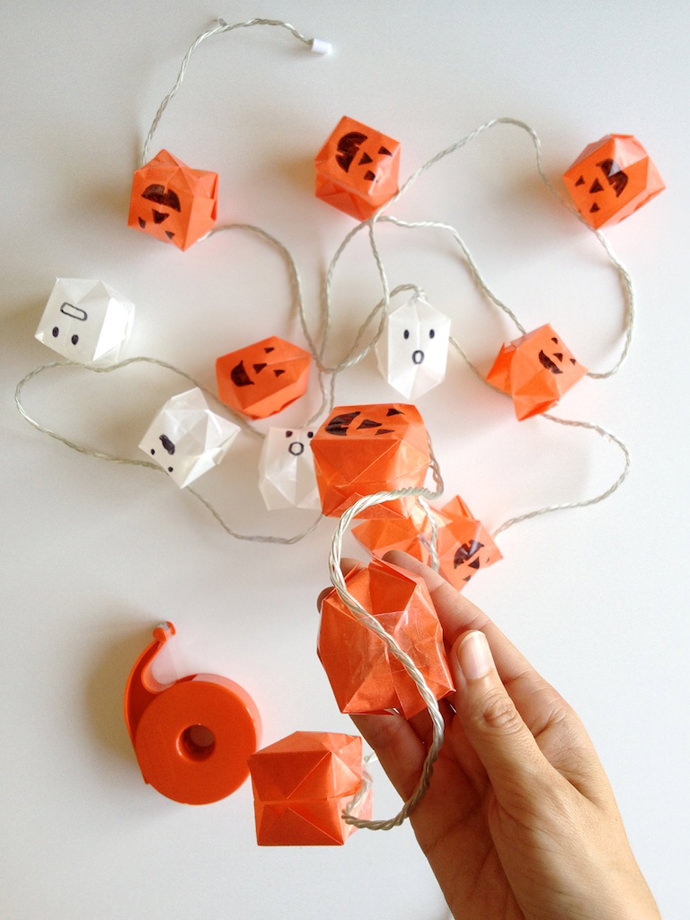
Add the balloons to the string of lights and attach with tape.
![DIY Origami Halloween Lights](https://www.handmadecharlotte.com/wp-content/uploads/2014/10/4_origami-pumpkin_test.jpg)
![DIY Origami Halloween Lights](https://www.handmadecharlotte.com/wp-content/uploads/2014/10/4_origami-pumpkin_tree-1.jpg)
Happy crafting ;-)