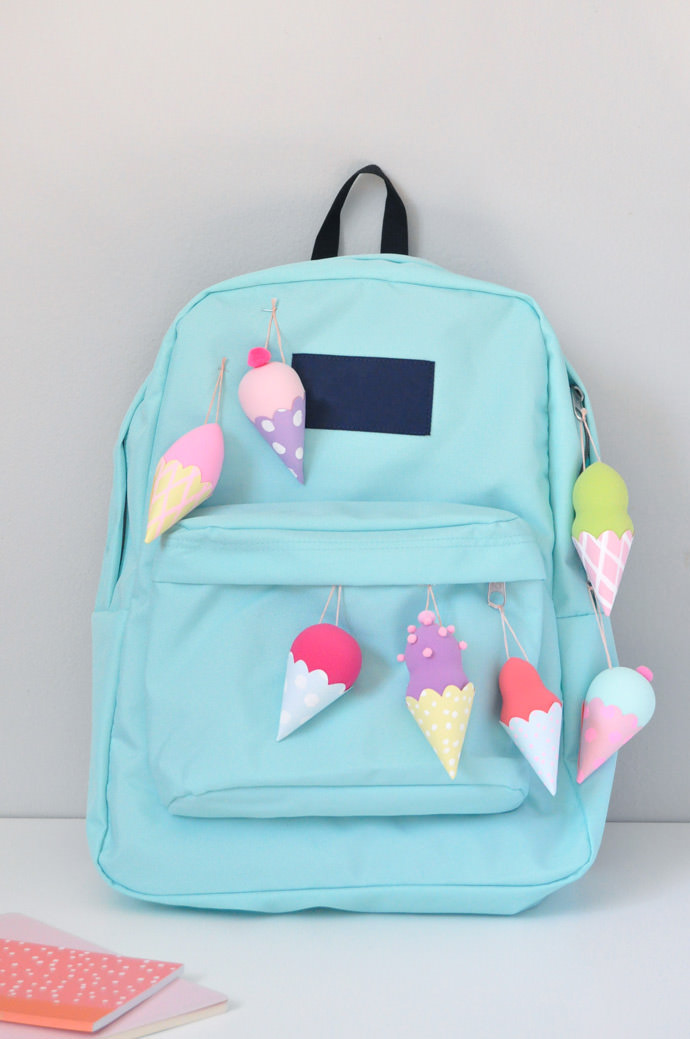
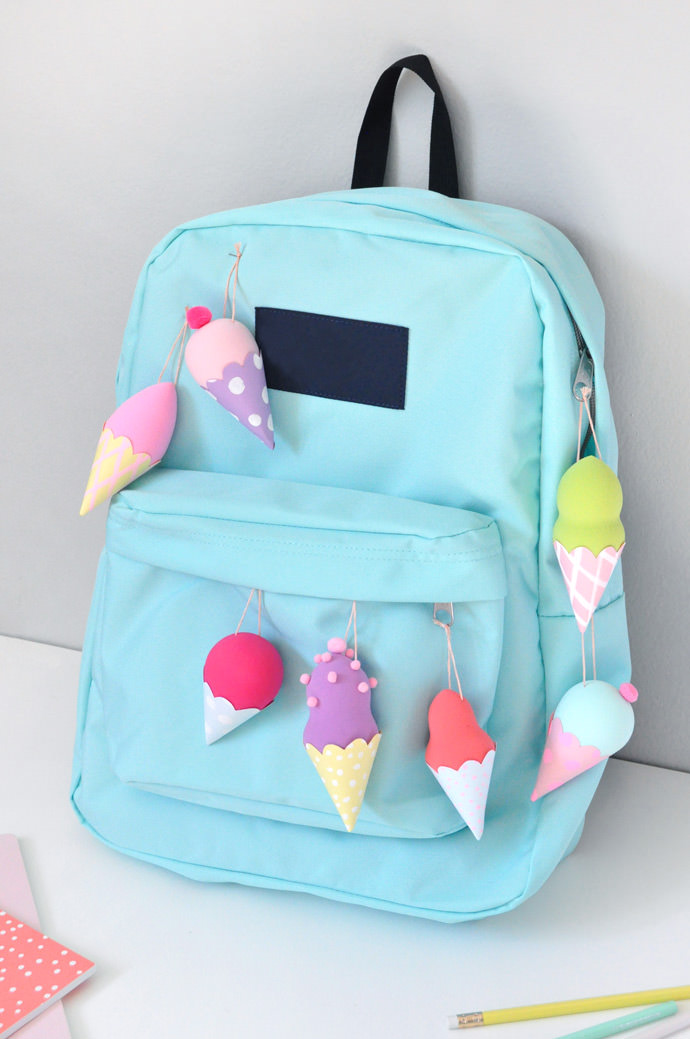
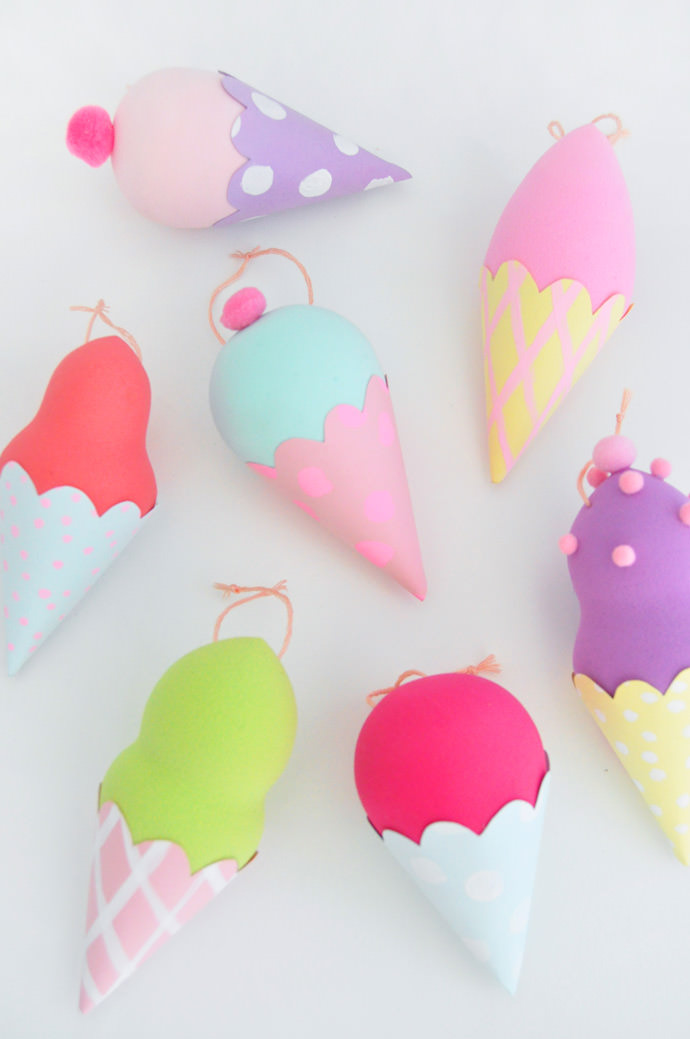
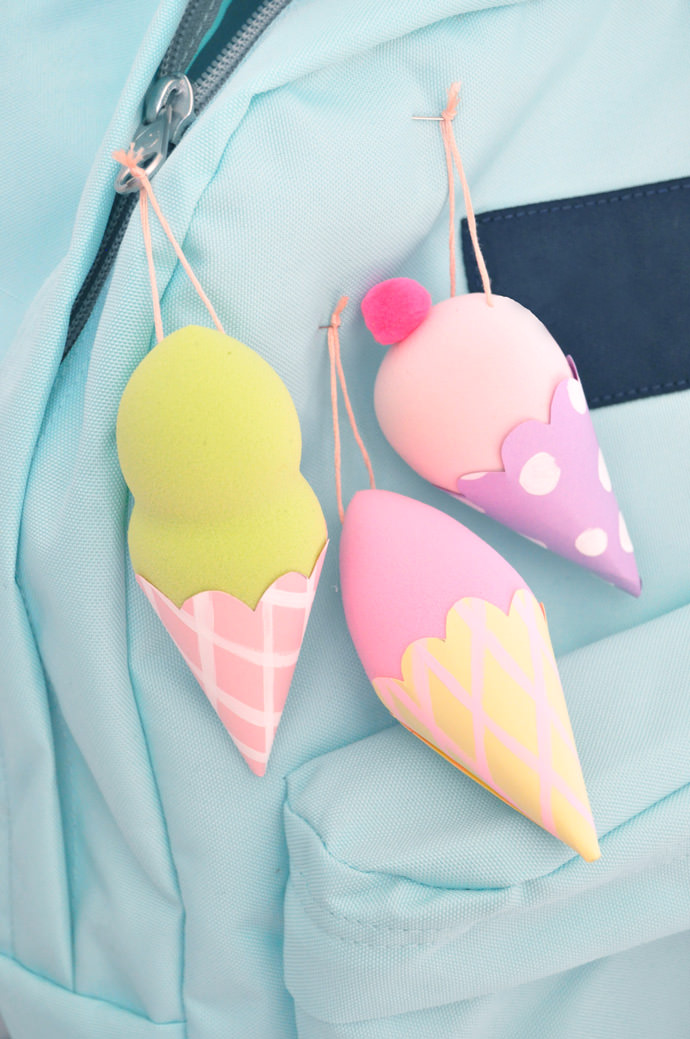
When I stumbled upon these colored make up sponges, I knew they’d be the PERFECT mini ice cream cones. I love how they come in so many different round blobby shapes and in the best sorbet shades for summer. Collecting enamel pins and flair has become such a big trend lately, so why not make your own ice cream backpack charms too
I bought all these foam sponges from Forever 21, but there are tons available online as well. These might be my new favorite craft supply – look out for another DIY project soon using different shaped foam sponges. The possibilities for these guys are endless
What You Need
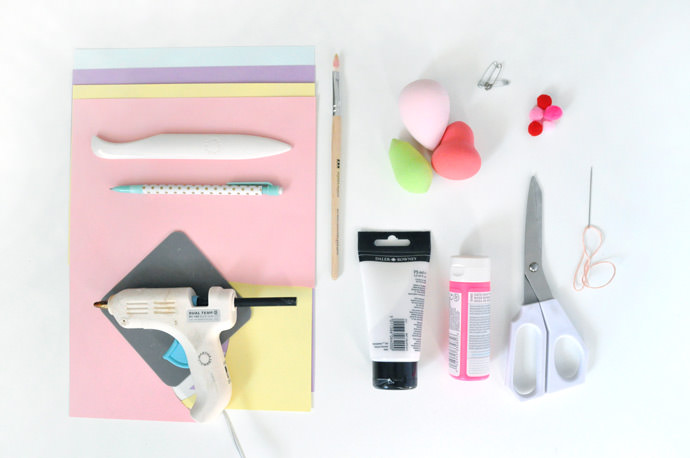
- Colored card stock
- Bone folder
- Pencil
- Hot glue gun
- Paintbrush
- Paint
- Colored foam make-up sponges
- Safety pins
- Embroidery needle
- Embroidery thread
- Scissors
- Pom poms
How-To
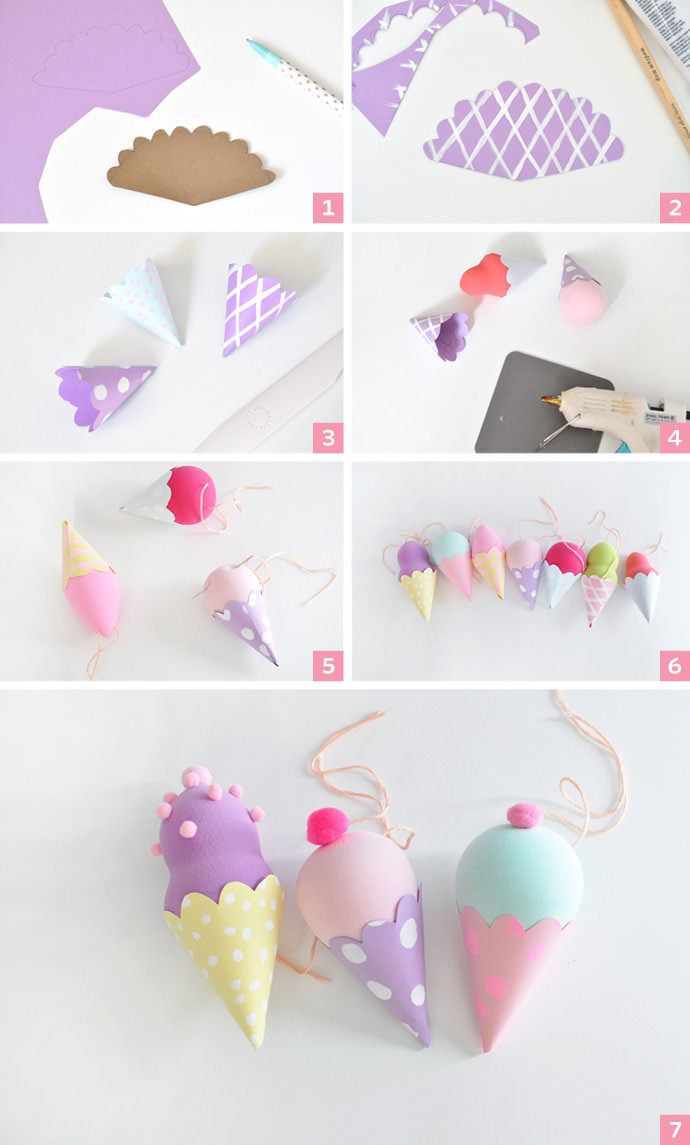
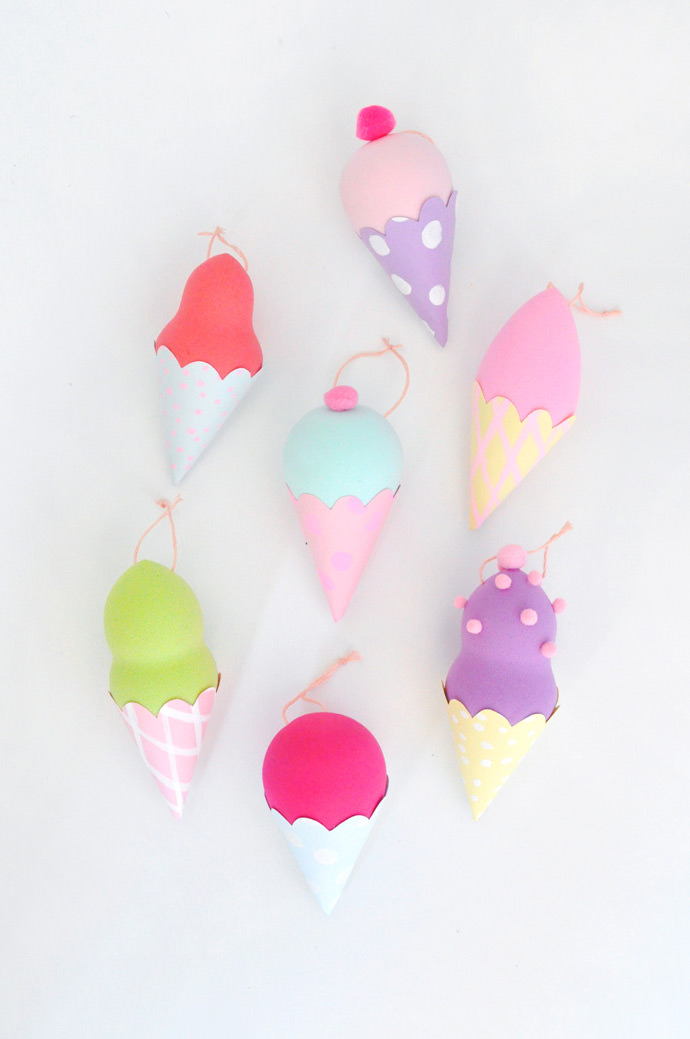
- On a piece of cardstock, draw a wedge (almost half of a circle) that can be rolled into a cone. Make sure that your foam sponge can fit into the cone template you’ve drawn. Include a scalloped edge as shown if you like, and trace the template onto more card stock.
- Paint a crosshatch pattern onto the wedge to imitate an ice cream cone. I also did some in polka dots. Let dry and cut out.
- Slide the bone folder along the paper while pulling it to gently curve the cone. Then roll into a cone shape and hot glue in place. If your foam sponges vary in size, it is a good idea to glue the cone the exact size to fit the foam you’ve matched to it.
- Put a couple dabs of hot glue into the inside of the cone and place the foam inside to attach.
- Put the embroidery thread into the needle and pierce the foam as shown. Pull the needle all the way through and leave the thread loose for now.
- Repeat for all your ice cream cones!
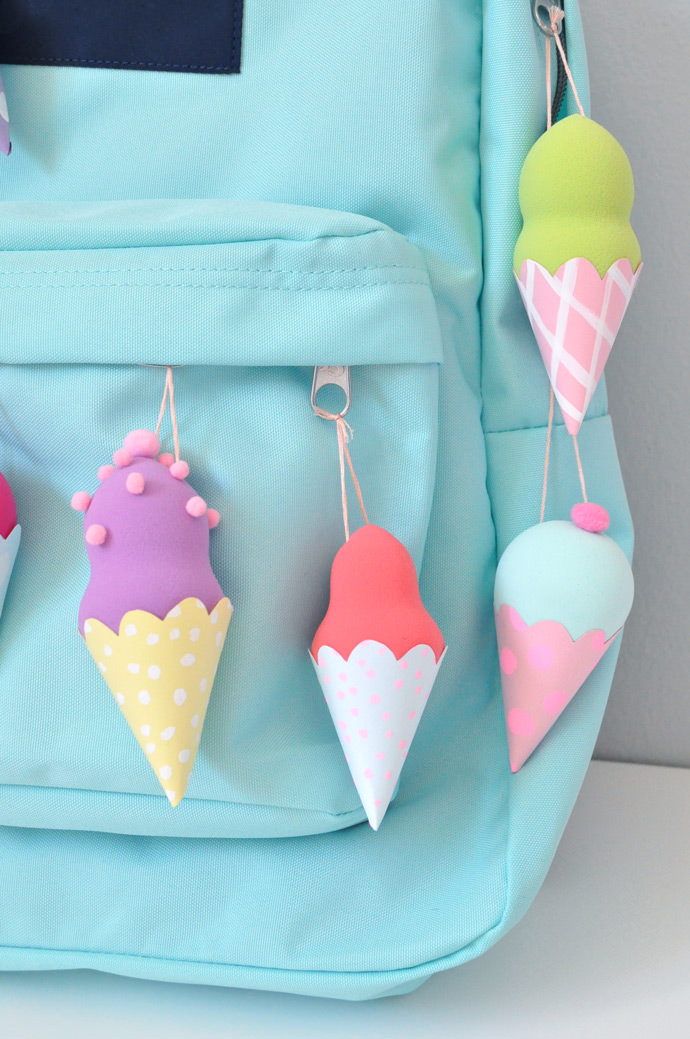
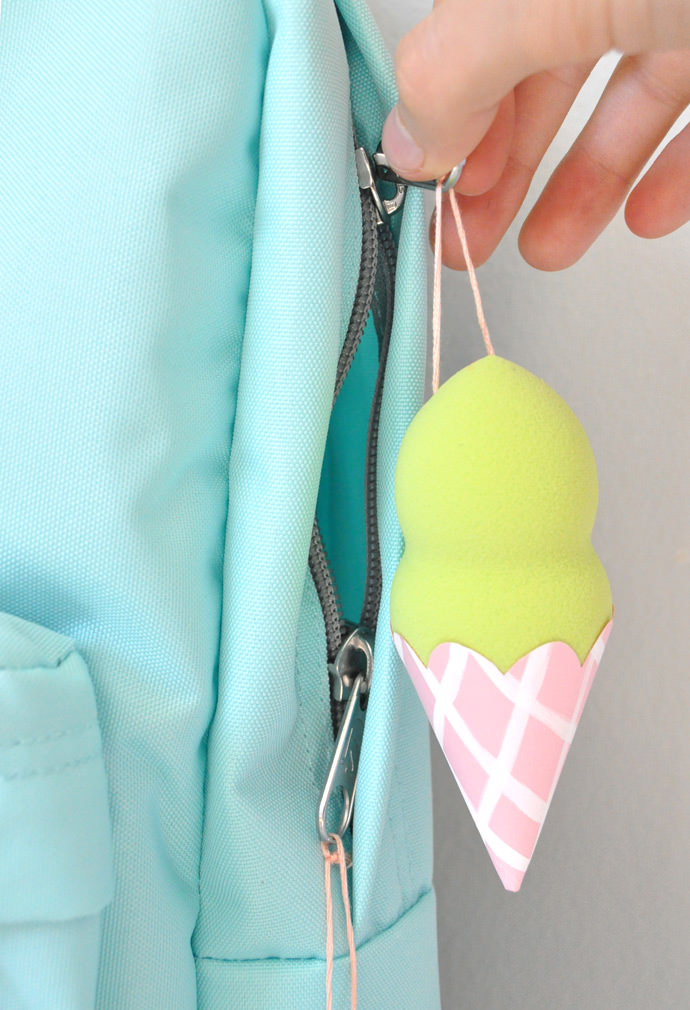
- Hot glue mini pom poms on the ice cream for decoration. Tie the embroidery thread onto the zipper pulls of your backpack, or just tie into a simple loop and attach onto the backpack with a safety pin.
Happy crafting!