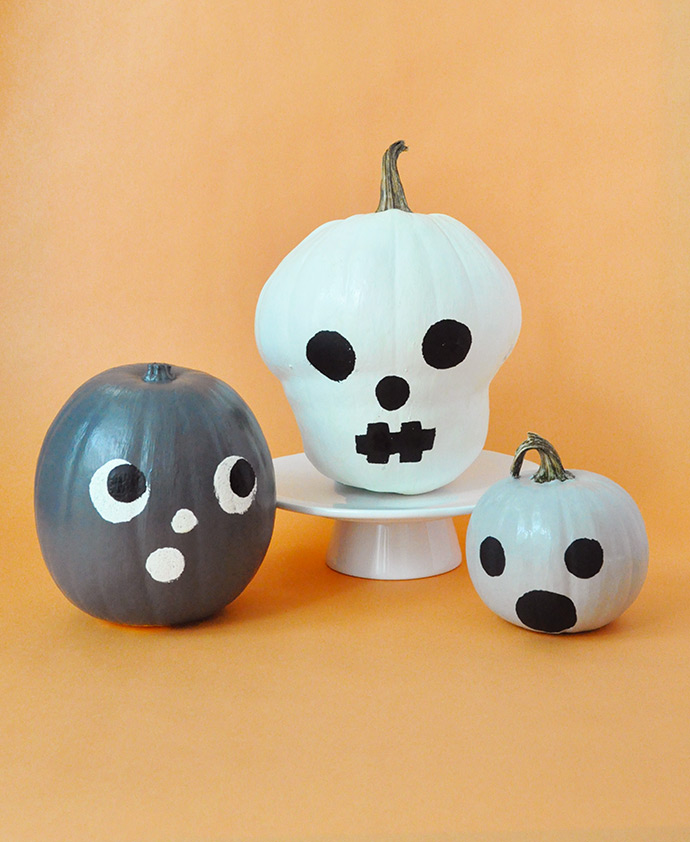
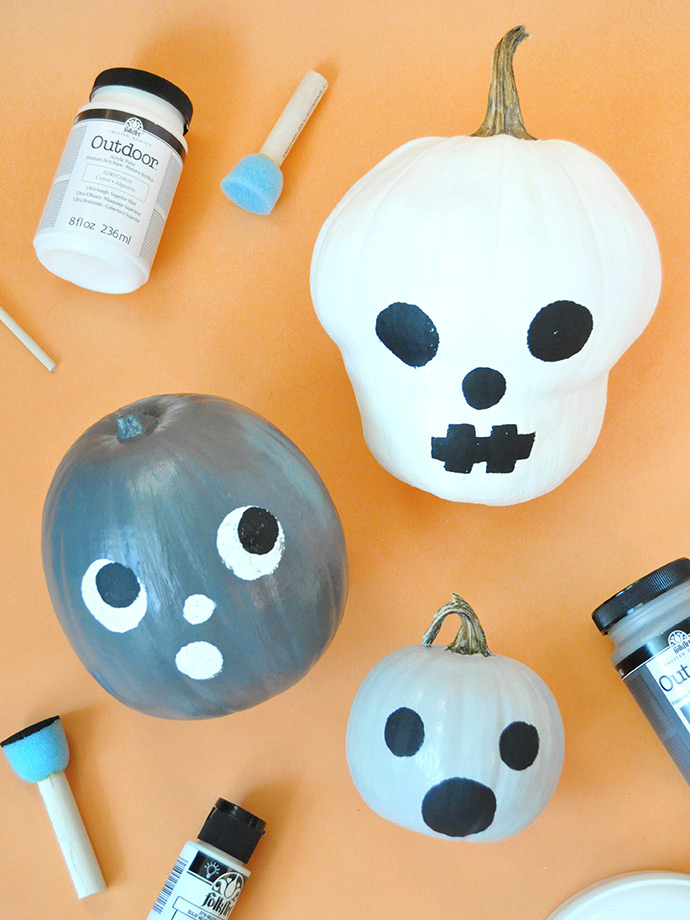
BOO! Are you afraid of the dark? These painted glow-in-the-dark pumpkins are here to help lead the way! In the daytime they look just like adorably spooky painted pumpkins, but once night falls their glow-in-the-dark faces appear! Painting pumpkins doesn’t have to be hard – we used circular foam pouncers as stamps to make the process quick and easy.
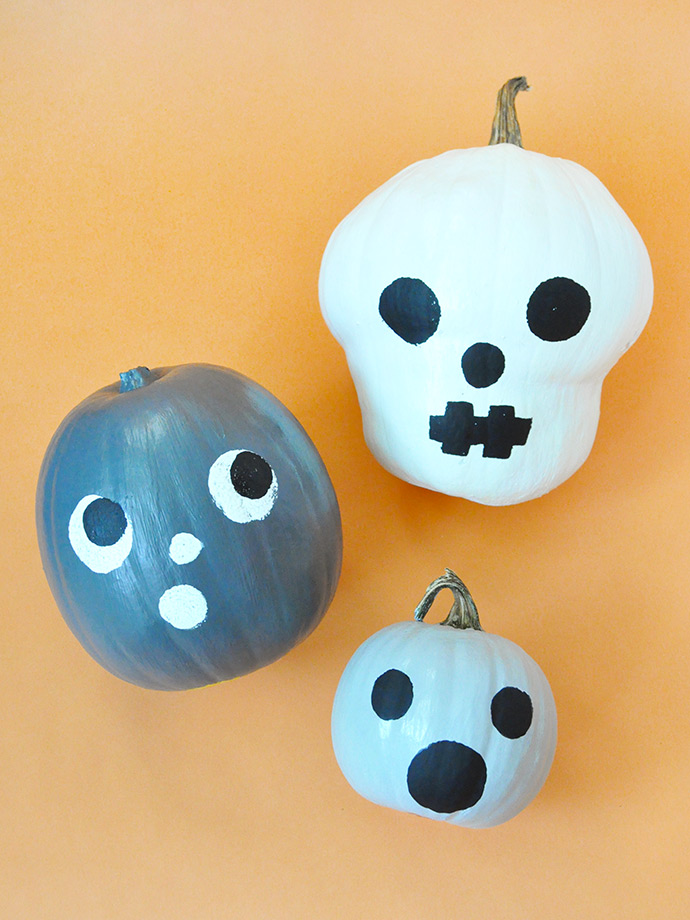
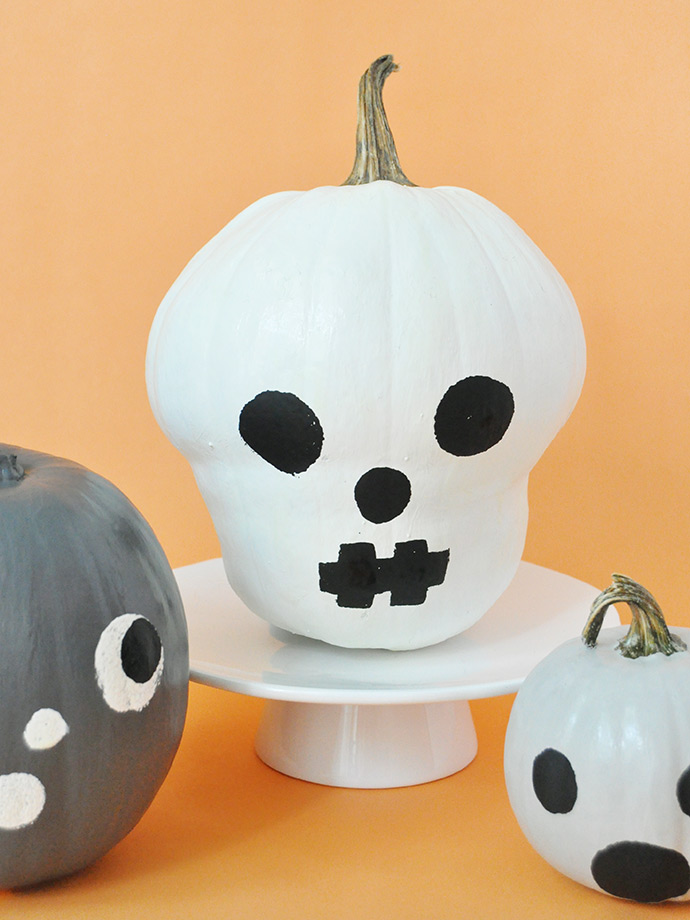
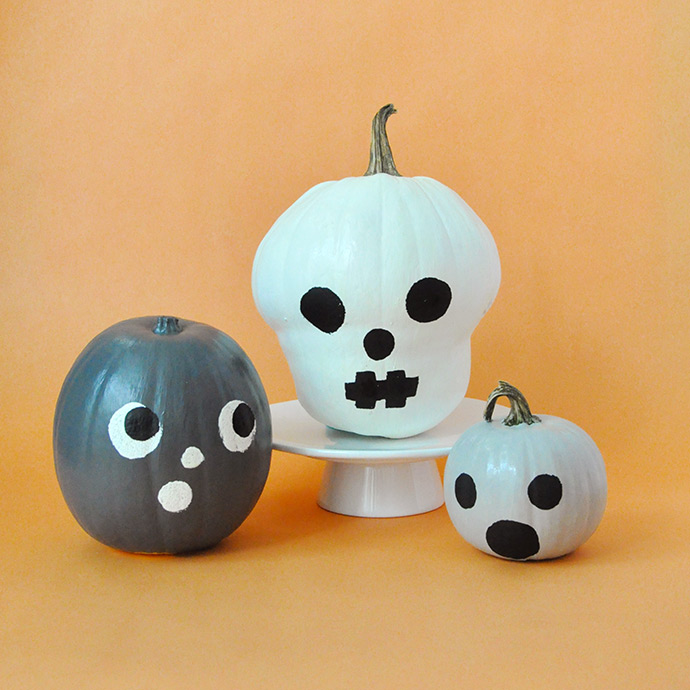
When painting pumpkins that we’re going to leave out on the porch or lawn, we always use Folk Art Outdoor Acrylic Paint. It comes in a ton of colors and it’s formulated to withstand the elements so that your painted pumpkins last until Halloween. When we saw this funny-shaped pumpkin at the pumpkin patch, we grabbed it right up – it looks exactly like the skull! Using the skull as the starting point, we added in these baby pumpkins with surprised faces – this trio of painted pumpkins came together in no time! Keep reading for full instructions.
what you need:
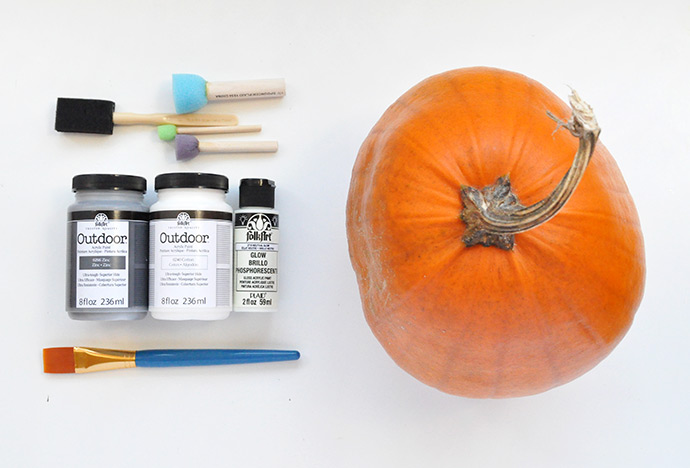
- Pumpkins
- Folk Art Outdoor Acrylic Paint
- Folk Art Glow Acrylic Paint
- Paintbrush
- Various sponge brushes and pouncers
how-to:
Step 1
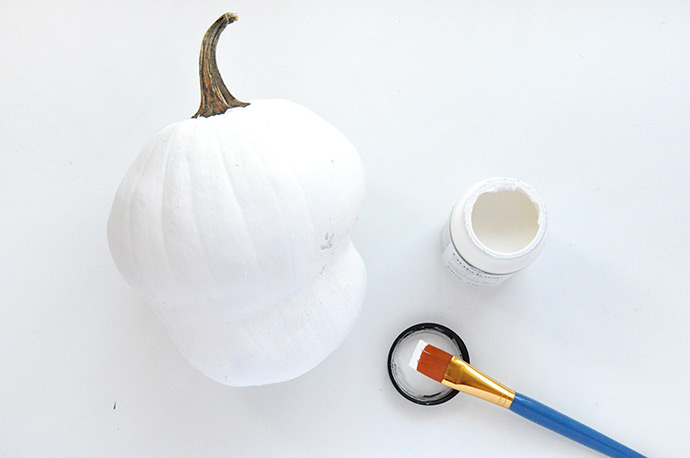
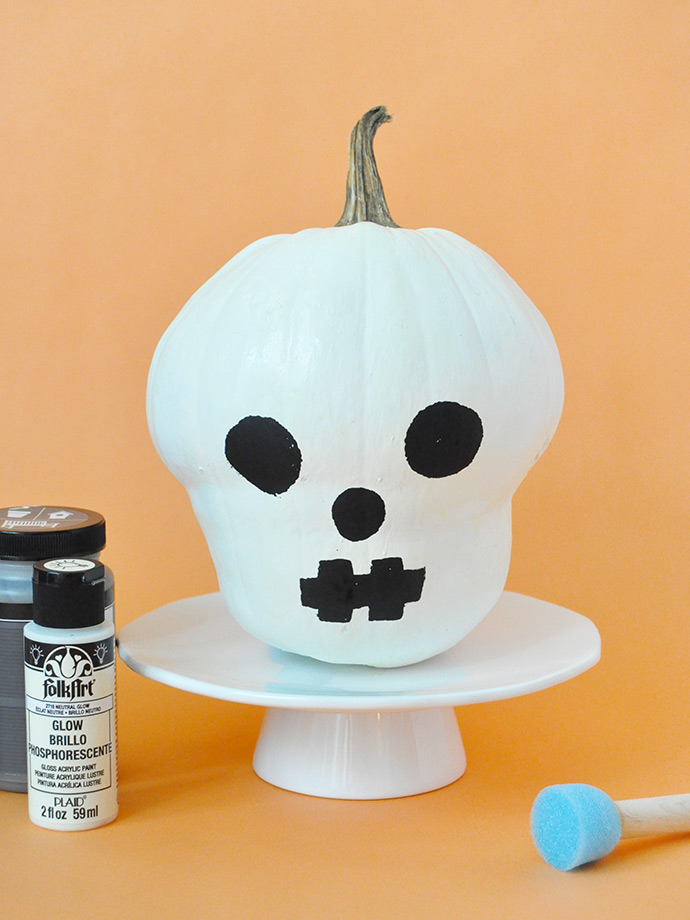
Start by painting the base color on your pumpkin. For this skull pumpkin, we used white. Let dry. Depending on what part of the design you want to be glow-in-the-dark, apply a few coats of the glow paint and let dry again.
Step 2
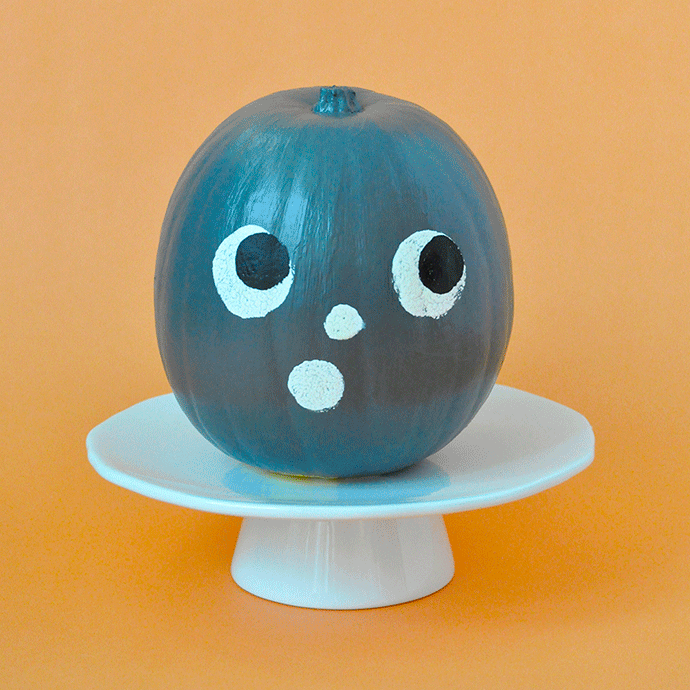
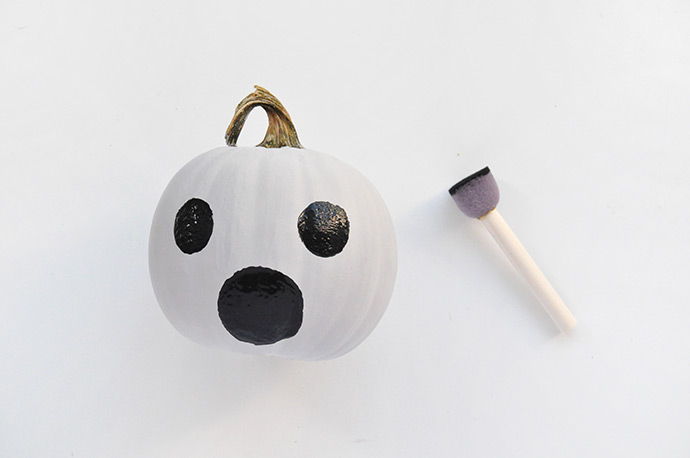
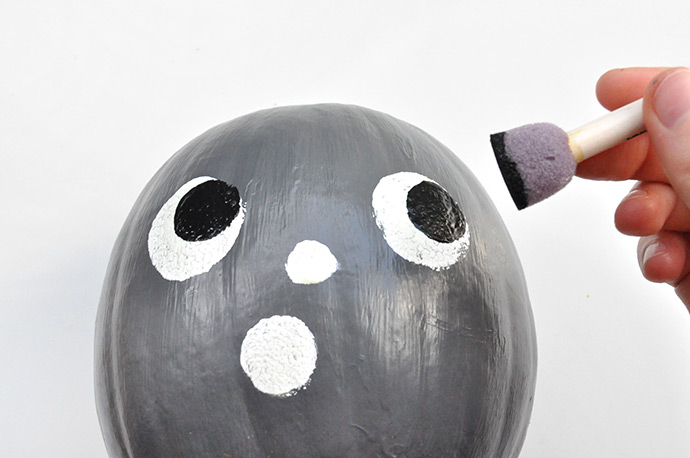
For this pumpkin, we started with a grey base coat, let dry, applied a few coats of glow paint, let dry again, and then use the foam pouncer to apply face details with black paint.
Step 3
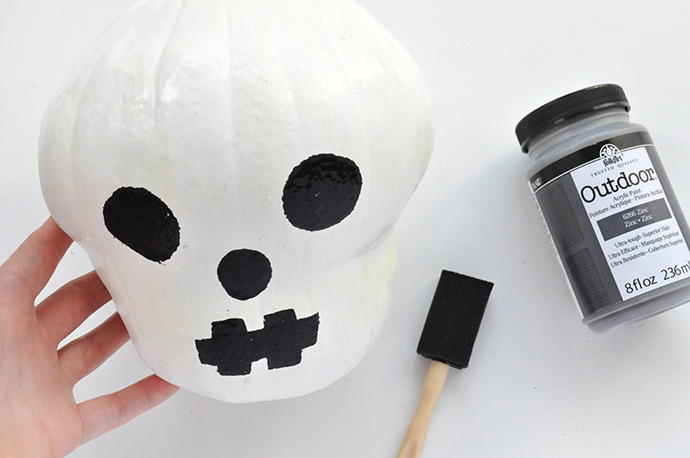
For the skull pumpkin, we did a similar method but this time use the round pouncers to make the eyes and nose and then trimmed the end of a foam brush so that it would make a rectangle stamp and used that to make the skull’s mouth.
Step 4
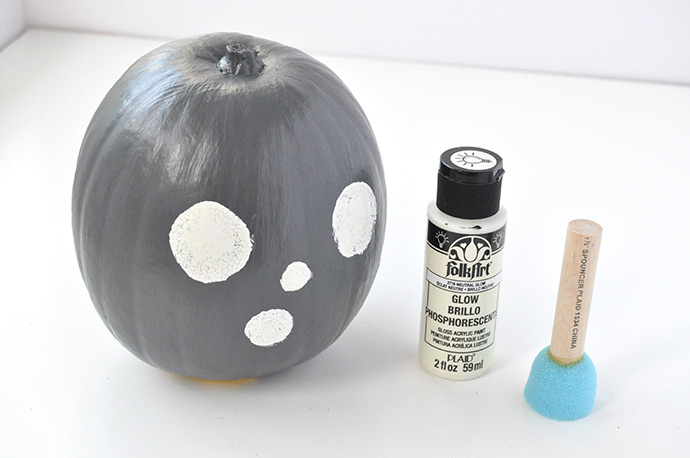
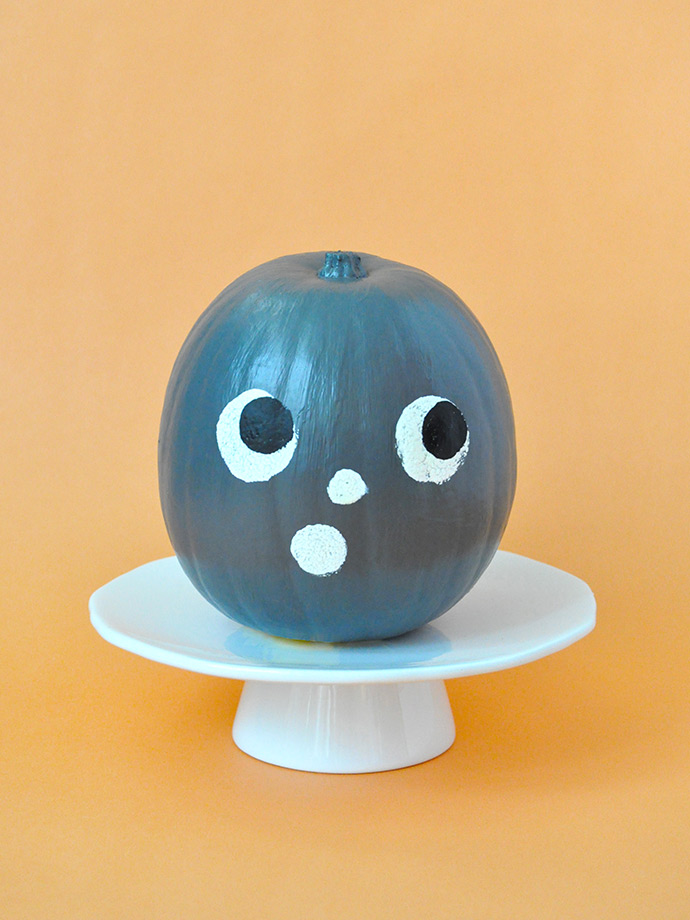
For this pumpkin, we did the reverse – start with a grey base coat and let dry. Apply the face details with a round pouncer and white paint and let dry again. Next apply glow paint over the face details, and let dry.
Step 5
To add a little more interest, we used a smaller pouncer to add black pupils over the glow painted eyes. Isn’t he cute?

This post is sponsored by Plaid Enterprises.