
Wall organizers are great for dressing up your workspace and keeping craft tools and materials tidy. This vintage-style embroidered organizer features a super cute & folksy doll with yarn braids and it’s perfect for storing your favorite hairpins, cards, pens, scissors…

Making the organizer is a snap. I used cross-stitching to embellish the piece, but feel free to have fun adding felt for the doll’s face and trim to garnish the pockets if you don’t feel like embroidering.
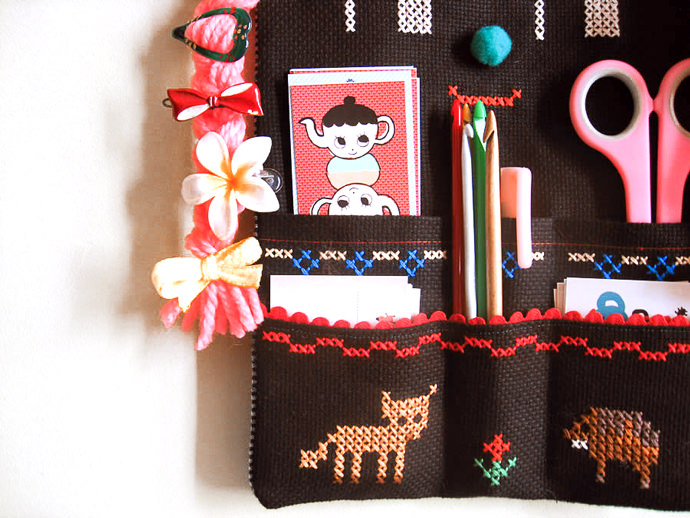
Your wall will light up with this fun & folksy organizer!
What You Need

- Printable template with the cross stitch chart (download here)
- Main fabric (14-count black Aida or any evenwave fabric)
- Backing fabric (blue gingham)
- Interfacing
- Needle & embroidery thread
- Scissors
- Tailors chalk or erasable marker/pen
- Pins
- Sewing machine
- Iron
- Wooden chopsticks
- String
For decoration:
- Yarn
- Rickrack, ribbon, bias tape, trims…
- Pom poms
How-To
Step 1
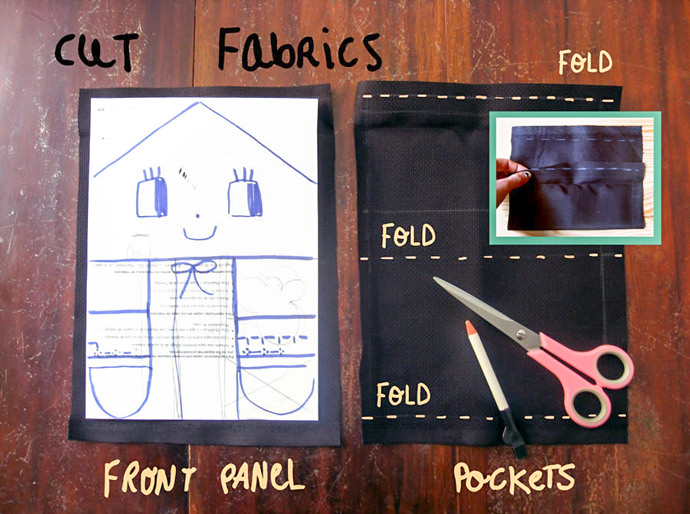
Download and print the Wall hanger template and cut your fabrics following instructions.
From the main fabric:
- 1 piece 8.25 in. x 12 in. – this is the front panel
- 1 piece 8.25 in. x 10 in. – these is the pockets piece.
From the backing fabric:
- 1 piece 8.25 in. x 12 in.
From the interfacing:
- 1 piece 8.25 in. x 12 in.
Step 2
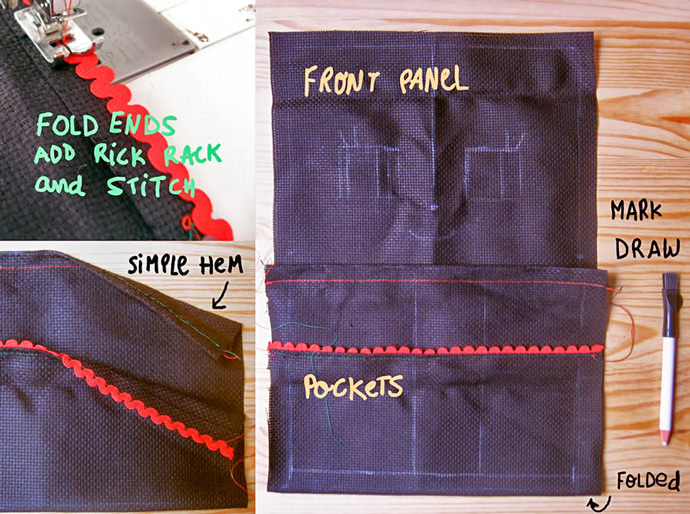
Let’s make the pockets piece first. Fold the piece following the template instructions. Fold the ends over 1/4″ and topstitch along the folds to make simple hems.
Note: you can add a rickrack or any other trim to the pocket tops as shown on the images. I’ve sewn a red rickrack all around the edge of the opposite side bottom pocket to combine with the embroidered border.
Step 3
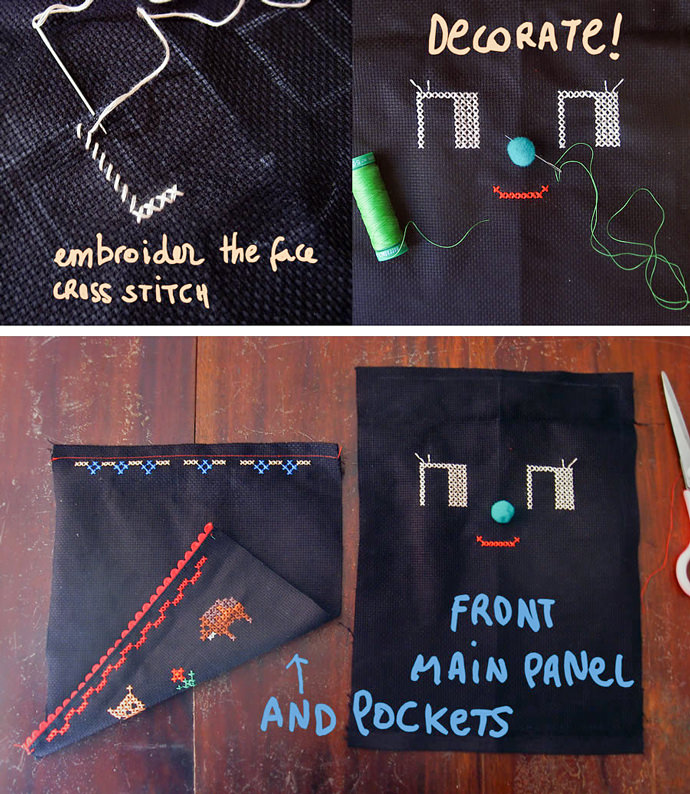
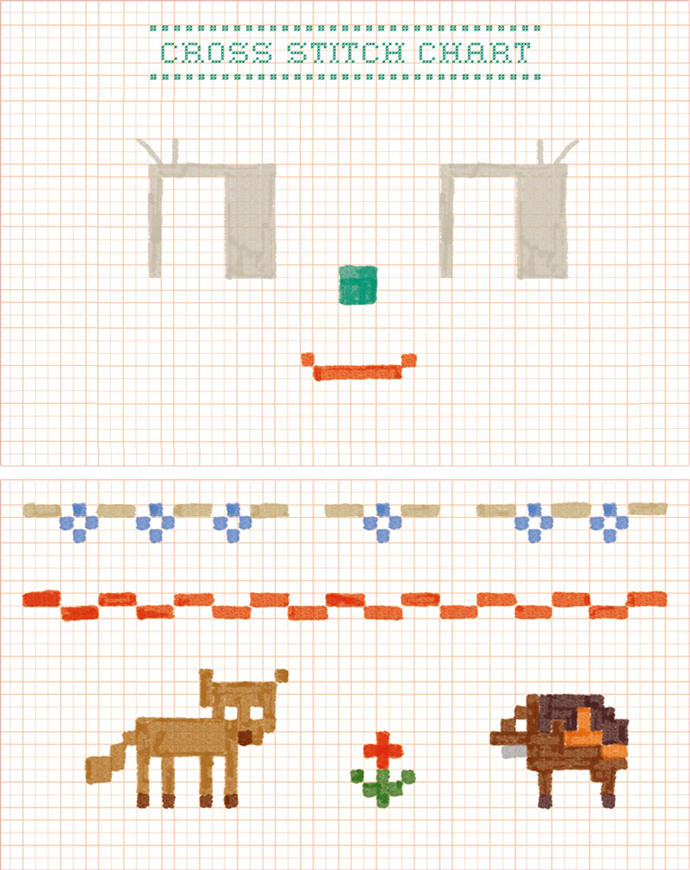
Time to decorate and embroider! Find the center of the fabrics and count holes to place and center cross stitch charts. Mark and draw designs.
I used a beautiful 14-count black evenwave fabric for needlework. I worked “over two threads,” meaning when following the chart you would miss one hole and go into the next.
Stitches are quite big, easy for children and adults too! You can find cool cross-stitch guidelines for beginners on this website, but if you don’t want to embroider you can decorate it using felt, buttons, goggling eyes… whatever you like!
I designed a smiling face for the front main panel, and for the pockets I made two cute borders and little forest fellows: a fox, a flower and a wild boar.
Step 4
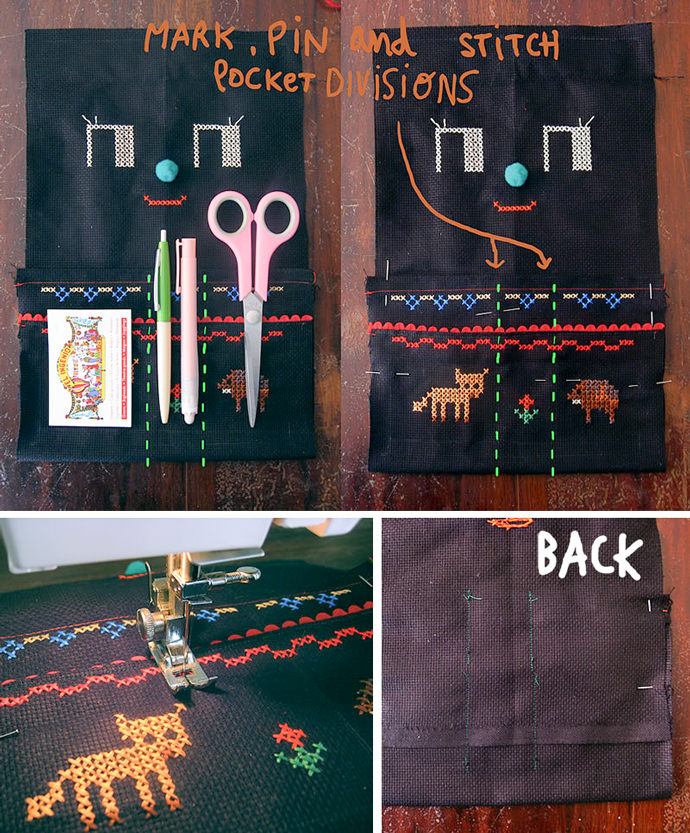
Place folded piece f0r the pockets onto the main panel once you’ve finished decorating. Pin and mark pocket divisions. Sew along these marks, attaching the pockets to the main panel.
Step 5
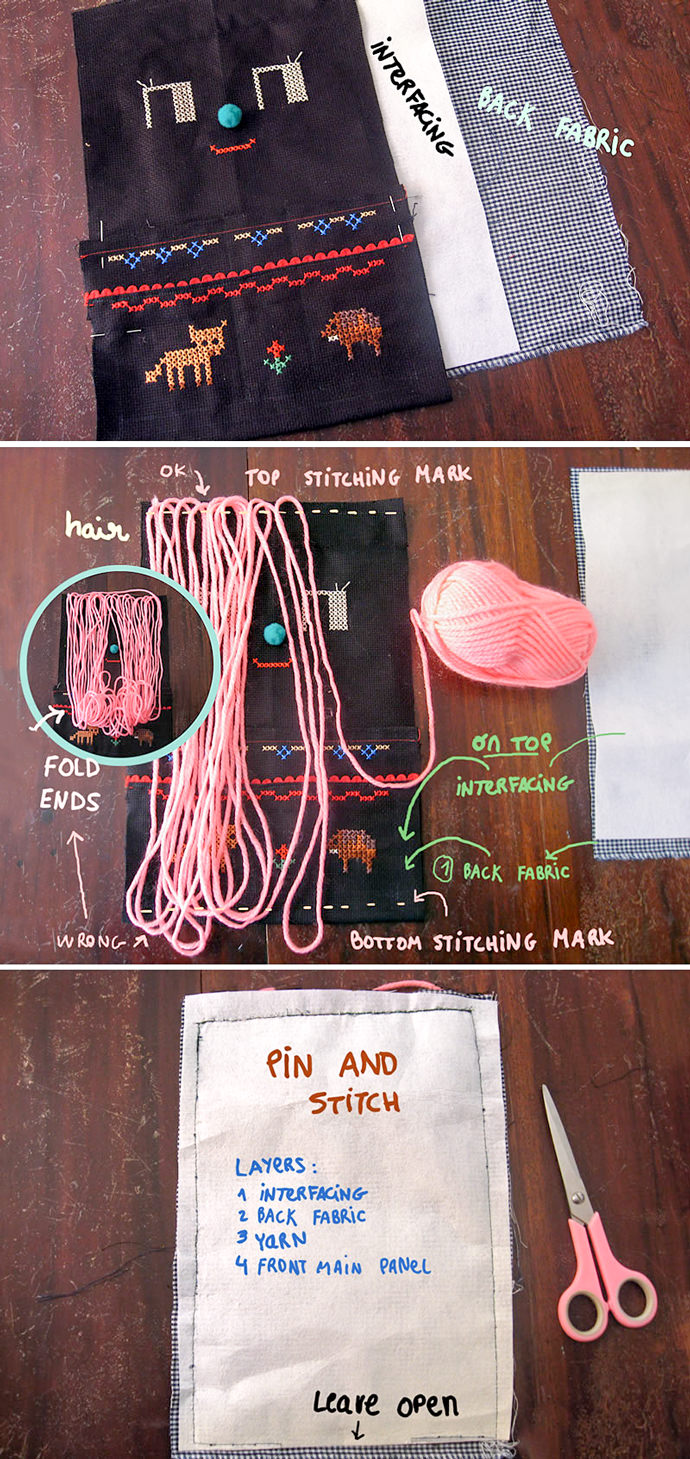
Place loops of yarn all along front panel top. Take note that the yarn must be longer on top, to exceed the stitching mark, to be well-sewn.
Fold inside bottom yarn loops ends, making sure they don’t reach the other stitching mark.
Lay and line up the backing fabric and next, on top, the interfacing piece, sandwiching the yarn between fabric layers. Pin and stitch around all four sides using a 0.7-in. seam allowance, leaving a 2.5-in. opening for turning the wall hanger right side out.
Step 6
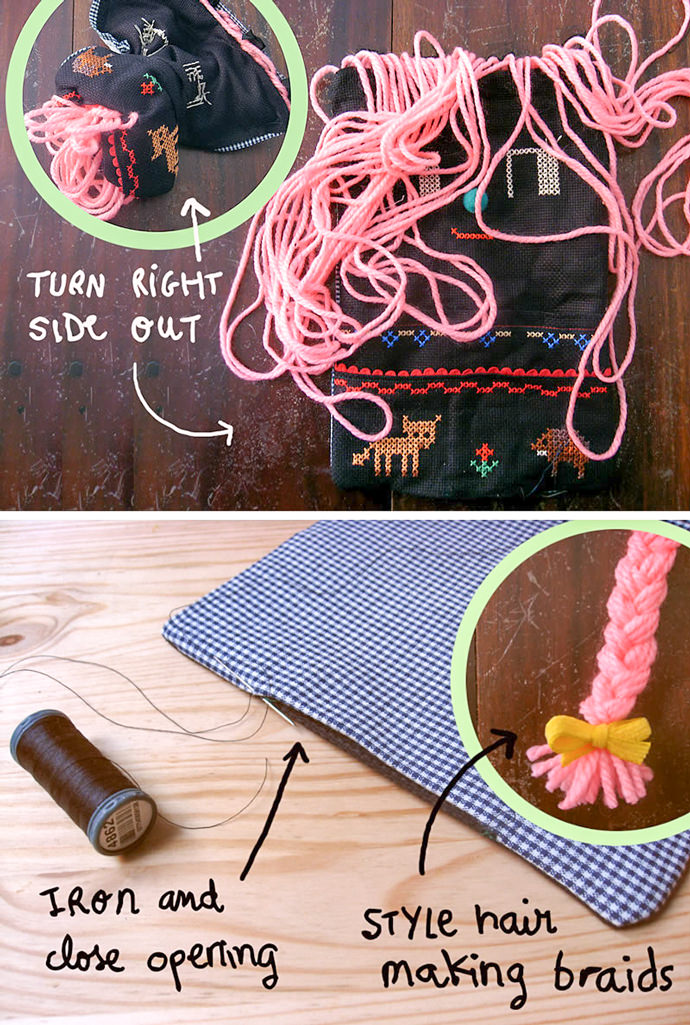
Turn it right side out. Iron and hand-stitch to close your turning opening. Style the doll’s hair, making two lovely braids using cute ribbons.
Step 7
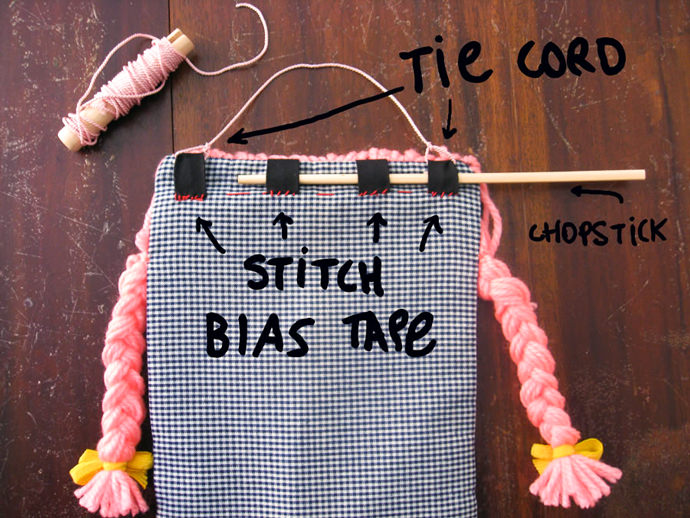
Cut four pieces of bias tape or other trim of your choice and stitch to the top of the backing piece (for passing through the wooden chopstick).
Tie a cord and you’re done!
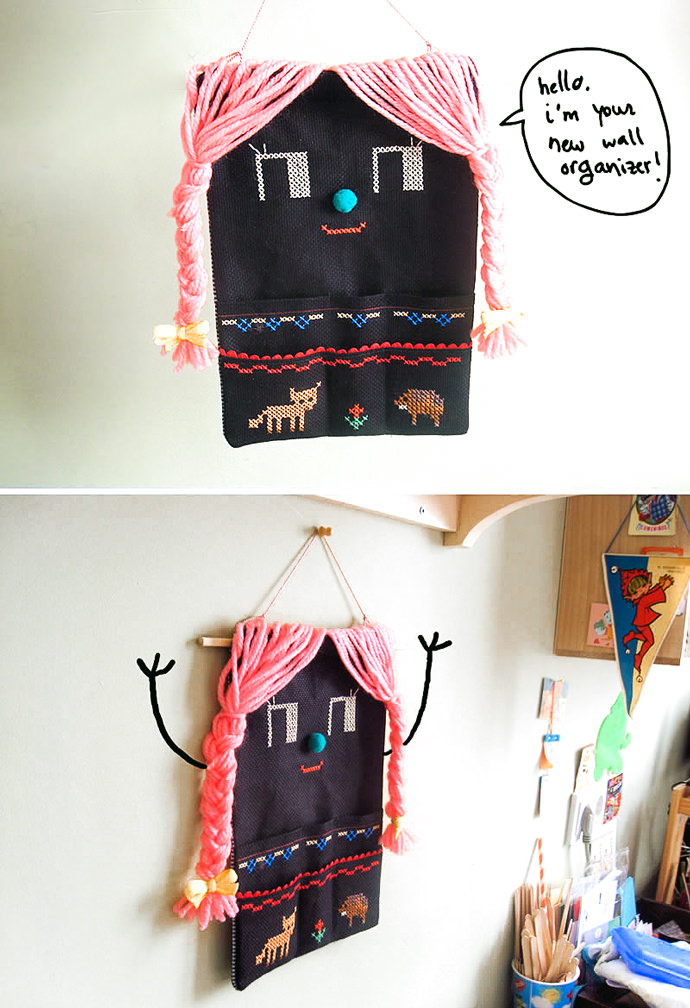
Hang up your new wall organizer. Fill in your cards, pens or craft tools, and attach a pair of fab hairpins to her cute braids.
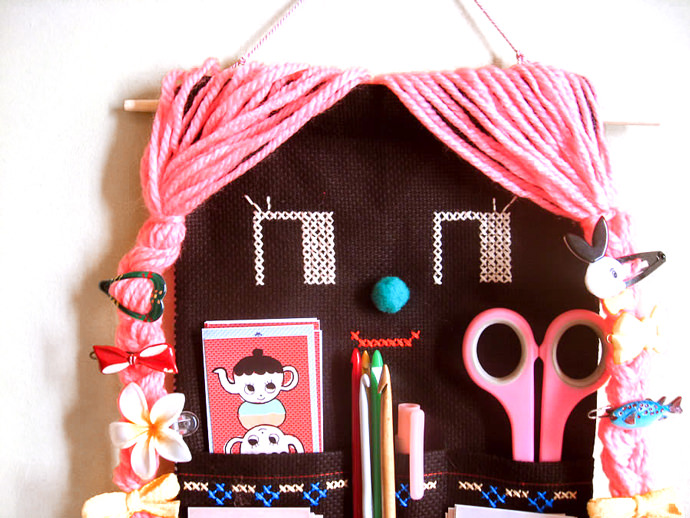
Happy crafting :)