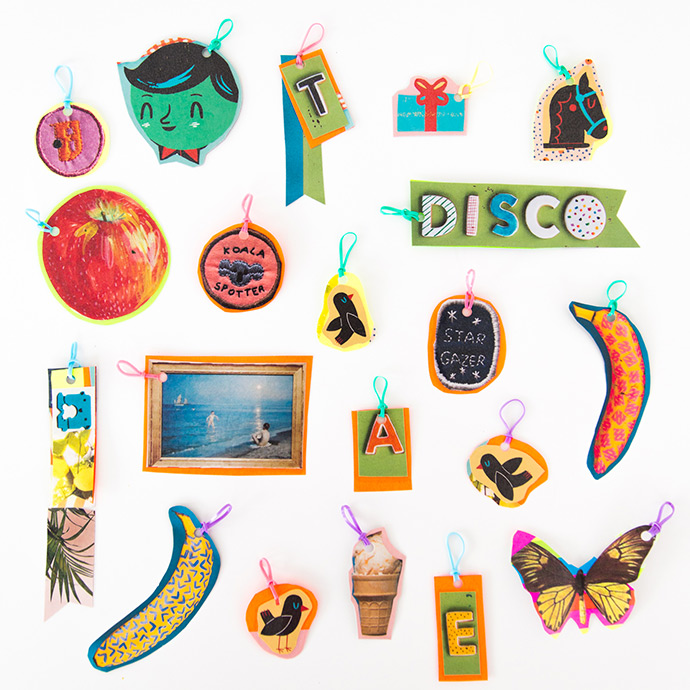
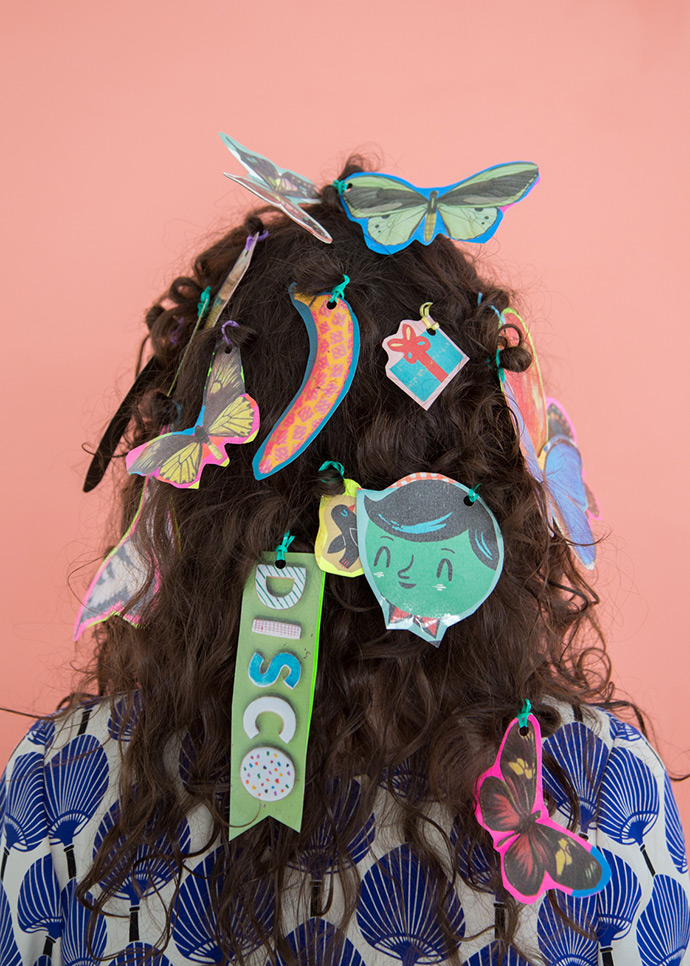
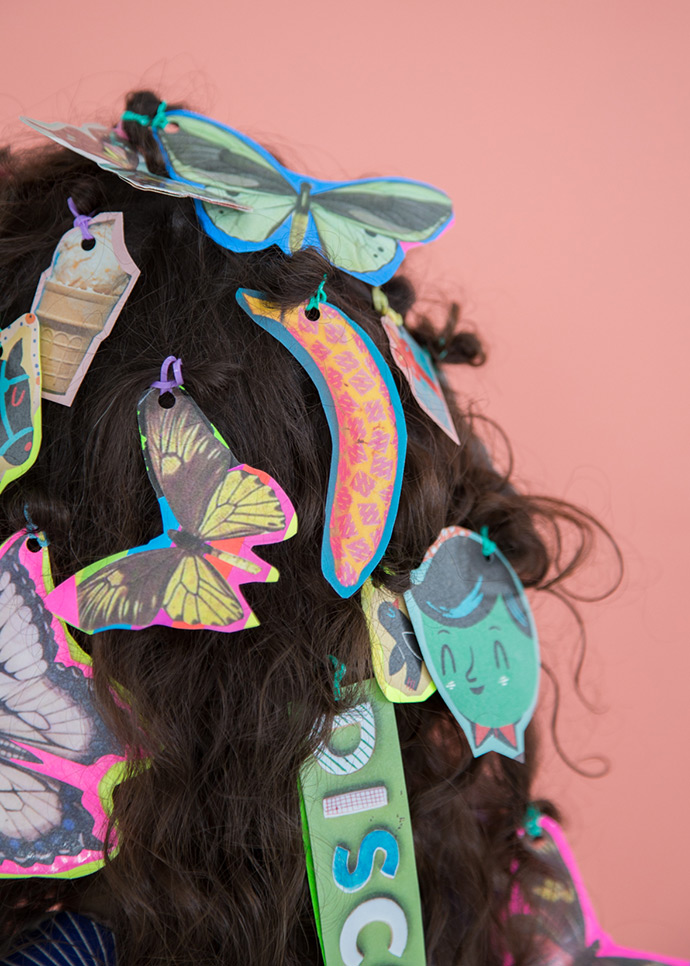
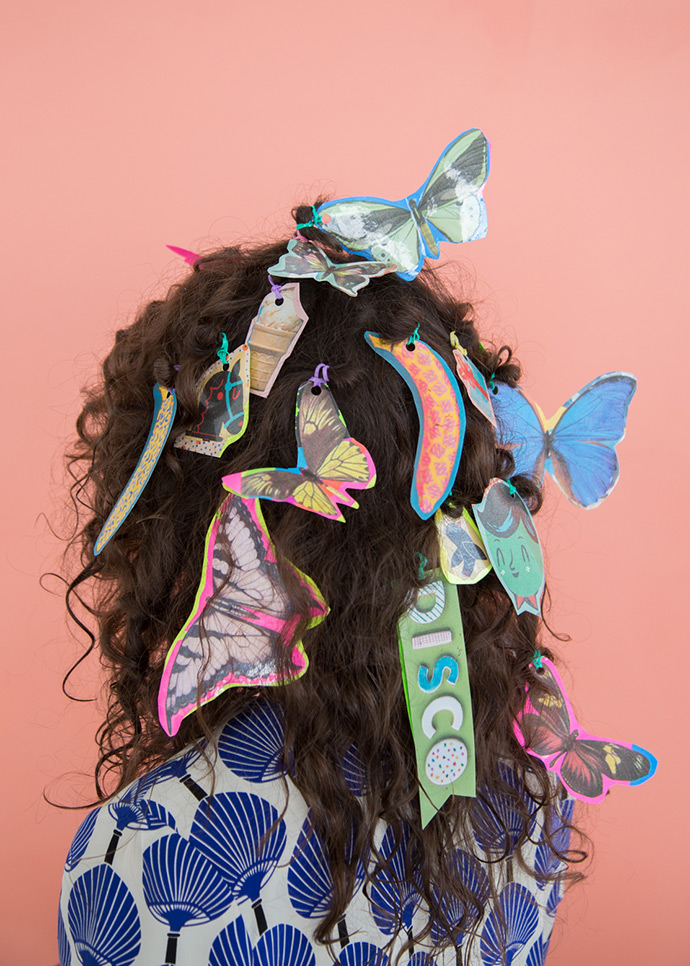
Looking to up your hair game? These DIY paper hair ties are just the ticket! We spent some time crafting at the Paper & Stitch studio a little while back and dreamed up these beauties. We love Lunch Lady, a bright and playful Australian magazine featuring fun recipes, parenting stories, photography, and design. Their colorful pages and awesome patterns were the perfect shapes to use for our DIY hair ties!
These hair ties are SO quick to make that you’ll have a massive collection by the time you’re through! Use old magazines or books, scrap paper, fun print-outs, and cardstock to create a completely unique set for any occasion. Wear them all for crazy hair day or pick a couple of your favorites for a simpler look. Let’s get crafting!!
What You Need

- Scissors
- Magazine clippings or print-outs
- Cardstock
- Hole punch
- Rubber hair elastics
- Glue
- Clear contact paper
How-To
Step 1
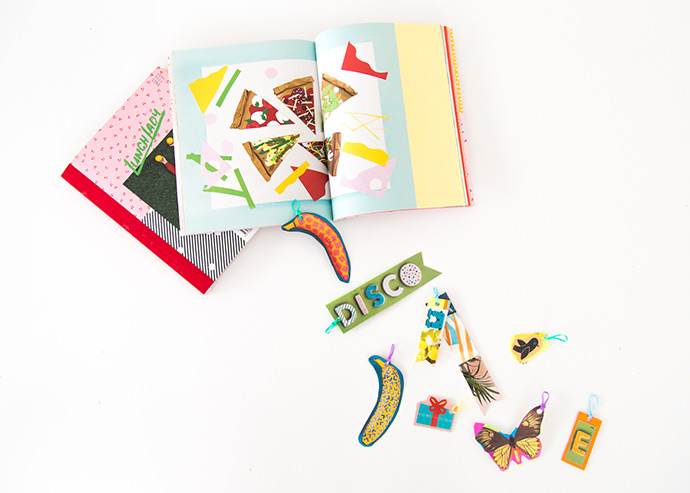
Look around the house for old magazines, scrap paper, or fun photos – we used a copy of Lunch Lady magazine.
Step 2
Cut around the shapes you want to feature and glue each shape onto cardstock, leaving space between the shapes.
Step 3
Cut around the glued shaped, leaving some of the cardstock visible around the edges for an extra pop of color.
Step 4
Peel the backing off of a piece of clear contact paper and lay your cut-out shapes onto the sticky side. Peel the backing off of another sheet of contact paper and lay it on top of the first, sandwiching the colorful cut-outs in the middle. Press to smooth, using a straight edge (like a ruler or book) to avoid air bubbles.
Step 5
Use scissors to cut out the shapes and then make a hole in the edge of each using a hole punch.
Step 6
Slide one end of the hair elastic into the hole-punched paper tag, and then pull that end through the other end of the hair elastic, so that the elastic is secured to the tag.

Photos by Michelle Norris Photography
Shot in the Paper & Stitch studio
Crafted by Handmade Charlotte